
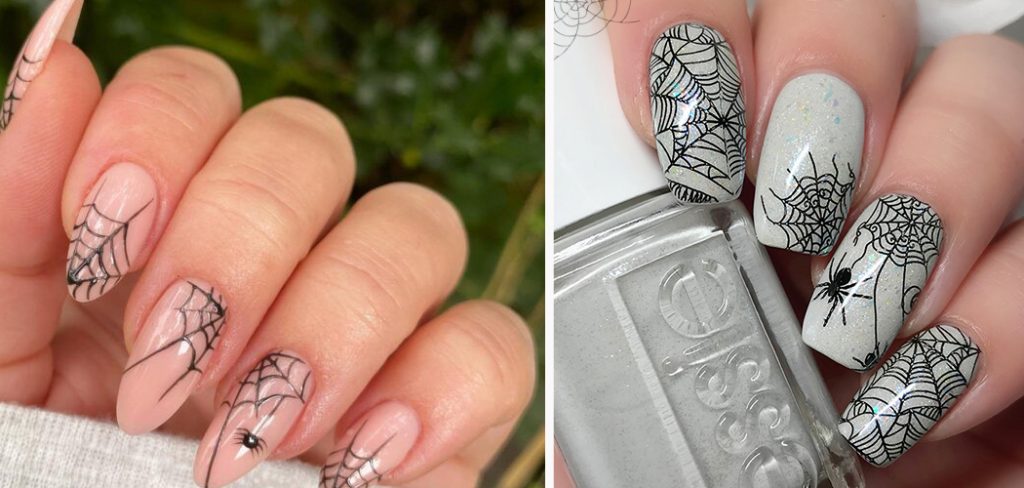
If you are looking to achieve a spooky and unique nail design, painting spider webs on your nails is the perfect choice. Whether it’s for Halloween or fun, this intricate design will make your nails stand out.
You don’t need fancy tools or professional skills to create this look. With some basic materials and a little bit of practice, you can easily achieve this Halloween-inspired nail art. In this guide, we will walk you through the steps on how to paint spider webs on nails. So, let’s get started!
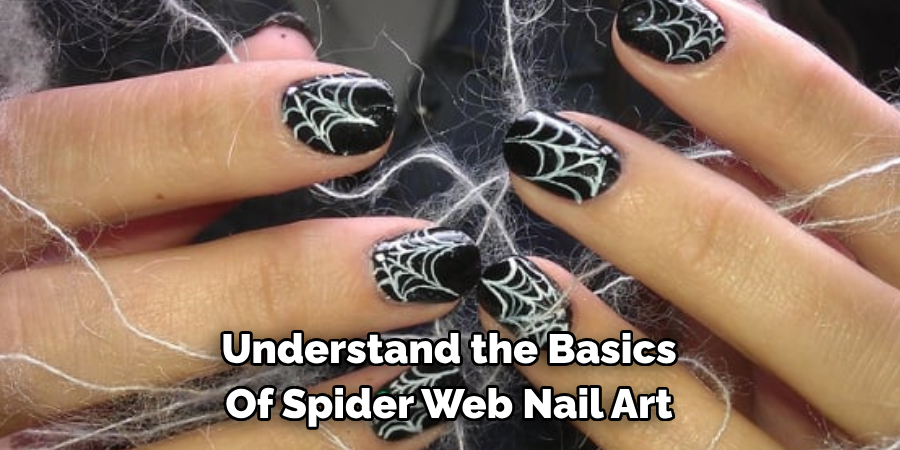
Understanding Spider Web Nail Art
Before diving into the tutorial, it’s important to understand the basics of spider web nail art. This design is created by drawing intersecting lines that resemble a spider web on your nails. It can be done in different colors and styles, making it a versatile and fun nail design.
Typically, this design is paired with other Halloween-inspired elements, such as spiders or bats, to complete the spooky look. However, you can also keep it simple and let the spider webs be the main focus of your nails.
Tools and Materials You Will Need to Paint Spider Webs on Nails
- Base coat
- White nail polish
- Black nail polish or black acrylic paint
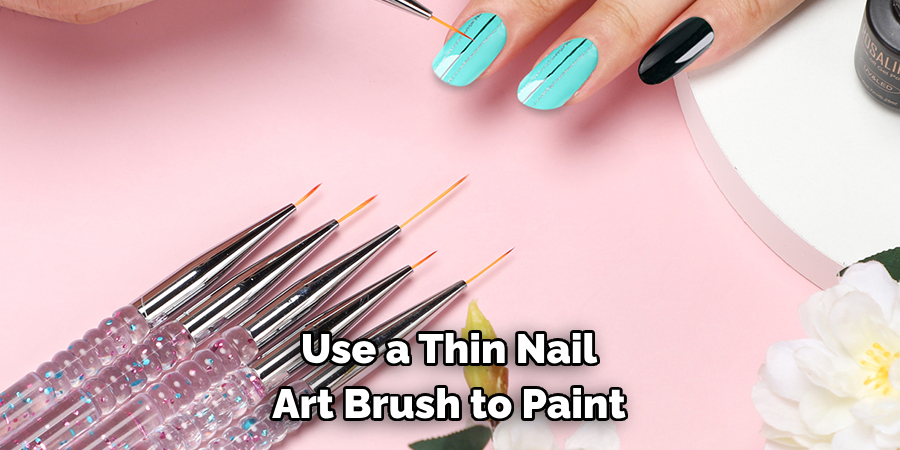
- Thin nail art brush or toothpick
- Topcoat
- Nail polish remover (optional)
Step-by-step Guidelines on How to Paint Spider Webs on Nails
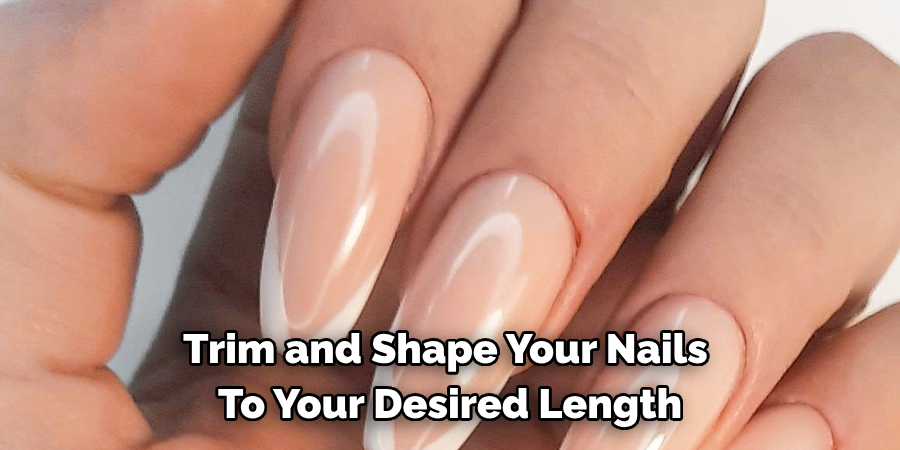
Step 1: Prep Your Nails
Before painting, ensure your nails are clean and properly prepped. Trim and shape your nails to your desired length and apply a base coat. This will help protect your natural nails from any potential staining from the colored polish. Preparing your nails also helps the polish adhere better and last longer. If you have any old polish on your nails, remove it with a gentle nail polish remover.
Step 2: Apply White Nail Polish
Next, apply two coats of white nail polish on all your nails. This will serve as the base for the spider web design and make the colors pop. Allow the polish to dry completely before moving on to the next step. This is important to prevent smudging or ruining the design. If you’re short on time, you can use a quick-drying topcoat to speed up the process.
Step 3: Create the Spider Web Design
Take your black nail polish or black acrylic paint and dip your thin nail art brush into it. If you don’t have a thin brush, you can use a toothpick as an alternative. Begin by creating three intersecting lines in the middle of your nail to form a triangle. Then, continue drawing curved lines from each point of the triangle to the edge of your nails. This will create the classic spider web pattern. Make sure to leave enough space between the lines for a more realistic look. You can also play around with different designs and patterns.
Step 4: Add Finishing Touches
Once you have completed the spider web design on all your nails, let it dry for a few minutes. Then, seal it in with a topcoat to protect the design and add shine. This will also help your nail art last longer. If you accidentally smudge or mess up the design, you can use a cotton swab dipped in nail polish remover to clean up any mistakes. Make sure to be gentle and only remove the areas you want to fix.
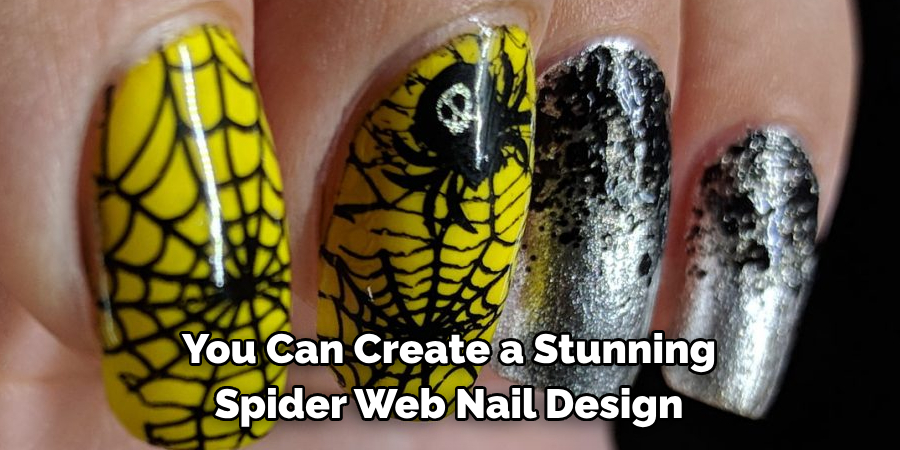
Following these simple steps, you can create a stunning spider web nail design at home. You can also experiment with different colors and add other Halloween elements to make it your own. With practice, you’ll be able to perfect this unique and spooky nail art in no time! Now, go ahead and show off your creepy-crawly nails this Halloween season. So, have fun and get creative with your spider web nail art. Happy painting!
Additional Tips and Tricks to Paint Spider Webs on Nails
1. To create a more realistic look for your spider webs, try using shades of black or grey for the lines. This will give the illusion of depth and make it look like an actual web. You can also add some silver or white lines for a shimmering effect.
2. You can use a thin nail art brush to paint on the web for a more intricate design. This will allow you to create finer and more delicate lines, giving your nails a professional look.
3. If you’re struggling with creating symmetrical webs, try using stencils or tape to guide your lines. Place the stencil or tape on your nail and paint over it, then carefully remove it for perfect webs every time.
4. You can incorporate other Halloween-themed designs, such as spiders or bats, to add a spooky element to your spider web nails. This will make your nails stand out even more and give them a festive touch.
5. Feel free to experiment with different colors and designs for your spider webs. You can try using a dark purple base and painting silver webs or use neon colors for a more modern twist.
6. For those who are short on time, you can also use nail stickers or decals to create spider web designs quickly and easily. Plenty of options are available online or at beauty supply stores.
7. If you’re using acrylic or gel nail polish, make sure to cure each layer properly before adding the next one. This will ensure that your design lasts longer and doesn’t smudge or chip easily.
8. To add more dimension to your spider webs, try using a matte top coat over your design. This will give it a textured look and make it appear more realistic.
9. Remember to seal in your design with a top coat to protect it and make it last longer. This will also give your nails a glossy finish for a polished look.
10. Have fun and get creative with your spider web designs! There are endless possibilities and variations, so don’t be afraid to try new techniques and colors to make your nails unique and spooky for Halloween.
Following these tips and tricks will help you create stunning spider web nails that are sure to impress. Remember to practice and have patience, as nail art takes time and precision. With these techniques, you can rock the perfect Halloween manicure that will have everyone admiring your spooky style. Happy painting!
Things You Should Consider to Paint Spider Webs on Nails
1. The first thing to consider is the color of your spider webs. It’s best to choose a dark or bold color such as black, dark grey, or navy blue for the base of your nail. This will make the white spider web design stand out more.
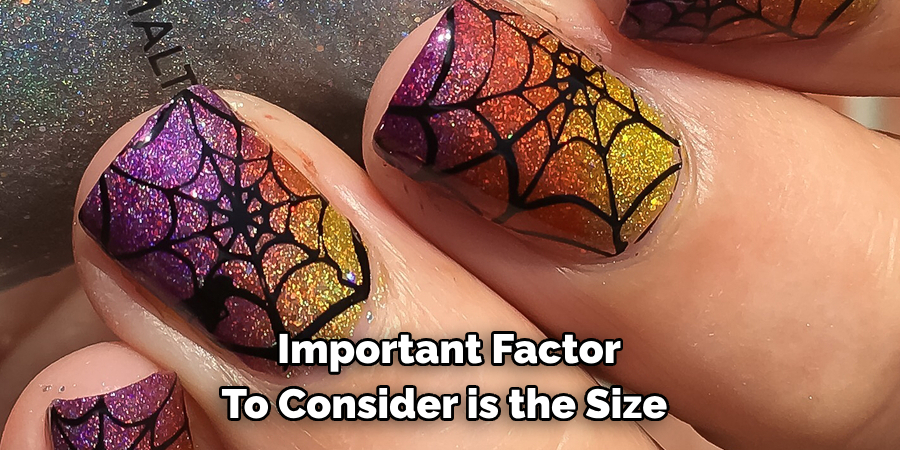
2. Another important factor to consider is the size and placement of your spider webs. You want to make sure they are evenly spaced and not too big or too small for the nail. It’s also best to place them towards the tip of the nail for a more realistic look.
3. When it comes to creating the actual web design, there are a few techniques you can use. One popular and easy method is to use a toothpick or small dotting tool to create lines that intersect and form the web pattern. You can also use a nail art brush with thin bristles for more precise lines.
4. It’s important to be patient when creating spiderwebs. It may take a few tries to get the design right, but keep going. Practice makes perfect.
5. Adding a touch of glitter or rhinestones to your spider web design can make it stand out even more and add a bit of sparkle to your nails.
6. Another tip is to use a top coat after the spider web design has dried to seal in the design and help it last longer. This will also give your nails a glossy finish.
7. When removing the spider web design, be gentle and use a non-acetone nail polish remover to avoid damaging your nails.
8. Be bold and get creative with your spider web design. Experiment with different colors, sizes, and patterns to make it unique and fit your personal style.
9. Consider adding other elements, such as spiders or bats, to your design for a fun and spooky Halloween look.
Following these considerations will help you achieve a perfect and eye-catching spider web design on your nails. Remember to have fun and be patient, as creating nail art is all about creativity and experimentation. Keep practicing, and soon you’ll be a pro at painting spider webs on your nails! Why not give it a try and add some spooky flair to your Halloween look this year? Happy painting!
Maintaining Tips for Spider Web Nail Art
1. Apply a Top Coat:
Applying a top coat is one of the easiest ways to maintain your spider web nail art. This will seal in your design and protect it from chipping or peeling. Choose a high-quality top coat that dries quickly for best results. This will also give your nails a shiny finish, making the spider web design stand out even more.
2. Avoid Harsh Chemicals:
Harsh chemicals in household cleaning products or beauty treatments can damage your nail art. Try to avoid contact with these substances as much as possible, and wear gloves when using them if necessary. This will help preserve the longevity of your spider web nail art. If any of these chemicals come into contact with your nails, wash them off immediately and reapply a top coat afterward.
3. Touch Up As Needed:
Even with proper maintenance, it’s inevitable that some parts of your spider web nail art will start to chip or peel over time. To keep your design looking fresh, touch up any areas that need it with a small brush and some nail polish. This will help extend the lifespan of your nail art and keep it looking flawless.

4. Keep Nails Short:
Long nails are prone to getting caught on things, which can damage your spider web design. Try keeping your nails short and rounded at the tips to avoid this. This will not only help protect your nail art, but it will also make day-to-day activities easier and more comfortable. If you prefer longer nails, consider getting gel or acrylic extensions instead. They are more durable and less likely to break or get damaged.
5. Moisturize Regularly:
Keeping your nails and cuticles moisturized is essential for maintaining any nail art design. Dryness can cause your nail polish to crack and chip, ruining the spider web effect. Make sure to apply moisturizer or cuticle oil daily to keep your nails and surrounding skin hydrated. This will also promote healthy nail growth.
6. Store Nail Art Supplies Properly:
Proper storage of your nail art supplies is crucial for maintaining their quality and effectiveness. Make sure to store your nail polish in a cool, dry place away from direct sunlight. This will prevent the polish from drying out or becoming discolored. Also, clean your brushes and tools after each use to prevent any residue buildup that can affect their performance.
7. Protect Your Nails While Sleeping:
While you may not realize it, your nails are vulnerable while you sleep. Tossing and turning during the night can cause friction between your nails and bedding, leading to chipped or peeled nail art. Wear cotton gloves while sleeping to protect your nails and maintain your spider web design to prevent this. This will also help keep your hands warm and moisturized while you sleep.
8. Schedule Regular Touch Ups:
No matter how well you maintain your spider web nail art, eventually, it will need to be touched up or redone entirely. Make sure to schedule regular appointments with a professional nail artist to keep your design looking its best. They can also help you with any repairs or touch-ups that may be needed. This will ensure that your spider web nail art remains a statement piece for your nails.
Following these tips will help you maintain your spider web nail art and keep it looking flawless for as long as possible. With proper care, you can rock this spooky design all year round! Experiment with different colors and designs, and have fun creating your own unique spider web nail art. Happy Halloween!
Removing Tips for Painted Spider Webs on Nails
1. Soak and Scrub:
The first step in removing painted spider webs on nails is to soak your fingers in warm water for 10-15 minutes. This will help soften the paint and make it easier to remove. After soaking, gently scrub your nails with a soft-bristled brush or an old toothbrush to loosen the paint. This method works best for water-based paints.
2. Use Nail Polish Remover:
If the painted spider webs are done using nail polish, you can remove it with a regular nail polish remover. Soak a cotton ball or pad in the remover and place it on your nail for a few minutes. Then, gently wipe away the paint with the saturated cotton ball. Be sure to wash your hands thoroughly afterward, as nail polish remover contains harsh chemicals.
3. Try Acetone:
If the paint is stubborn and won’t come off with regular nail polish remover, try using pure acetone. This strong chemical can effectively dissolve most paint types but can also be harsh on your skin and nails. Be sure to use it in a well-ventilated area and avoid getting it on your skin. This method is not recommended for those with sensitive skin or weak nails.
4. Use a Cuticle Pusher:
The painted spider webs can sometimes get stuck in the small crevices around your cuticles and nail bed. In this case, using a cuticle pusher can help scrape off the paint without damaging your nails. Be gentle and use caution to avoid hurting yourself. Using this method, along with the previous ones, can ensure that all traces of paint are completely removed.
5. Lemon and Baking Soda:
Mix lemon juice with baking soda to create a paste for a natural alternative. Gently rub the paste onto your nails, focusing on the areas with painted spider webs. Let it sit for a few minutes before rinsing off with warm water. The acid in lemon juice helps break down the paint while baking soda acts as a gentle abrasive to scrub it away.
6. Don’t Pick:
It can be tempting to try and peel or pick off the painted spider webs, but this can damage your nails and leave them weak and brittle. It’s best to use one of the above methods to remove the paint safely without causing any harm. If you have gel or acrylic nails, do not attempt to pick off the paint, as it can also damage the artificial coating.
7. Moisturize Your Nails:
After removing the painted spider webs, be sure to moisturize your nails and cuticles with a nourishing oil or cream. This will help restore any moisture lost during removal and keep your nails healthy and strong. If you have any cuts or scrapes from removing the paint, applying moisturizer can also help with healing and preventing infection.
Following these tips can help you easily and safely remove painted spider webs on your nails. Always be cautious when using strong chemicals, and seek professional help if needed. With these methods, you can keep your nails looking clean and healthy while still enjoying fun nail designs like painted spider webs. Happy nail care!

Conclusion
Now you know how to paint spider webs on nails and create that perfect Halloween nail art! It may seem intimidating at first, but with a little practice and patience, you can achieve stunning spider web designs on your nails. Remember to have fun and be creative with your color choices and shapes for an added personalized touch. Remember to take care of your nails before and after painting them to maintain healthy and strong nails. Happy Halloween!
About the Author
Jane Hubbard is a passionate beauty expert with a wealth of experience in makeup, hair, and overall beauty techniques. After years of working as a hairdresser specialist, she followed her entrepreneurial spirit and started her own consultancy business.
Jane has always been driven by her desire to help others feel confident in their own skin, and she does this by sharing her knowledge, experiences, and practical beauty tips. Through her consultancy, she empowers individuals to embrace their unique beauty, offering tailored guidance that boosts both self-esteem and personal style.
Professional Focus
Specializes in makeup, hairstyling, and beauty consulting.
Provides personalized beauty advice, tips, and techniques to help individuals feel confident in their appearance.
Dedicated to staying up-to-date with the latest industry trends and developments.
Passionate about creating a comfortable and empowering experience for every client.
Education History
University of Craft and Design – Bachelor of Fine Arts (BFA) in Woodworking and Furniture Design
Woodworking Apprenticeships – Extensive hands-on training with skilled craftsmen to refine carpentry and furniture making techniques
Online Courses & Masterclasses – Continued education in advanced woodworking techniques, design principles, and specialized tools
Expertise:
Makeup artistry, hairstyling, and beauty consulting.
Personalized beauty techniques to enhance confidence and self-expression.
Educating clients on how to maintain their beauty routines at home.