
Are you tired of using harsh chemicals and makeup removers to remove waterproof mascara? Do you want a natural and gentle way to remove stubborn mascara without damaging your lashes or skin?
How to remove waterproof mascara naturally can be a challenge, as its long-lasting formula is designed to resist water and smudging. However, reaching for harsh chemical-based removers isn’t the only solution. Natural methods can effectively break down rigid mascara formulas while being gentle on your skin and lashes. Using easily accessible and skin-friendly ingredients, you can protect the delicate eye area and avoid unnecessary irritation.

This introduction will guide you through simple, natural ways to safely remove waterproof mascara and keep your lashes healthy. Let’s dive in!
What Are the Benefits of Removing Waterproof Mascara Naturally?
Before we jump into the different methods, let’s first understand why using natural ingredients to remove waterproof mascara is beneficial.
- Gentle on Your Skin: Many traditional makeup removers contain harsh chemicals that can strip the skin of its natural oils and cause irritation. On the other hand, natural ingredients are usually gentler and less likely to cause adverse reactions.
- Nourishing for Lashes: Waterproof mascaras can be tricky to remove because they often contain waxes and oils that help them stay put all day. However, these same ingredients can also dry out your lashes and make them brittle over time. Natural removers with nourishing properties can help keep your lashes healthy and strong.
- Environmentally Friendly: Many commercial makeup removers come in plastic bottles, which contribute to pollution and damage to the environment. Natural, eco-friendly options can reduce our carbon footprint and promote sustainable living.
- Anti-Aging Benefits: Some natural makeup removers contain ingredients such as coconut or avocado oil, which are known for their anti-aging properties. These oils can not only effectively remove stubborn makeup but also hydrate and nourish the skin, reducing the appearance of fine lines and wrinkles.
- Multi-Purpose Use: Another benefit of using natural makeup removers is that they often have multiple uses. For example, coconut oil can be used as a makeup remover, moisturizer, and hair treatment.

What Will You Need?
To make your natural makeup remover, you will need a few simple ingredients:
- Carrier Oil: This can be any plant-based oil, such as coconut, avocado, or almond oil. These oils are gentle on the skin and won’t clog pores.
- Witch Hazel: This natural astringent helps to remove excess dirt and oil from the skin.
- Essential Oils: You can add a few drops of essential oils for added benefits and fragrance. Some popular options include lavender for its calming properties, tea tree for its anti-bacterial properties, and rosehip for its anti-aging benefits.
10 Easy Steps on How to Remove Waterproof Mascara Naturally
Step 1. Prepare Your Ingredients
Gather all the ingredients needed for this natural mascara removal method – coconut oil, castor oil, almond oil, witch hazel, and essential oils (optional). Make sure to use high-quality and organic ingredients for the best results. If you have sensitive skin, doing a patch test before using these ingredients on your face is recommended.
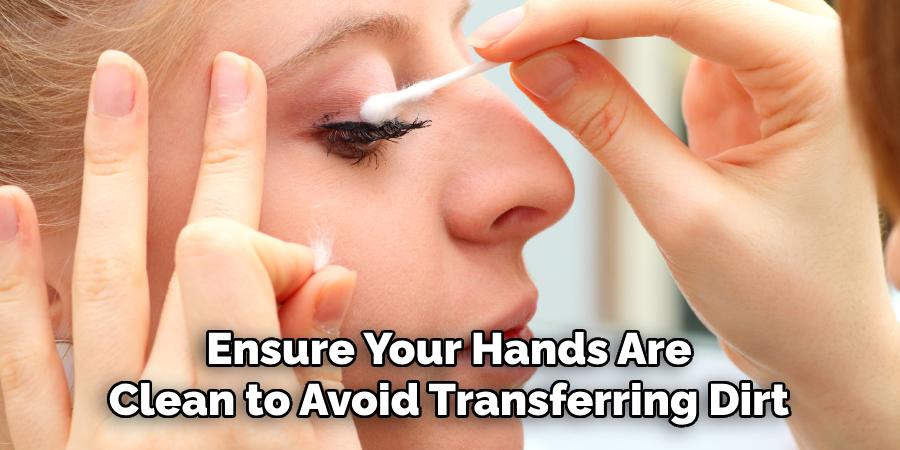
Step 2. Wash Your Hands:
Before starting the removal process, ensure your hands are clean to avoid transferring dirt or bacteria to your face. Use a mild soap and warm water, scrubbing your hands thoroughly for at least 20 seconds. This step is crucial as it helps maintain proper hygiene and prevents irritation or breakouts from dirty hands coming into contact with your skin and eyes. Once your hands are clean, dry them with a clean towel to avoid introducing moisture that could interfere with the removal process.
Step 3. Prepare the Cotton Pad:
To effectively remove makeup or cleanse your skin, it is essential to properly prepare the cotton pad. Begin by selecting a soft, high-quality cotton pad to avoid irritation, especially around sensitive areas like the eyes. Take your preferred makeup remover, micellar water, or cleansing oil, and apply a few drops onto the cotton pad. Ensure the product is evenly distributed, allowing it to soak into the pad without over-saturating it, which can lead to dripping and wastage. Prepped correctly, the cotton pad will gently lift dirt, oil, and makeup from your skin without requiring excessive pressure, helping maintain your skin’s health and integrity.
Step 4. Press and Hold:
Gently press the prepared cotton pad onto your skin, focusing on specific areas such as the eyes or lips if removing heavy makeup. Hold it for a few seconds to allow the product to break down makeup, sunscreen, or impurities more effectively. The key here is to be patient and avoid rubbing or scrubbing, as excessive force can irritate your skin and potentially cause redness or swelling. Giving the product time to work ensures a thorough yet gentle cleanse, leaving your skin refreshed and residue-free.
Step 5. Wipe Gently:
Using a soft cotton pad, microfiber cloth, or tissue, gently wipe away the product and any dissolved makeup or grime. Pay close attention to delicate areas, such as under the eyes, and use light, sweeping motions to avoid pulling or tugging on the skin. You may need to repeat the process for waterproof makeup or stubborn residues, but always maintain a gentle touch to protect your skin’s natural barrier. After wiping, your skin should feel clean and comfortable, without any sticky or oily residue.
Step 6. Repeat if Necessary:
If you notice traces of makeup, dirt, or oil remaining on your skin after the initial cleanse, it’s a good idea to repeat the cleansing process. Consistency and thoroughness are key to achieving a fresh, clean complexion. Begin by applying another small amount of the cleanser to your cotton pad or cloth, ensuring it’s adequately saturated for effective removal. Re-focus on areas that accumulate more product, such as around the eyes, nose edges, or jawline. However, it’s essential to avoid over-cleansing, as this can strip the skin of its natural oils and lead to dryness or irritation. Instead, aim for balanced cleansing that refreshes your skin and prepares you for the next steps of your skincare routine.
Step 7. Rinse with Water:
After cleansing, rinse your face thoroughly with lukewarm water to remove residual product. Make sure to gently splash water across all areas of your face, paying attention to crevices around the nose and hairline. Avoid using too hot water, as it can dehydrate your skin and compromise its protective barrier. Once rinsed, pat your face dry with a clean, soft towel instead of rubbing to prevent irritation and maintain skin softness.
Step 8. Cleanse Your Face:
Start your skincare routine by cleansing your face with a gentle, skin-suitable cleanser. Apply the cleanser to damp skin using your fingertips, massaging it in circular motions for about 30 seconds to one minute. Focus on areas prone to buildup, like the T-zone, without being too harsh to avoid irritation. This step removes dirt, oil, and impurities, allowing your subsequent skincare products to penetrate more effectively. Rinse thoroughly with lukewarm water and proceed to pat your skin dry with a soft towel.
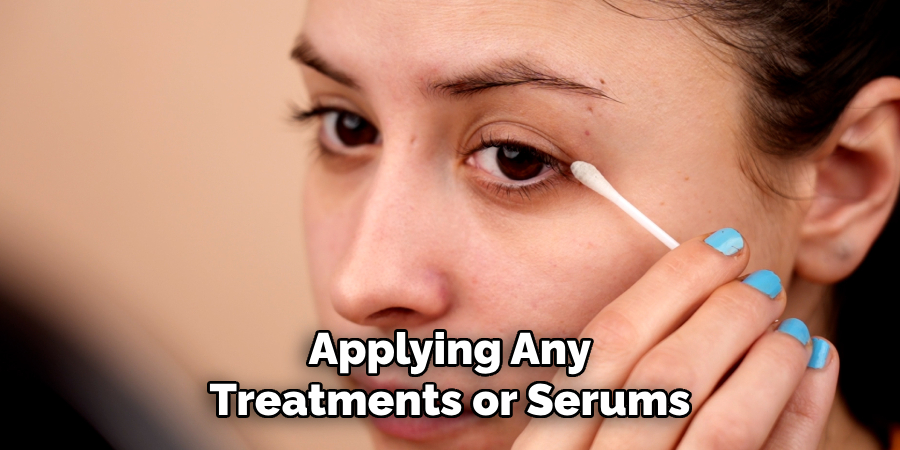
Step 9. Moisturize:
After cleansing and applying any treatments or serums, it’s essential to lock in hydration with a suitable moisturizer. Choose a product that matches your skin type—lightweight, gel-based moisturizers work well for oily or combination skin, while richer creams nourish dry or sensitive skin. Gently apply the moisturizer to your face and neck using upward motions, ensuring even coverage.
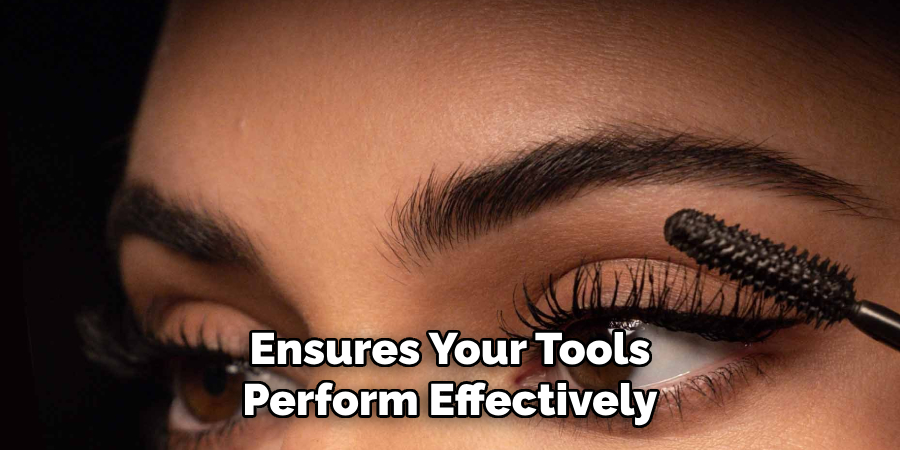
Step 10. Clean Your Tools:
Properly cleaning your skincare tools is a vital step in maintaining healthy skin and ensuring their longevity. Brushes, sponges, and devices like facial rollers or cleansing brushes can accumulate bacteria, oil, and product residue over time. To clean them, gently soap or cleanser and rinse thoroughly with warm water. Allow them to dry completely before storing or using them again. Regular cleaning, ideally once a week, helps prevent breakouts and ensures your tools perform effectively.
Using these natural methods effectively removes waterproof mascara and nurtures your skin in the process!
5 Things You Should Avoid
- Avoid Harsh Scrubbing: Rubbing your eyes aggressively can irritate your skin and damage your lashes, leading to breakage and discomfort. Always use a gentle touch.
- Do Not Use Alcohol-Based Products: Alcohol can dry out your skin and cause unnecessary irritation around your sensitive eye area. Stick to natural, soothing alternatives.
- Avoid Skipping the Cleansing Step: Failing to cleanse your face after removing mascara can leave residue that clogs pores and contributes to skin issues.
- Do Not Use Dirty Tools: Unclean cotton pads or tools can introduce bacteria to your skin, potentially causing infection. Always ensure your items are clean.
- Avoid Neglecting Moisturization: Waterproof mascara removers can sometimes strip your skin of its natural oils. Always follow up with a good moisturizer to keep your skin hydrated.
Conclusion
How to remove waterproof mascara naturally requires patience and gentle care to protect your skin and lashes.
Using ingredients like coconut oil or olive oil can effectively break down the tough formula without causing irritation. Always be gentle during the process to avoid unnecessary tugging or pulling, which can lead to lash loss or skin damage. Regularly cleaning your tools and following up with appropriate moisturization will ensure your skin stays healthy and radiant.
By adopting these natural techniques, you can maintain clean, beautiful lashes while avoiding harsh chemicals.
About the Author
Jane Hubbard is a passionate beauty expert with a wealth of experience in makeup, hair, and overall beauty techniques. After years of working as a hairdresser specialist, she followed her entrepreneurial spirit and started her own consultancy business.
Jane has always been driven by her desire to help others feel confident in their own skin, and she does this by sharing her knowledge, experiences, and practical beauty tips. Through her consultancy, she empowers individuals to embrace their unique beauty, offering tailored guidance that boosts both self-esteem and personal style.
Professional Focus
- Specializes in makeup, hairstyling, and beauty consulting.
- Provides personalized beauty advice, tips, and techniques to help individuals feel confident in their appearance.
- Dedicated to staying up-to-date with the latest industry trends and developments.
- Passionate about creating a comfortable and empowering experience for every client.
Education History
- University of Craft and Design – Bachelor of Fine Arts (BFA) in Woodworking and Furniture Design
- Woodworking Apprenticeships – Extensive hands-on training with skilled craftsmen to refine carpentry and furniture making techniques
- Online Courses & Masterclasses – Continued education in advanced woodworking techniques, design principles, and specialized tools
Expertise:
- Makeup artistry, hairstyling, and beauty consulting.
- Personalized beauty techniques to enhance confidence and self-expression.
- Educating clients on how to maintain their beauty routines at home.