
Are you a professional nail technician or someone who loves doing their nails at home? If yes, you must know the importance of clean and sanitized tools.
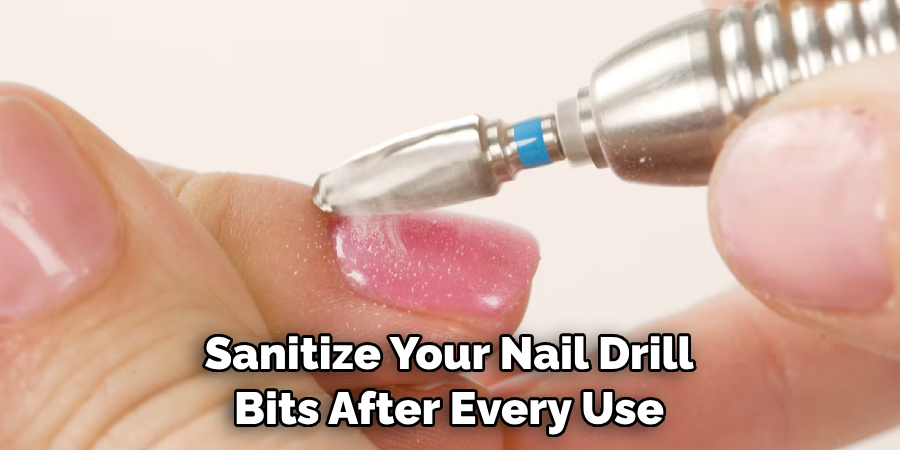
Nail technicians know that the most important part of a successful manicure is hygiene. Whether you are in a salon, or working from home, it’s essential to take proper measures to ensure your tools are clean and sanitized for each use. This means regularly disinfecting drill bits used for acrylics, gel nails or other services. But keeping these handy implements germ-free can be tricky – thankfully there’re some straightforward methods to get the job done without too much effort!
In this blog post we’ll show you step-by-step how to sanitize nail drill bits, so keep reading if you’d like more information on safely cleaning your equipment between clients.
What Will You Need?
- A small container big enough to hold your drill bits
- Isopropyl alcohol or a specialized nail tool disinfectant
- Clean paper towels
Once you have all these items ready, you can start the process.
10 Easy Steps on How to Sanitize Nail Drill Bits
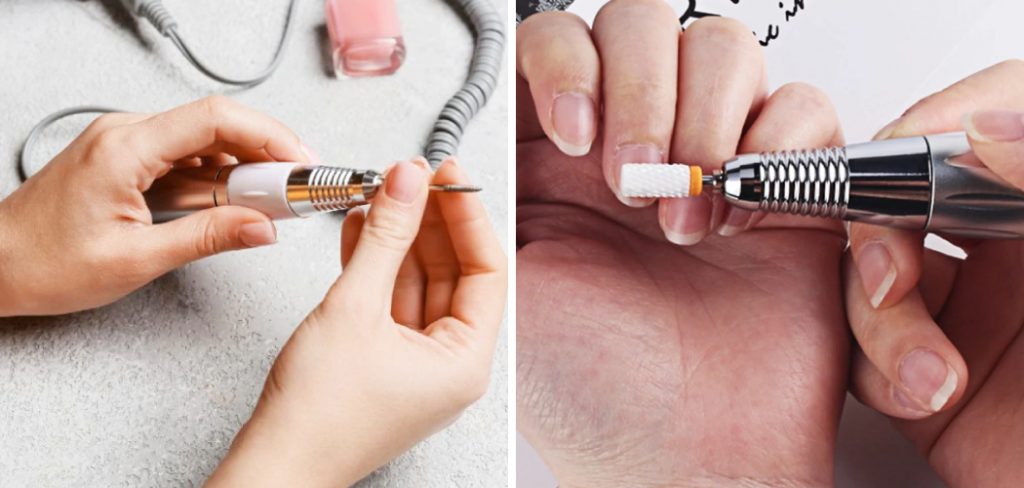
Step 1. Remove the Drill Bits:
First, you need to remove the drill bits from your nail drill. Be careful not to hurt yourself during this process. Always follow the manufacturer’s instructions when removing and replacing drill bits.
Step 2. Soak the Drill Bits:
Next, place the removed drill bits into your small container. Pour enough isopropyl alcohol or specialized nail tool disinfectant into the container to fully submerge the drill bits. The bits must be completely covered with the solution to disinfect them thoroughly. Allow them to soak in the disinfectant according to the product’s indicated time, usually 10 to 30 minutes.
Step 3. Rinse the Drill Bits:
After the soaking time, carefully remove the drill bits from the disinfectant solution using a clean pair of tweezers or tongs. Rinse them under clean, running water. It’s important to rinse thoroughly to ensure all the disinfectant solution is washed off the drill bits. Remember, while disinfectants kill germs, they can irritate the skin if left on the tools.
Step 4. Dry the Drill Bits:
Once the drill bits are rinsed, they need to be dried properly. Place them on a clean paper towel and pat them dry thoroughly. Remember, any remaining moisture can potentially harbor bacteria, so ensuring the drill bits are dehydrated before storing them is essential.
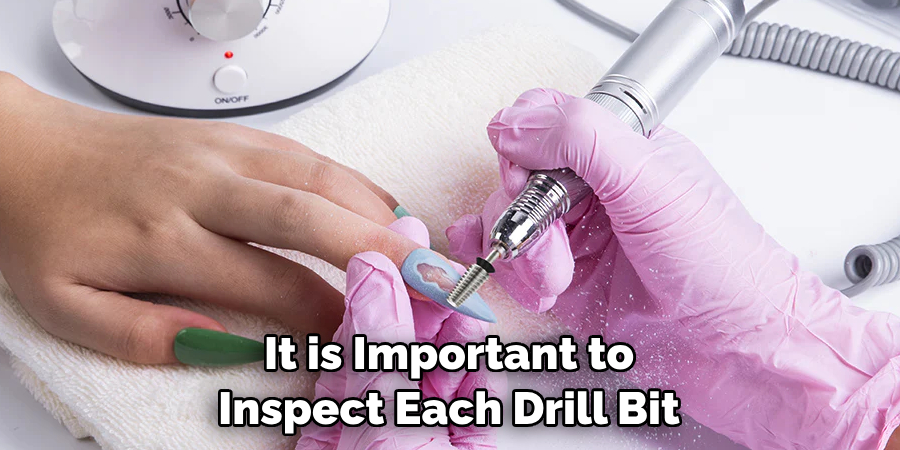
Step 5. Inspect the Drill Bits:
After drying, it is important to inspect each drill bit. Look for any signs of damage or wear. It should be replaced if a bit is cracked, chipped, or excessively worn. Damaged drill bits perform poorly, but they can also harbor bacteria and other harmful microorganisms, negating the sanitization process. Using a magnifying glass may help in this step.
Step 6. Store the Drill Bits:
Once the drill bits are clean, dry, and inspected, it’s time to store them. Always store the sanitized drill bits in a clean, dry, and covered container to prevent contamination. It’s best to keep them separate from other nail tools to avoid any cross-contamination. Remember, proper storage is as important as proper cleaning for sanitary nail tools.
Step 7. Regularly Repeat the Process:
It’s vital to remember that sanitizing your nail drill bits isn’t a one-time task. To maintain consistent hygiene, it should be repeated after every client or personal use. Regular cleaning doesn’t just ensure that your tools stay sanitary and helps extend their lifespan, giving you better value for your investment. Staying consistent with your sanitation schedule is necessary for any successful nail technician or enthusiast.
Step 8. Educate Your Clients:
Another important element in maintaining cleanliness and sanitation is educating your clients. Make them aware of your sanitization process and how often you clean your tools. This not only reassures them about the hygiene standards you maintain but also helps them understand the value of the service they are receiving. In addition, it sets the right expectation for what they should look for when seeking nail services elsewhere. After all, informed clients are the best type of clients.
Step 9. Consider Drill Bit Lifespan:
Remember that all drill bits have a lifespan, and even with the best care and maintenance, they will eventually need to be replaced. Depending on the material of your drill bits, they may last anywhere from a few weeks to several months. Always adhere to the manufacturer’s recommended lifespan, and replace your drill bits regularly to ensure optimum performance and hygiene.
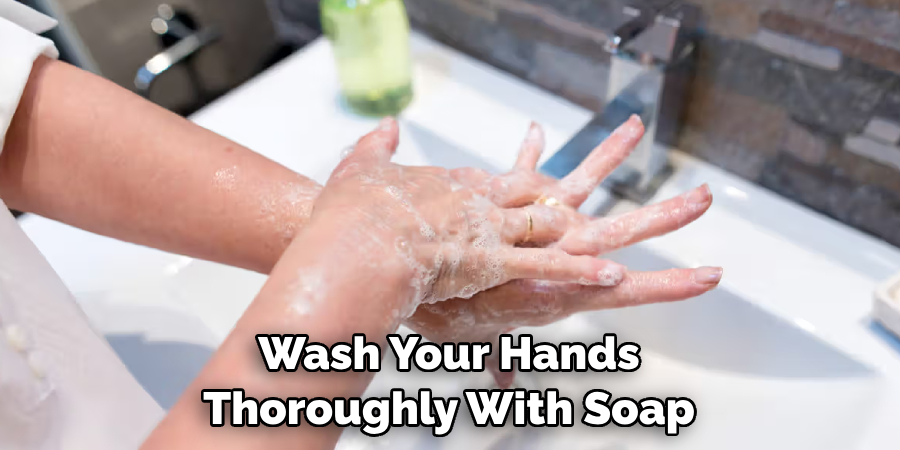
Step 10. Proper Hand Hygiene:
Last but not least, remember to follow proper hand hygiene. Before and after handling your drill bits or performing any nail services, wash your hands thoroughly with soap and warm water for at least 20 seconds. It’s also a good practice to have hand sanitizer readily available. This additional step will minimize the risk of cross-contamination, ensuring a healthier environment for you and your clients.
By following these ten easy steps on sanitizing nail drill bits, you can ensure a clean and hygienic environment for your clients.
5 Additional Tips and Tricks
- Always Wear Gloves: When sanitizing nail drill bits, always wear gloves to protect your skin from the disinfectant, which can be harsh and damaging.
- Choose High-Quality Disinfectants: Opt for EPA-registered disinfectants to thoroughly eliminate harmful pathogens. This is a key step in learning how to sanitize nail drill bits.
- Follow the Manufacturer’s Instructions: Different nail drill bits may require unique sanitation processes. Always follow the manufacturer’s instructions for the best results.
- Regular Replacement: Even with regular sanitization, nail drill bits can wear down over time. Ensure to replace them periodically for optimal performance and hygiene.
- Dry Properly After Sanitizing: Let the nail drill bits dry completely before you store them. This step must be revised to avoid bacterial growth.
With these additional tips and tricks, you can confidently sanitize your nail drill bits and ensure the safety of both yourself and your clients.
5 Things You Should Avoid
- Neglecting the Soaking Step: Skipping the soaking step can leave harmful pathogens on your drill bits. Always ensure you soak your tools in a high-quality disinfectant for the recommended time.
- Improper Drying: Drying is just as important as sanitizing. Avoid leaving your tools damp as this can lead to bacterial growth and cross-contamination.
- Ignoring Damaged Bits: Using damaged or worn-out drill bits can pose an infection risk. Always inspect your tools and replace them when necessary.
- Poor Storage Practices: Avoid storing your tools in a humid or dirty environment. Such conditions can contaminate your sanitized tools. Always store them in a clean, dry, and covered container.
- Inconsistent Sanitization: Inconsistent sanitization can lead to the buildup of harmful pathogens on your tools. To maintain hygiene, sanitize your nail drill bits after every use is crucial.
By avoiding these common mistakes, you can ensure that your nail drill bits stay clean and sanitary for the best results.
Is Alcohol Enough to Sterilize Nail Tools?
No, alcohol alone is not enough to sterilize nail tools. While alcohol can effectively kill most bacteria and viruses, it does not eliminate all types of pathogens, such as spores or fungi. Sterilization requires a more thorough process, including cleaning and disinfecting with EPA-registered products. Additionally, using only alcohol to sanitize your tools may damage them over time, making them less effective and potentially causing harm to clients. Following the sanitation process outlined above for optimal hygiene and safety is always best.
In conclusion, learning to sanitize nail drill bits is essential for any nail technician or enthusiast.
Does UV Light Sanitize Nail Tools?
UV light can be used as a part of the sanitization process for nail tools, but it should not be relied on as the sole method. While UV light can effectively kill some bacteria and viruses, it does not eliminate all types of pathogens and may not reach all areas of the tool. It’s best to use UV light in addition to cleaning and disinfecting with EPA-registered products for the best results. Remember to follow the manufacturer’s instructions when using UV light for sanitization purposes.
With these tips and tricks, you can confidently maintain a clean and hygienic environment for your nail services. Happy sanitizing!

Conclusion
With the proper knowledge of how to sanitize nail drill bits, it’s possible to sanitize them quickly and effectively. It takes just a few steps to ensure that whatever nail drill bit you use is safe and clean – spraying with alcohol, wiping with cleaning tissue, and storing away from contaminated surfaces. Don’t neglect regular cleaning of your nail drill bits! Not only will this help preserve their lifespan, but it will also keep you and your clients safe from the potential spread of bacteria or infection.
Remember: an ounce of prevention is worth a pound of cure – stay on top of your nail tool maintenance, and you’ll be able to keep your work up to par. Now take action: look through your collection of nail drill bits, gather the necessary supplies listed above, and start sanitizing so that you can feel confident in the safety of every manicure or pedicure that you give!
You Can Also Check This Out to Keep Matte Nails Clean
About the Author
Jane Hubbard is a passionate beauty expert with a wealth of experience in makeup, hair, and overall beauty techniques. After years of working as a hairdresser specialist, she followed her entrepreneurial spirit and started her own consultancy business.
Jane has always been driven by her desire to help others feel confident in their own skin, and she does this by sharing her knowledge, experiences, and practical beauty tips. Through her consultancy, she empowers individuals to embrace their unique beauty, offering tailored guidance that boosts both self-esteem and personal style.
Professional Focus
Specializes in makeup, hairstyling, and beauty consulting.
Provides personalized beauty advice, tips, and techniques to help individuals feel confident in their appearance.
Dedicated to staying up-to-date with the latest industry trends and developments.
Passionate about creating a comfortable and empowering experience for every client.
Education History
University of Craft and Design – Bachelor of Fine Arts (BFA) in Woodworking and Furniture Design
Woodworking Apprenticeships – Extensive hands-on training with skilled craftsmen to refine carpentry and furniture making techniques
Online Courses & Masterclasses – Continued education in advanced woodworking techniques, design principles, and specialized tools
Expertise:
Makeup artistry, hairstyling, and beauty consulting.
Personalized beauty techniques to enhance confidence and self-expression.
Educating clients on how to maintain their beauty routines at home.