
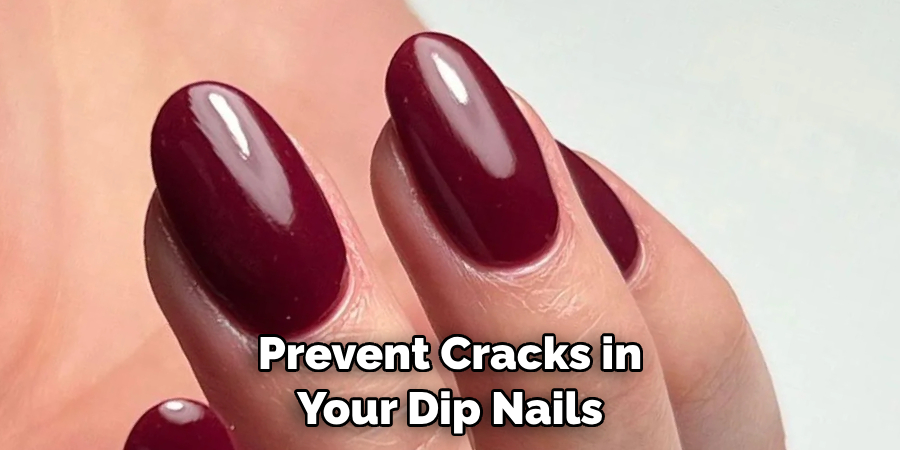
Do you want to save yourself the headache of having your dip-painted nails cracking and chipping? Let’s be honest: who doesn’t love a clean manicure that won’t chip off within 24 hours after painting it? Are you aware that there are steps to prevent your dip nail designs from cracking prematurely? Fortunately, here at Weave Beauty, we have taken the guesswork out of this issue.

Dip nails have become the go-to choice for many people, especially those who want a long-lasting manicure without the hassle of regular polish. However, like all nail treatments, there are certain precautions you should take to ensure your dip nails stay intact.
In this post, we will walk through various tips and tricks on how to stop dip nails from cracking through proper care and maintenance. Get ready to do some serious money-saving!
What Will You Need?
Before we dive into the steps, you will need to gather some supplies:
- Nail file
- Buffer
- Acetone or dip powder remover
- Cotton balls or pads
- Cuticle oil
- Top coat
Once you have all the necessary items, let’s get started!
8 Easy Steps on How to Stop Dip Nails From Cracking
Step 1. Prep Your Nails Before Dipping
Preparation is key when it comes to preventing dip nails from cracking. Start by cleaning your nails thoroughly, ensuring no old polish or residue. Use the nail file to shape your nails to your preferred style and even out any rough edges. Next, use the buffer to smooth the surface of each nail gently. This creates a better adhesive surface for the dip powder.
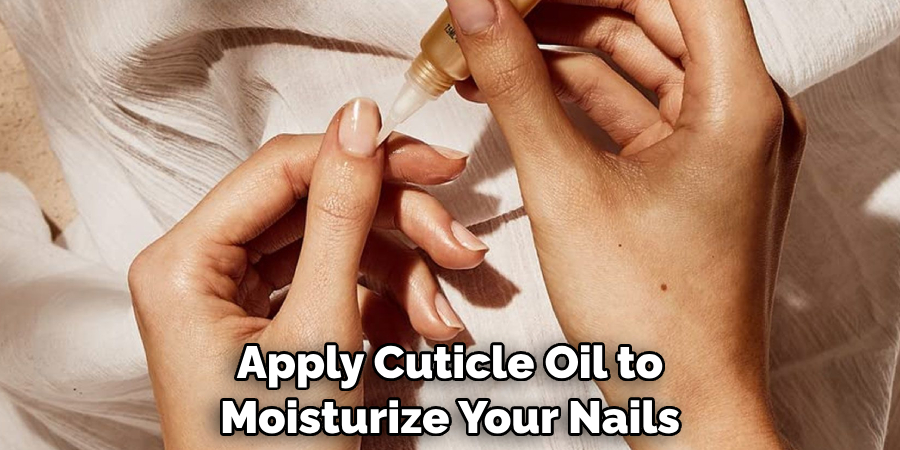
Remember, the smoother the nail surface is, the less likely your dip manicure will crack later on. Lastly, apply a thin layer of cuticle oil around your nails, but be careful not to get any on the nail bed itself, as this could interfere with the dip powder adhesion. Now, your nails are prepped and ready for dipping.
Step 2. Apply the Base Coat Correctly
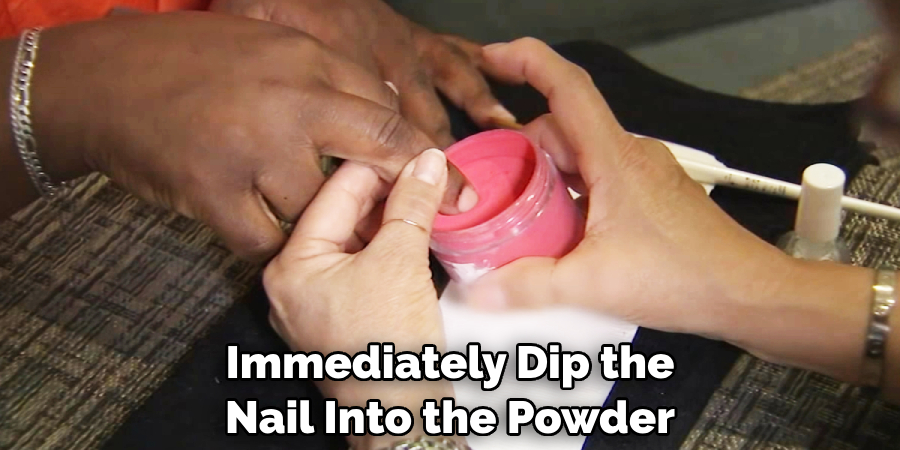
The base coat plays a crucial role in preventing dip nails from cracking. It’s the layer that binds the dip powder to your nails, so it’s important to get it right. Apply a thin, even coat of base to one nail at a time, and then immediately dip the nail into the powder.
Be sure to apply the base coat before dipping, as the base coat needs to be wet for the powder to adhere properly. Avoid getting the base coat onto your skin or cuticles, which can cause lifting and cracking. Repeat this process for each nail. Once all nails are coated and dipped, allow them a few minutes to dry before moving to the next step.
Step 3. Apply the Activator Coat
After the base coat and dip powder application, the next step involves the application of the activator coat. This coat hardens the powder and base coat, forming a strong layer resistant to cracking. Apply a generous activator layer to each nail, ensuring full coverage.
Be careful not to touch the nails while the activator is setting. Wait about two minutes until the activator has completely hardened before moving to the next step. This step is crucial as it helps to solidify the dip powder and prevent cracks from forming.
Step 4. File and Buff Again
Now that your dip powder manicure is solidified, it’s time to file and buff again. This step is important to smooth out any bumps or lumps that may have formed during the dipping process. Start by gently filing the edges and the surface of your nails, being careful not to file too much as this could cause thinning and potentially lead to cracks. After filing, use the buffer again to create a perfectly smooth surface.
Step 5. Apply the Second Activator Coat
To further enhance the durability of your dip nails and prevent cracking, apply a second coat of the activator. This step reinforces the solid layer formed by the first activator coat and the dip powder, making it even stronger and more crack-resistant. Allow the second activator coat to dry completely, waiting at least two minutes before proceeding to the next step.
Step 6. Apply the Top Coat Correctly
The top coat is the final layer of your dip powder manicure. It provides a lustrous finish while also protecting the underlying layers from damage. Apply a thin, even layer of top coat to each nail. Be sure to cover the entire nail surface, but avoid getting the top coat on your skin or cuticles, as this can cause the polish to lift and potentially crack. Allow the top coat to dry thoroughly.
Step 7. Maintain Your Dip Nails
Good maintenance is key to preventing cracks in your dip nails. Avoid using your nails as tools, as this can put undue pressure on them and cause cracking. Regularly apply cuticle oil to moisturize your nails and cuticles, as dry nails are more prone to cracking. If you notice any chips or cracks, repair them promptly to prevent further damage.
Step 8. Regular Touch-ups
Regular touch-ups are necessary to maintain the integrity of your dip nails and prevent any cracks from forming. Apply another layer of top coat to your nails every one or two weeks. This revitalizes the shine and gloss of your manicure and fortifies the strength of your dip nails, reducing the chances of them cracking. Remember to let the top coat dry thoroughly before using your hands.
Following these simple steps and regularly maintaining your dip nails, you can enjoy a beautiful and long-lasting manicure without worrying about cracks.
5 Additional Tips and Tricks
- Moisturize Regularly: One of the best ways to prevent your dip nails from cracking is by moisturizing your nails and cuticles. Use a good quality nail oil or hand cream daily.
- Avoid Water Exposure: Extended exposure to water can make your nails soft and cause the dip powder to lift from the nail. Use gloves when doing dishes or other activities requiring prolonged water contact.
- Use a Good Quality Top Coat: A quality top coat protects your nails from any potential damage. It forms a hardened shield over your dip nails, preventing them from cracking.
- Avoid Using Your Nails as Tools: Using your nails to open packages, remove stickers, or for any other similar activities can cause them to crack. Always use the appropriate tool instead of your nails.
- Keep Your Nails Trimmed: Long dip nails are more prone to cracking due to the added pressure on the tips. Keep them trimmed regularly to avoid any unnecessary stress on your nails.
With these additional tips, you can ensure your dip nails stay strong and crack-free. Remember to take care of your nails and avoid harsh activities or products that may weaken them.
5 Things You Should Avoid
- Harsh Chemical Exposure: Avoid using cleaning products or any other harsh chemicals without wearing gloves, as these can damage the dip powder and lead to cracking.
- Biting or Picking at Your Nails: These habits can weaken the nails, and the added pressure may cause cracks in the dip powder.
- Skipping the Base Coat: The base coat isn’t just a pre-color ritual – it is essential in protecting your nails from staining and helps the dip powder adhere properly.
- Cheap Dip Powder Kits: Not all dip powder kits are created equal. Some cheaper versions may provide different durability and might lead to easy cracking.
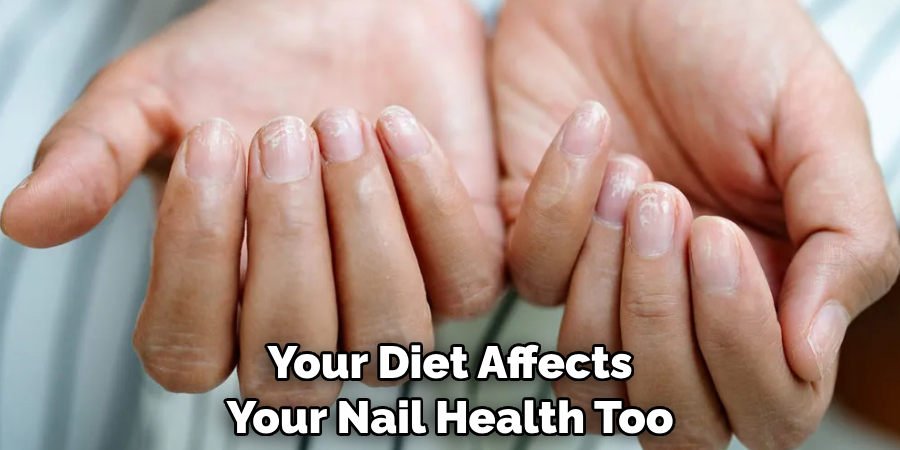
- Ignoring Nail Health: It’s not just about external care — your diet affects your nail health too. Ignoring your nutrition might make your nails weaker and more prone to cracks.
By avoiding these pitfalls, you can help ensure that your dip nails stay flawless and crack-free for a longer duration.
Why Do My Dip Nails Crack So Quickly?
There are a few reasons your dip nails might be prone to cracking. Here are some possible causes:
- Incorrect Application Technique: If the layers of dip powder are not applied evenly or with enough coats, it can lead to uneven drying and eventual cracks.
- Dry Nails: If your natural nails are dry and brittle, they will struggle to hold onto the dip powder, leading to cracks.
- Nail Trauma: If you accidentally hit or bump your nails against a hard surface, it can cause small cracks that may eventually lead to larger ones.
- Low-Quality Products: As mentioned earlier, using low-quality products or skipping steps in the application process can make your dip nails more prone to cracking.
By understanding the potential causes, you can take steps to prevent cracks in your dip nails and enjoy long-lasting results. Remember to follow proper application techniques, moisturize your nails, and avoid harsh chemicals or activities.
Conclusion
With proper maintenance and care, your dip nails can last up to four weeks and look beautiful. Taking the extra steps to help prevent your dip nails from cracking will ensure you can enjoy high-quality nail designs for a longer duration.
Ensure you’re regularly cleaning and caring for them, and keep them away from water as much as possible. If the problems persist, consider having touch-ups done or investing in a higher-quality powder for less prone cracking. If you practice good care habits, you’ll be delighted with strong and healthy nails every day.
Hopefully, the article on how to stop dip nails from cracking has been helpful to you. Start taking care of your nails today and enjoy beautiful, long-lasting dip manicures!
About the Author
Jane Hubbard is a passionate beauty expert with a wealth of experience in makeup, hair, and overall beauty techniques. After years of working as a hairdresser specialist, she followed her entrepreneurial spirit and started her own consultancy business.
Jane has always been driven by her desire to help others feel confident in their own skin, and she does this by sharing her knowledge, experiences, and practical beauty tips. Through her consultancy, she empowers individuals to embrace their unique beauty, offering tailored guidance that boosts both self-esteem and personal style.
Professional Focus
Specializes in makeup, hairstyling, and beauty consulting.
Provides personalized beauty advice, tips, and techniques to help individuals feel confident in their appearance.
Dedicated to staying up-to-date with the latest industry trends and developments.
Passionate about creating a comfortable and empowering experience for every client.
Education History
University of Craft and Design – Bachelor of Fine Arts (BFA) in Woodworking and Furniture Design
Woodworking Apprenticeships – Extensive hands-on training with skilled craftsmen to refine carpentry and furniture making techniques
Online Courses & Masterclasses – Continued education in advanced woodworking techniques, design principles, and specialized tools
Expertise:
Makeup artistry, hairstyling, and beauty consulting.
Personalized beauty techniques to enhance confidence and self-expression.
Educating clients on how to maintain their beauty routines at home.