
Are you looking for the perfect way how to take off a clay mask? Look no further than clay masks! Clay masks are a great way to pull out impurities from within the pores—all while detoxifying and exfoliating, giving you an instant boost in radiance. But, before diving into your new luxurious routine of gloriously glowing skin, it’s important to know how to correctly take off a clay mask—to ensure you are getting the full benefit without any potential harm!
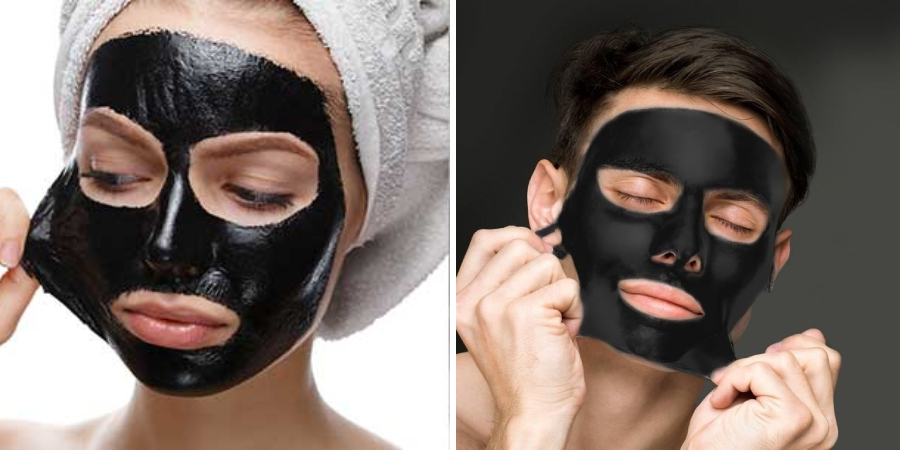
Whether you use a traditional clay mask or a new, convenient sheet mask, here is how to properly remove a clay mask.
In this blog post, we’ll dive into what you need to do when taking off a clay mask—from preparation beforehand to seeing the beautiful results afterward. So keep reading if you want healthy, reinvigorated skin with just one simple beauty treatment!
What Will You Need?
Before getting started, make sure to have the following items handy:
- A bowl of water (room temperature or slightly warm)
- A washcloth
- An exfoliating scrub, if desired
- Your favorite moisturizer
Once you have all the necessary materials, you can remove your clay mask.
10 Easy Steps on How to Take Off a Clay Mask
Step 1: Remove Excess Clay
Using a damp washcloth (with just enough water to be wet), gently wipe off the clay in circular motions. Do not use too much pressure here, as this might cause irritation or even break your skin’s capillaries. Be careful not to tug or pull the skin, either. If the clay is still too dry, you may want to spritz it with a tiny bit of water before wiping it off.
Step 2: Rinse Your Face with Water
Rinse your face for approximately one minute using lukewarm water until all clay is removed. Avoid using hot water, as this could strip away essential oils from your skin and leave it feeling dry and tight. If your skin feels too tight after washing, follow up this step with a moisturizer.
Step 3: Apply Exfoliating Scrub (optional)
If you choose to use an exfoliator, make sure to apply it in gentle circular motions over your entire face. This will help remove any remaining particles of clay that could be stuck in the pores. Avoid harsh scrubbing, as this can damage the delicate skin on your face.
Step 4: Rinse Again
After exfoliating, rinse your face once more with lukewarm water. This will help erase any remaining residue from the scrub or clay mask, leaving your skin smooth and refreshed. As with Step 2, avoid using hot water.
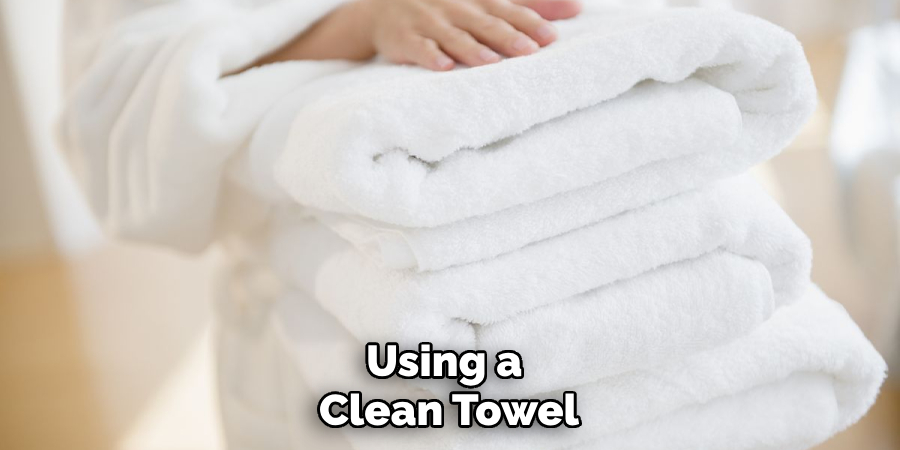
Step 5: Pat Dry
Gently pat your face dry using a clean towel. You don’t want to rub too hard as this could irritate you. You can use a toner if you’d like, but this is unnecessary. This step is all about allowing your skin to breathe and feel refreshed.
Step 6: Apply Moisturizer
Apply a moisturizer, gently massaging into the skin until completely absorbed. A good tip is to use an oil-free moisturizer for oily skin types and something richer for dryer skin types. Ensure that the moisturizer is applied all over your face and neck.
Step 7: Let Moisturizer Sink In
Let the moisturizer sink into your skin for a few minutes. This will help to prevent any dryness or irritation from occurring. Additionally, it will give your skin time to absorb all the beneficial ingredients from the mask properly.
Step 8: Apply Sunscreen (optional)
If you plan on going out in the sun, applying SPF protection is important, as clay masks can make your skin more susceptible to sunburns and other damage caused by UV rays. Another good tip is to wear a hat or visor if you plan on being out in the sun for an extended period of time.
Step 9: Enjoy the Results!
You should be left with glowing and healthy-looking skin free of impurities. Now enjoy the results of all your hard work! Remember that clay masks should be used no more than once or twice a week to avoid skin irritation or dryness.
Step 10: Repeat Weekly
We recommend repeating these steps weekly or twice monthly for the best results. Over time, you’ll see an improvement in your skin’s overall appearance and texture. Remember, with any skincare routine, consistency is key!
You can take off a clay mask like a pro with these simple steps! So go ahead and give it a try—your skin will thank you for it!

5 Additional Tips and Tricks
- Use lukewarm water when washing off the clay mask. Hot water can cause irritation and dryness, but cold water is ineffective in removing the mask.
- Rinse your face with circular motions to help gently massage away any stubborn areas of the clay mask.
- To ensure all clay residues are removed, use a soft washcloth to buff off any remaining bits of the mask from your skin.
- Apply a moisturizer or serum to keep your skin hydrated and nourished after washing off the mask.
- For best results, use a clay mask once or twice a week for deep cleansing and improved complexion.
Following these tips can help you get the most out of using a clay mask for your skincare routine!
6 Things You Should Avoid
- Avoid leaving the mask on for over a long time.
- Refrain from using a clay mask if your skin is irritated or dry.
- Do not scrub too harshly when rinsing off the mask, as this can damage your skin.
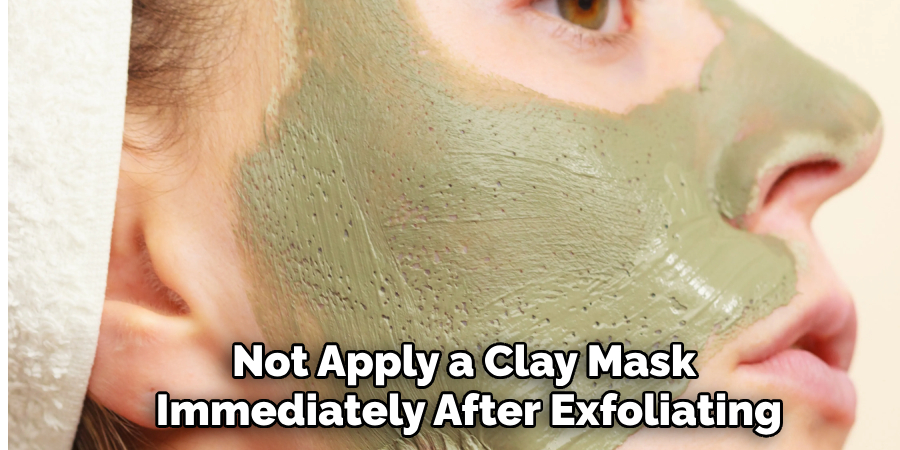
- Do not apply a clay mask immediately after exfoliating, as it can cause further irritation and sensitivity to your skin.
- Clear from applying clay masks too frequently, as excessive use may lead to overdrying or even clogged pores.
- Refrain from using a clay mask if you have any type of skin infection, such as acne or eczema.
By avoiding these mistakes, you can keep your skin healthy while still enjoying the benefits of a clay mask!
Can I Remove Clay Mask With Cold Water?
No, cold water is not effective in removing a clay mask. Clay masks are formulated to stick to your skin so that they can draw out dirt and impurities, which require warm water in order to be removed effectively without damaging the skin. Therefore, it is recommended to use lukewarm water when washing off the clay mask.
Instead of cold water, you can use a damp washcloth or soft sponge to remove the clay mask from your skin. Apply it gently in circular motions and use additional lukewarm water as needed until all the residue is gone. After that, apply a moisturizer or serum for nourishment.
By following these tips and avoiding potential mistakes, you can successfully take off a clay mask and enjoy its many benefits!
Is Clay Mask Good for Acne?
Yes, clay masks can be beneficial for people with acne-prone skin. Clay masks are formulated to draw out dirt, oil, and impurities from your pores, which helps keep your skin clean and prevents clogged pores that lead to breakouts.
Clay masks also help balance your skin’s pH levels while absorbing excess oils, helping reduce inflammation and redness associated with acne. In addition, some clay masks contain hydrating ingredients such as aloe vera or honey to soothe and nourish the skin.
However, it is important to note that clay masks should not be used if your skin is already dry or irritated; this could worsen the condition. Also, refrain from scrubbing too harshly when removing the clay mask, as this can damage your skin.
To get the best results from a clay mask for acne-prone skin, use it once or twice a week for deep cleansing and improved complexion. Regularly using a suitable clay mask allows you to enjoy clear and healthy skin!
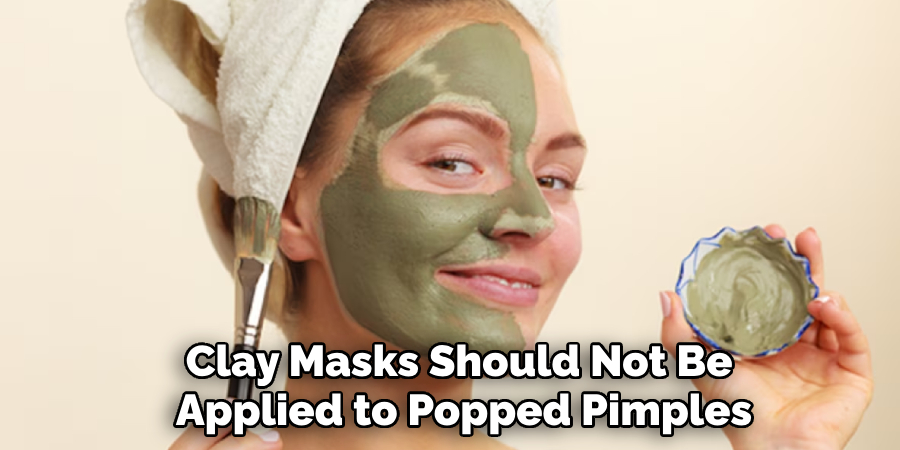
Can I Put Clay Mask on Popped Pimple?
No, clay masks should not be applied to popped pimples. Clay masks are formulated to draw out dirt and impurities from your pores, which can irritate the affected area further if used on a popped pimple. The clay mask may also get stuck in the wound and cause more discomfort and inflammation.
Waiting for the pimple to heal before applying a clay mask is best. When the affected area has healed, it can help to reduce inflammation and redness associated with acne.
Conclusion
Taking off a clay mask correctly is essential to achieving a satisfying and positive experience with the mask. Doing so successfully will leave you with skin that feels cleaner, tighter, and healthier than ever! Plus, it’s as easy as following these steps. Don’t forget to always use lukewarm water for your mask, which will help open your pores and make the process easier.
Finally, use a gentle circular motion while removing the clay to ensure you don’t damage any delicate parts of your face. Now that you know how to remove a clay mask properly – why not give it a go? You won’t be disappointed with the results!
Hopefully, the article on how to take off a clay mask has been helpful and informative. With this knowledge, you can now confidently and safely use clay masks to reap their many benefits!
You Can Check It Out To-Make Eyeliner Waterproof
About the Author
Jane Hubbard is a passionate beauty expert with a wealth of experience in makeup, hair, and overall beauty techniques. After years of working as a hairdresser specialist, she followed her entrepreneurial spirit and started her own consultancy business.
Jane has always been driven by her desire to help others feel confident in their own skin, and she does this by sharing her knowledge, experiences, and practical beauty tips. Through her consultancy, she empowers individuals to embrace their unique beauty, offering tailored guidance that boosts both self-esteem and personal style.
Professional Focus
- Specializes in makeup, hairstyling, and beauty consulting.
- Provides personalized beauty advice, tips, and techniques to help individuals feel confident in their appearance.
- Dedicated to staying up-to-date with the latest industry trends and developments.
- Passionate about creating a comfortable and empowering experience for every client.
Education History
- University of Craft and Design – Bachelor of Fine Arts (BFA) in Woodworking and Furniture Design
- Woodworking Apprenticeships – Extensive hands-on training with skilled craftsmen to refine carpentry and furniture making techniques
- Online Courses & Masterclasses – Continued education in advanced woodworking techniques, design principles, and specialized tools
Expertise:
- Makeup artistry, hairstyling, and beauty consulting.
- Personalized beauty techniques to enhance confidence and self-expression.
- Educating clients on how to maintain their beauty routines at home.