
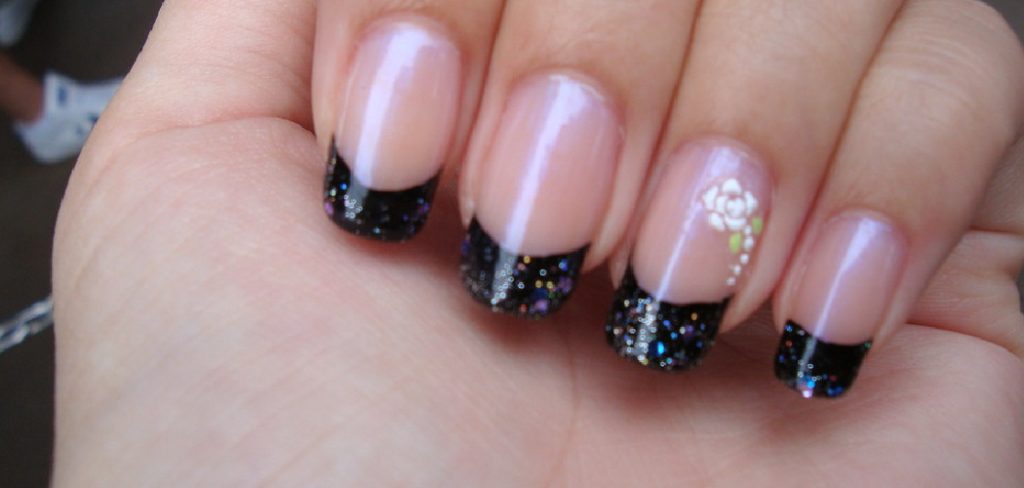
Are you ready to add some sparkle and glam to your nails? Don’t worry, using black nail glitter is easier than you think.
Black nails with glitter are a fantastic way to add a touch of elegance, drama, and sparkle to your manicure. Whether you’re looking to create a bold statement, elevate a classic black nail polish, or experiment with intricate nail art designs, black glitter offers a versatile option to suit any style. Applying black nail glitter can seem daunting at first, but with the right tools and techniques, it’s easy to achieve a stunning and professional-looking result.
This guide on how to use black nails glitter will walk you through the basics of using black nails glitter to ensure your nails dazzle with every design.
What are the Benefits of Using Black Nails Glitter?
Black nails glitter can elevate any nail look and add a touch of glamour and sophistication. Unlike traditional black nail polish, black glitter offers a multidimensional effect that catches the light and adds depth to your manicure.
Additionally, black nails glitter is incredibly versatile and can be used for various occasions. Whether you’re looking for something subtle for everyday wear or want to make a statement for a special event, black glitter nails have got you covered.
Furthermore, using black nails glitter can save you time and money in the long run. Instead of having to constantly buy new shades of nail polish to match different outfits or moods, adding some black glitter on top of your existing black polish can instantly elevate your look without breaking the bank.
What Will You Need?
To achieve the perfect black glitter nails, you will need:
- Black nail polish
- Glitter (loose or in a top coat)
- Clear top coat
- Nail polish remover
- Cotton balls or Q-tips
- Small brush or toothpick (optional for precise application)
Once you have all your supplies ready, let’s move on to the step-by-step process of creating black glitter nails.
10 Easy Steps on How to Use Black Nails Glitter
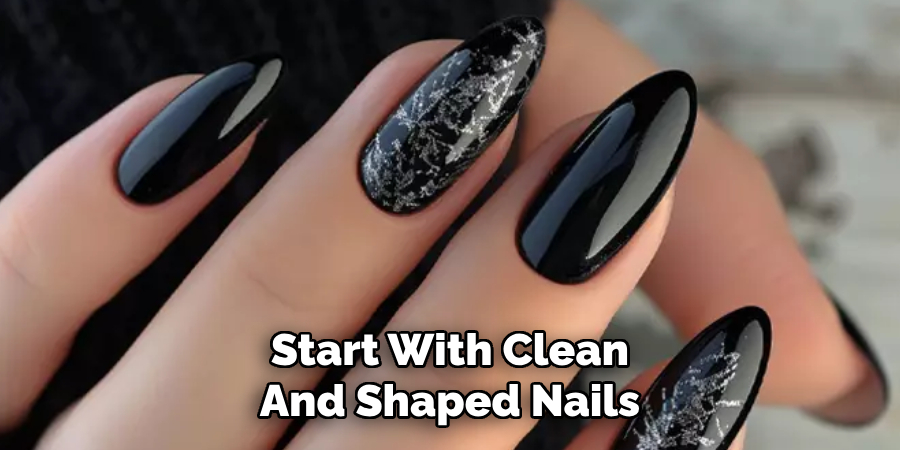
Step 1: Prep Your Nails
Start by ensuring your nails are clean and free from any old nail polish. Use nail polish remover and a cotton ball or Q-tip to clean your nails and remove any residue thoroughly. Next, trim and file your nails to your desired shape, whether that’s square, round, or almond. Smooth out any rough edges and gently buff the surface of your nails to remove any ridges, which will help the polish adhere better. Finally, wash your hands to remove any dust and oils, and make sure your nails are dry before moving on to the next step.
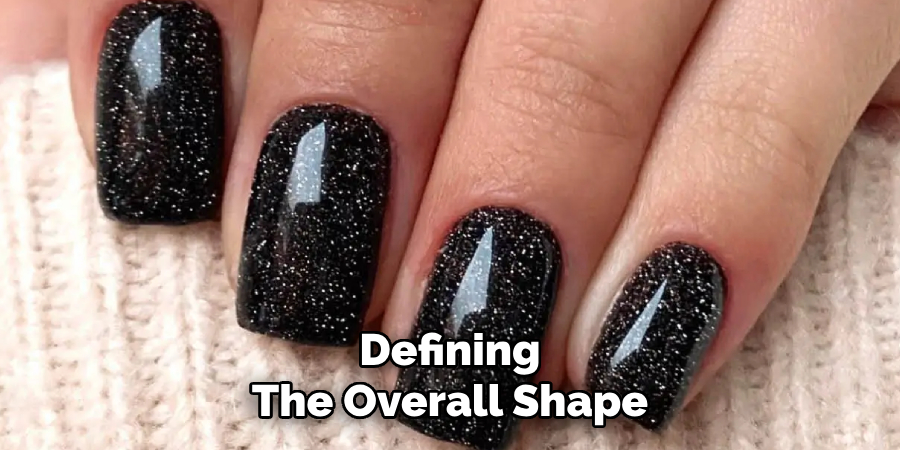
Step 2: Shape Your Nails
To achieve a polished look, take the time to shape your nails carefully. Using a quality nail file, work in one direction rather than sawing back and forth, as this helps prevent splitting or damage. Start by defining the overall shape that suits your preference and finger structure, such as an oval, square, or coffin shape. Be gentle around the edges to ensure a smooth and even finish. If you notice uneven areas or sharp corners, delicately refine them to create a balanced appearance. Proper shaping not only enhances the aesthetic but also strengthens your nails, reducing the risk of breakage.
Step 3: Apply a Base Coat
Once your nails are clean, shaped, and prepped, it’s time to apply a base coat. The base coat is an essential step as it protects your natural nails from staining and creates a smooth surface for the nail polish to adhere to. Choose a high-quality base coat that suits your needs—options are available for strengthening, smoothing, or filling in ridges.
Begin by applying a thin, even layer of base coat to each nail, starting from the cuticle and moving toward the tip in long, smooth strokes. Be sure to seal the edges of your nails by brushing a little polish along the free edge; this will help extend the life of your manicure. Allow the base coat to dry completely before proceeding to the next step. Patience during this process will ensure a better, longer-lasting result.
Step 4: Apply the Nail Polish
Once the base coat is fully dry, it’s time to apply your chosen nail polish. Start by selecting a high-quality polish in your desired color or finish. Shake the bottle gently to ensure even consistency, but avoid creating bubbles. Using steady hands, wipe the excess polish from the brush along the inner edge of the bottle to prevent overloading it.
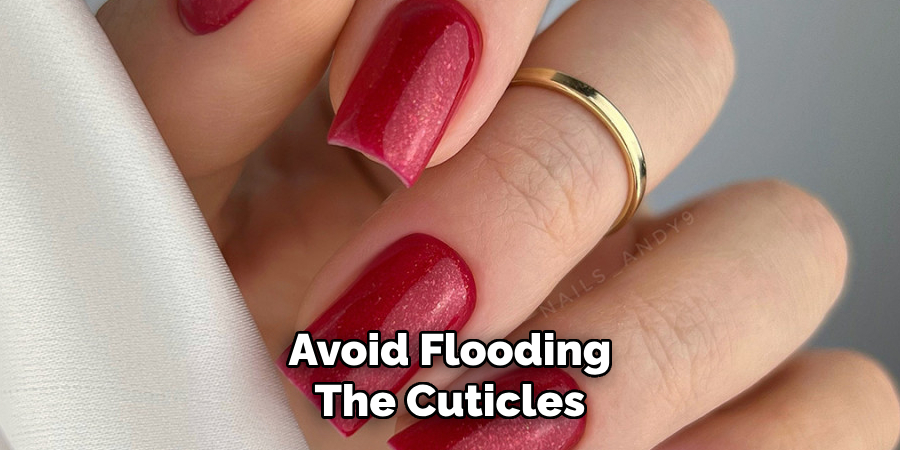
Begin applying the nail polish in thin, even layers. Start with a single stroke down the center of the nail, followed by one stroke on either side. This technique ensures a smooth and even application. Avoid overlapping or flooding the cuticles, as this can create messiness and lead to uneven edges.
Apply a second coat if necessary to achieve the desired opacity, ensuring the first coat is dry to prevent smudging or streaking. Work carefully and focus on one nail at a time for the best results. Thin layers dry more quickly and last longer than thick, uneven coats. After completing this step, allow the polish to dry completely before proceeding. Patience will help you achieve a polished, salon-quality look.
Step 5: Add the Black Nail Polish
Using a steady hand, apply a thin, even layer of black nail polish to each nail. Start at the center of the nail near the cuticle and gently stroke outward to the tip, ensuring complete coverage. Repeat on both sides to avoid leaving any gaps. Allow the first coat to dry fully before applying a second coat if needed for a more saturated and uniform look.
Take care to avoid flooding the cuticles or sidewalls with polish. A clean and precise application will enhance the overall design and make the black color stand out beautifully.
Step 6: Prepare the Glitter
Select a fine, loose glitter or a glitter polish that complements the black base color. If using loose glitter, pour a small amount onto a clean, flat surface or into a small dish for easier application.
Use a soft brush or a small applicator tool to pick up the glitter. Ensure the black polish is slightly tacky but not wet, as this will help the glitter adhere effectively. Gently press or sprinkle the glitter onto the nail, concentrating on areas where you want the sparkle to appear. For a more uniform finish, you can lightly tap the glitter with the applicator or brush it over the nail.
Step 7: Apply the Glitter
Once the glitter is applied to your satisfaction, use a soft, clean brush to carefully remove any excess glitter from around the nail and cuticle area. This helps keep the design neat and polished. Gently press on the glitter again to ensure it is securely adhered to the nail surface. If desired, add more glitter to areas that need additional sparkle. Take your time during this step to achieve the best possible result, ensuring an even and dazzling finish.
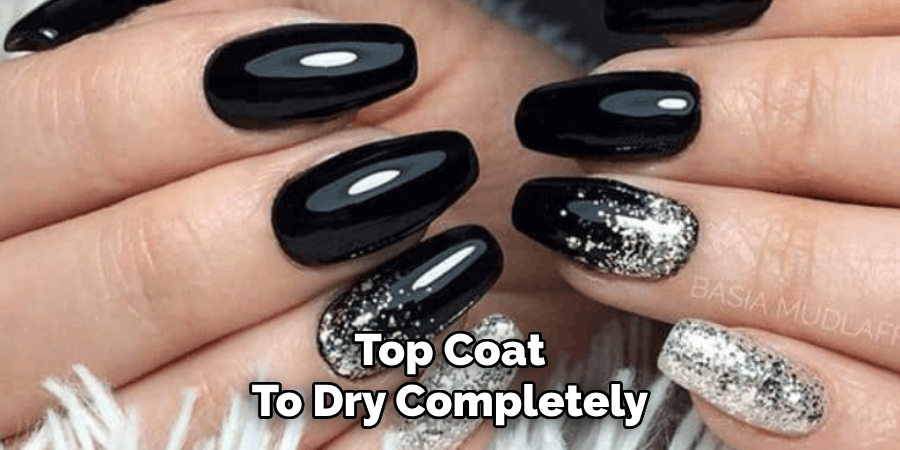
Step 8: Seal with a Top Coat
Finally, apply a high-quality, clear top coat over the entire nail to seal in the glitter and protect your design. This step not only enhances the longevity of your manicure but also adds a shiny, professional-looking finish. Make sure to cover the edges of each nail to prevent chipping and ensure durability. Allow the top coat to dry completely before touching anything to avoid smudging or imperfections. With this final step, your glitter manicure is complete and ready to dazzle!
Step 9: Clean Up the Edges
Once your manicure is fully dried, it’s time to tidy up any excess polish around the edges of your nails. Take a small, angled brush or a cotton swab dipped in nail polish remover and carefully clean around the cuticles and sides of your nails. This step ensures a polished, professional appearance by removing any stray polish that may have spread onto your skin during the application process. Be precise and gentle to avoid disrupting the manicure. With clean edges, your nails will look flawless and ready to show off!
Step 10: Allow to Dry Completely
After applying your nail polish and cleaning up the edges, patience is key. Allowing your manicure to dry completely is essential for maintaining the durability and appearance of your nails. Avoid rushing this step, as touching your nails too soon can lead to smudges, dents, or fingerprints that ruin the polished look.
For best results, keep your hands still and avoid any activities that might disturb your nails. You can speed up the drying process by using a quick-dry top coat, a nail drying spray, or even placing your hands in front of a fan. However, remember that even if your nails feel dry to the touch, it can take some time for the polish to set fully. Waiting at least 15–20 minutes is recommended before handling objects. Giving your manicure a full hour to harden completely will ensure a long-lasting, professional finish.
By following these simple tips, you can achieve a beautiful and long-lasting manicure at home.
Conclusion
Black nails with glitter offer a stylish and versatile look, perfect for any occasion.
To achieve this effect, start with clean and shaped nails, apply a base coat for durability, and layer a high-quality black polish as your base color. Once the base is dry, gently apply glitter polish, focusing on the desired accents or creating an ombré effect. Seal the design with a clear topcoat to add shine and protect your manicure. With patience and creativity, you can make a stunning and sophisticated look that elevates your overall style.
Hopefully, the article on how to use black nails glitter polish has given you some inspiration to try out this trendy nail art technique.
About the Author
Jane Hubbard is a passionate beauty expert with a wealth of experience in makeup, hair, and overall beauty techniques. After years of working as a hairdresser specialist, she followed her entrepreneurial spirit and started her own consultancy business.
Jane has always been driven by her desire to help others feel confident in their own skin, and she does this by sharing her knowledge, experiences, and practical beauty tips. Through her consultancy, she empowers individuals to embrace their unique beauty, offering tailored guidance that boosts both self-esteem and personal style.
Professional Focus
- Specializes in makeup, hairstyling, and beauty consulting.
- Provides personalized beauty advice, tips, and techniques to help individuals feel confident in their appearance.
- Dedicated to staying up-to-date with the latest industry trends and developments.
- Passionate about creating a comfortable and empowering experience for every client.
Education History
- University of Craft and Design – Bachelor of Fine Arts (BFA) in Woodworking and Furniture Design
- Woodworking Apprenticeships – Extensive hands-on training with skilled craftsmen to refine carpentry and furniture making techniques
- Online Courses & Masterclasses – Continued education in advanced woodworking techniques, design principles, and specialized tools
Expertise:
- Makeup artistry, hairstyling, and beauty consulting.
- Personalized beauty techniques to enhance confidence and self-expression.
- Educating clients on how to maintain their beauty routines at home.