
Are you looking for an exciting way to spruce up your crafts? Foil transfer gel could be the perfect addition! This versatile product can provide a unique and eye-catching appeal that you won’t find with any other craft material. Here is how to use foil transfer gel.
The art of transforming ordinary items into something special has never been easier! You can add an eye-catching metallic finish to practically any object with foil transfer gel. This simple craft can be used to create beautiful decorations for your home or even give a unique look to everyday items like vases, glasses, and trinkets.
Whether you’re looking for a fun new activity with friends or the perfect gift idea, learn how easy it is to use foam transfer gel in this comprehensive guide. Read on for our tips on working with foil transfer gel for crafting projects of any kind.
What are the Benefits of Using Foil Transfer Gel?
One of the greatest benefits of using foil transfer gel is that it’s an extremely versatile material. The gel can be applied to nearly any surface, making it ideal for crafts and home décor projects alike.
Additionally, adding a metallic finish to this product is much simpler than hand-painting or spray-painting the desired design. The gel only needs curing in a hot oven, so it’s much easier to use than lacquer or other sprays and paints. Plus, this method produces an incredibly smooth and uniform finish that will please even the most seasoned crafters.
What Will You Need?
Before you get started, there are a few essential items that you will need. These include:
- Foil transfer gel
- Baking sheet
- Crafting object (e.g., vase, trinket, etc.)
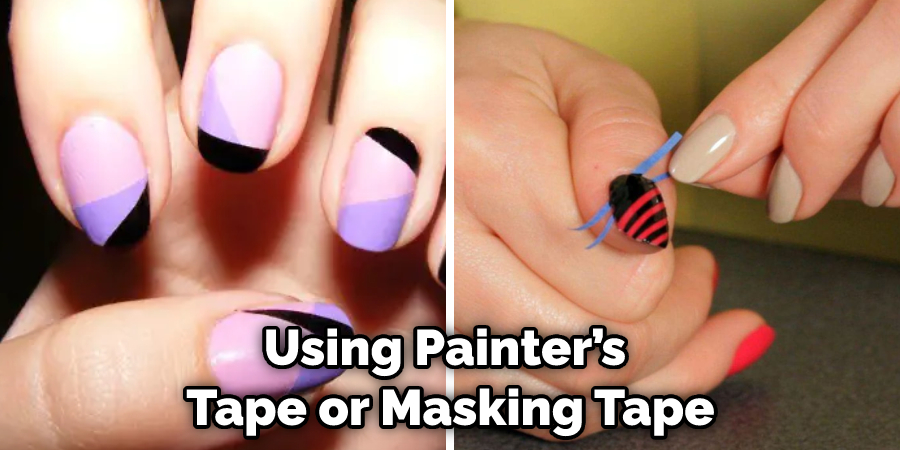
- Painter’s tape or masking tape
- Oven mitts or hot pads
Once you have all the necessary materials, it’s time to start crafting!
10 Easy Steps on How to Use Foil Transfer Gel
Step 1. Prepare Your Craft Object:
Before applying the gel, make sure that your craft object is clean and dry. Then cover any parts of the item that you do not want to be coated with the foil transfer gel by using painter’s tape or masking tape. Additionally, prepare a baking sheet to place the object on while it’s in the oven.
Step 2. Apply Foil Transfer Gel:
Using a brush or foam applicator, apply a thin, even layer of foil transfer gel to your object. Make sure to cover all areas that you would like to have a metallic finish once cured in the oven. It will look milky-white or opaque when first applied, but the color will change to a bright metallic finish when it’s finished.
Step 3. Allow Time for Drying:
Allow the gel time to dry completely before continuing on with this process. This typically takes about 12-24 hours, depending on your area’s air temperature and humidity levels. If you’d like to speed up the drying process, you can use a hair dryer set to low heat.
Step 4. Place Craft Object in Oven:
Once the gel has dried, place your object onto a baking sheet and put in the oven. Make sure to use oven mitts or hot pads for safety when handling the baking sheet. Be careful not to touch or move the object while it’s in the oven.
Step 5. Preheat Oven:
Turn on your oven and preheat it to 350°F (176°C). You can adjust this temperature based on your object size and desired finish. Don’t forget to set a timer for the duration of time your object needs to be in the oven.
Step 6. Bake Object:
Bake the craft object in the preheated oven for 15 minutes at 350°F (176°C). After 15 minutes, turn off the heat and allow it to cool inside the oven before removing it. Once cooled, remove your object from the oven and set it aside.
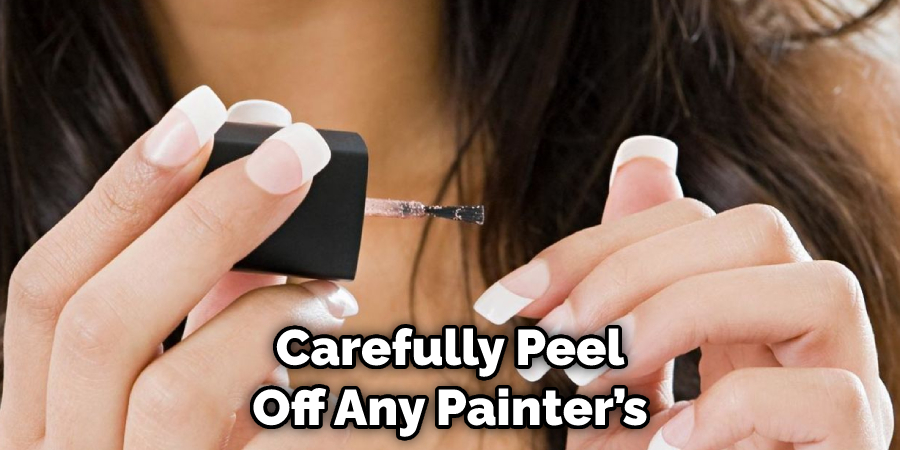
Step 7. Peel Off Painter’s Tape or Masking Tape:
Carefully peel off any painter’s or masking tape you used earlier to cover certain parts of the item. This will reveal the finished product! Moreover, if you have any excess foil transfer gel on the object, simply scrape it off with a plastic scraper.
Step 8. Clean Up Excess Gel:
If there is any excess gel on your craft object, you can use a damp cloth to wipe it away carefully. Be careful not to scrub too hard, as this may damage the finish of your project. If you still have some stubborn residue, you can use acetone or nail polish remover to remove it.
Step 9. Enjoy Your Crafted Object:
Finally, sit back and enjoy your newly crafted object! If desired, you can add additional decorations or embellishments to make it truly unique. Remember to take photos of your finished project and share it with your friends!
Step 10. Store Foil Transfer Gel Properly:
When not in use, store the foil transfer gel in a cool, dark place away from direct sunlight. Make sure that the lid is securely sealed after each use to ensure maximum freshness and shelf life of the product. Keep out of reach of children and pets.
By following these simple steps, you’ll be able to create beautiful metallic objects with just minutes of effort! With foil transfer gel, the possibilities are truly endless for crafting projects of any kind – let your imagination run wild and get creative!
5 Additional Tips and Tricks
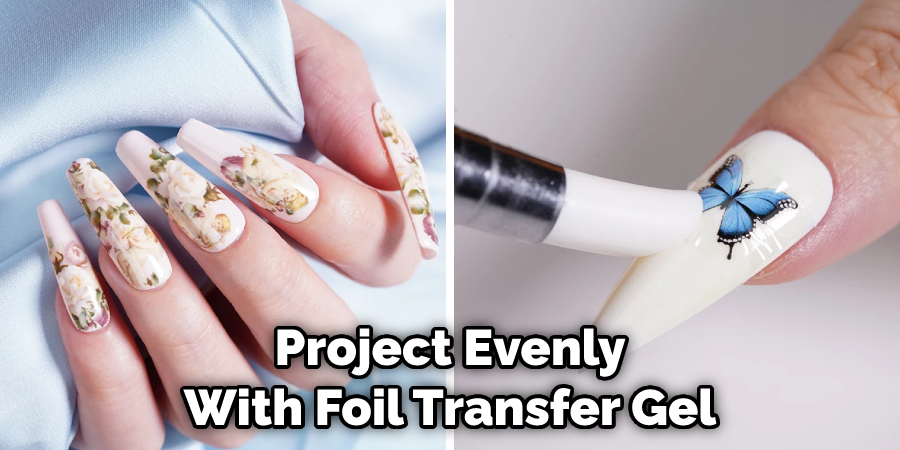
1. Use an Old Credit Card:In order to spread the foil transfer gel onto your project surface evenly, use an old credit card instead of a brush. This will help get smooth and even coverage without leaving any streaks or lines.
2. Work in Small Sections: Taking your time with this step is important as it will ensure that you don’t miss any areas and that every part of your project is covered equally. Working in small sections at a time will make it easier for you to check for accuracy before moving on to the next one.
3. Cover the Entire Surface: Make sure you cover the entire surface of your project evenly with foil transfer gel so that all parts are properly embedded with the design when applied later on. Having too much gel on the project is better than not enough, so use as much as necessary to get thorough coverage.
4. Clean Any Excess: You can remove any excess foil transfer gel with a paper towel or damp cloth before applying the foil. This helps ensure that you are working with a clean surface and that every part of your project is free of debris before moving on to the next step.
5. Test on Scrap First: If you’re unsure how well the design will come out once applied, test it on a small scrap material beforehand. This allows you to see what the final product will look like without ruining your project in case something goes wrong during application.
With these tips and tricks in mind, you’ll be able to use foil transfer gel with ease and confidence! Just remember to take your time and be careful when applying the product to ensure that your project turns out just how you want it.
5 Things You Should Avoid
1. Avoid Using Too Much Pressure: You should not use too much pressure when using a burnishing tool to adhere to the foil transfer gel. Too much pressure can cause the sheet of foil to tear and also create air bubbles beneath its surface.
2. Avoid Applying Heat Directly: If you are using an iron to apply heat, it is important that you keep it moving constantly. Applying direct heat can damage your materials or ruin your design project!
3. Avoid Contact With Water: It is best to avoid getting your foil transfer gel wet, as this can cause it to come off prematurely. Be sure to protect any areas near the gel where water may be present such as sinks and tubs.
4. Avoid Over-stretching the Foil:The edges of the foil can become brittle and tear easily if it is stretched too far. Take care when handling the sheet of foil, and try not to pull at it or stretch it out.
5. Avoid Using Abrasive Tools: Using sandpaper, razor blades, or any other type of abrasive tool will damage your project’s surface. To get even results with a foil transfer, you should only use burnishing tools for applying pressure and heat to adhere to the gel.
By following these five simple tips, you’ll be able to get beautiful results with your next foil transfer project! Have fun experimenting!

Conclusion
Foil transfer gel is a great way of adding a unique, creative touch to many types of objects! From paper and cardstock to fabric and wood, there are countless opportunities for expressing yourself with foil, and your imagination can be the limit.
The application process is easy and straightforward; all you need is the right materials and the patience to practice once before you perfect it. The results are always worth it; foil transfer gel easily adds brilliance, shine, and sparkle to any project. Have fun experimenting with this versatile technique!
Hopefully, the article on how to use foil transfer gel has been helpful in getting started with your project. With these tips and tricks, you’ll have all the tools needed to create a stunningly unique finished product! Good luck!
About the Author
Jane Hubbard is a passionate beauty expert with a wealth of experience in makeup, hair, and overall beauty techniques. After years of working as a hairdresser specialist, she followed her entrepreneurial spirit and started her own consultancy business.
Jane has always been driven by her desire to help others feel confident in their own skin, and she does this by sharing her knowledge, experiences, and practical beauty tips. Through her consultancy, she empowers individuals to embrace their unique beauty, offering tailored guidance that boosts both self-esteem and personal style.
Professional Focus
Specializes in makeup, hairstyling, and beauty consulting.
Provides personalized beauty advice, tips, and techniques to help individuals feel confident in their appearance.
Dedicated to staying up-to-date with the latest industry trends and developments.
Passionate about creating a comfortable and empowering experience for every client.
Education History
University of Craft and Design – Bachelor of Fine Arts (BFA) in Woodworking and Furniture Design
Woodworking Apprenticeships – Extensive hands-on training with skilled craftsmen to refine carpentry and furniture making techniques
Online Courses & Masterclasses – Continued education in advanced woodworking techniques, design principles, and specialized tools
Expertise:
Makeup artistry, hairstyling, and beauty consulting.
Personalized beauty techniques to enhance confidence and self-expression.
Educating clients on how to maintain their beauty routines at home.