
Are you tired of constantly painting your nails and waiting for them to dry? Then magnetic nail polish is the perfect solution for you! This innovative nail polish gives your nails a unique look in just a few simple steps.
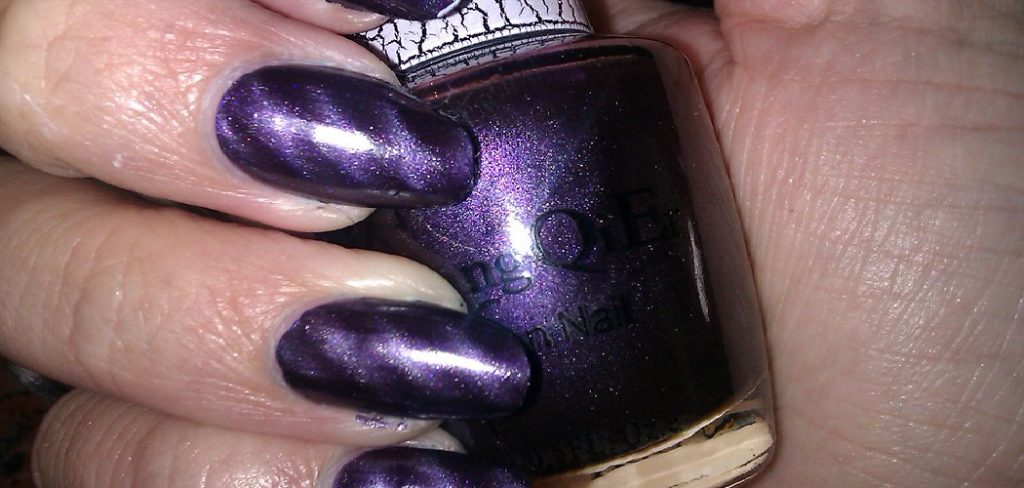
Magnetic nail polish is a fun and innovative way to elevate your manicure with mesmerizing, multidimensional designs. This type of polish contains metallic particles that respond to a magnet, allowing you to easily create unique patterns and effects. Whether you’re new to magnetic nail polish or looking to refine your technique, the process is simple and offers stunning results.
With the right tools and a bit of creativity, you can achieve salon-quality nails from the comfort of your home. Let’s dive into the easy steps on how to use magnetic nail polish.
What Are the Benefits of Magnetic Nail Polish?
Before we jump into the tutorial, let’s briefly explore the benefits of using magnetic nail polish.
- Saves Time: Unlike traditional nail polish, magnetic nail polish dries quickly and only requires one coat for full coverage. This means you can have stunning nails in just a fraction of the time.
- Unique Designs: With magnetic nail polish, you can create unique designs and patterns that are difficult to achieve with regular polish. The metallic particles in the polish respond to a magnet, allowing you to create mesmerizing effects on your nails.
- Long-lasting: Magnetic nail polish is known for its longevity and durability. It can last up to two weeks without chipping or peeling, making it perfect for those with busy schedules.
- Easy to Remove: Contrary to popular belief, magnetic nail polish is just as easy to remove as regular polish. Simply use a non-acetone nail polish remover, and you’re good to go.
Once you’ve experienced the benefits of magnetic nail polish, it’s time to learn how to use it.
What Will You Need?
Before getting started, make sure you have the following items on hand:
- Magnetic nail polish of your choice
- A magnet strip or a magnetic wand
- A base coat and topcoat (optional)
- Non-acetone nail polish remover (optional)
Once you have all the necessary tools, it’s time to get creative!
8 Easy Steps on How to Use Magnetic Nail Polish
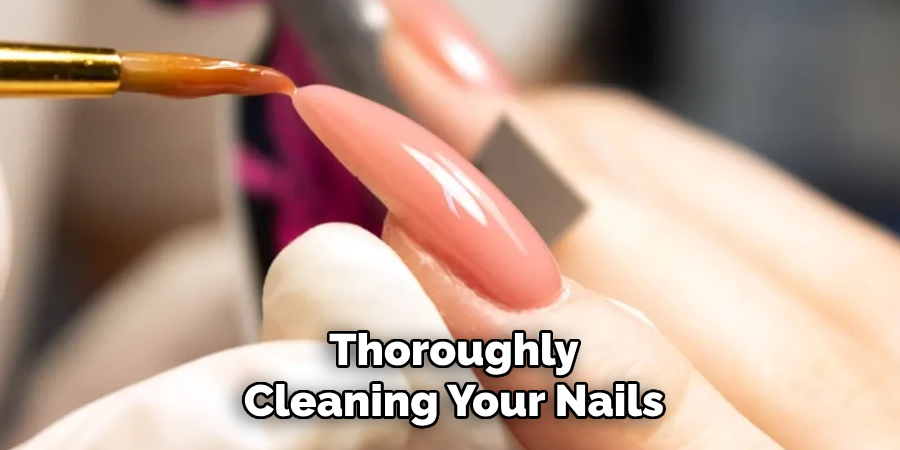
Step 1: Prep Your Nails
Start by thoroughly cleaning your nails to remove any dirt, oil, or residue that could prevent the magnetic nail polish from adhering properly. Use a non-acetone nail polish remover to ensure a smooth surface. Next, trim your nails to the desired length and shape them using a nail file.
Buff the surface of your nails gently to create an even texture, which helps the nail polish apply more evenly. Finally, wash your hands with soap and water and dry them thoroughly to remove any dust or remaining residue. If desired, apply a base coat to protect your nails and create an ideal base for the magnetic polish.
Step 2: Apply the First Coat of Magnetic Nail Polish
Begin by carefully applying a thin, even layer of magnetic nail polish to each nail. Make sure to cover the entire nail surface, avoiding the cuticles and skin around the nail to achieve a clean, professional look. The first coat doesn’t need to be perfect for the magnetic effect, as its primary purpose is to provide an even color base for the second coat.
Allow this initial layer to dry completely to ensure the subsequent coat adheres properly and prevents smudging. Patience is key at this stage, as rushing could compromise the final look. If necessary, clean up any excess polish from the sides of the nail with a small brush dipped in a non-acetone nail polish remover.
Step 3: Apply the Second Coat and Use the Magnetic Tool
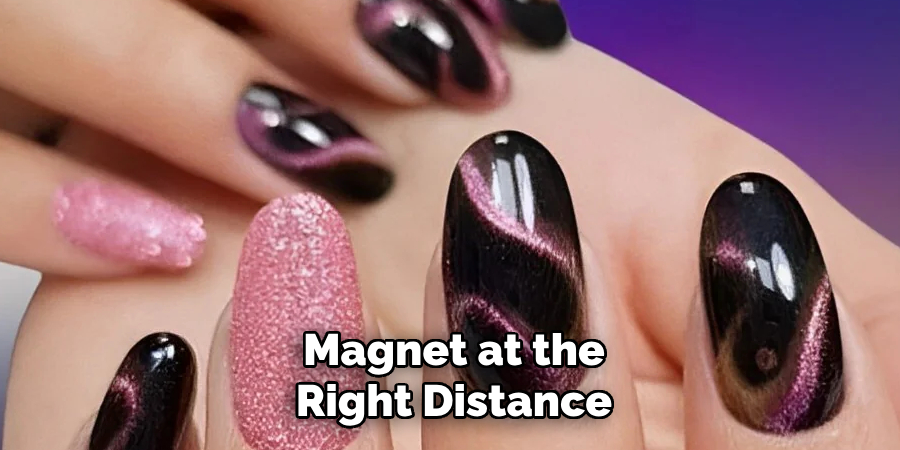
Once the first coat has fully dried, apply a second, slightly thicker layer of magnetic nail polish to each nail. While the polish is still wet, immediately hold the magnetic tool close to the nail’s surface without touching it. Position the magnet as the polish instructions direct to create the desired effect, whether it’s lines, waves, or another unique pattern.
Hold the magnet steady over the nail for 10–15 seconds to allow the design to set. Repeat this process for each nail, taking care to work one nail at a time to ensure the polish remains wet while using the magnet. Allow the nails to dry completely before moving on to the final step.
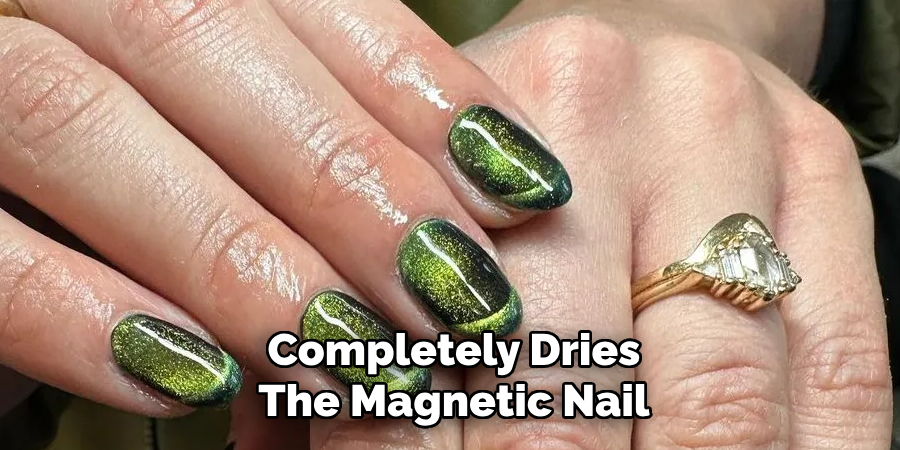
Step 4: Apply a Top Coat
After completely dries the magnetic nail polish, seal your design with a high-quality top coat. This step adds a glossy finish to the nails and protects the magnetic design from chipping or fading.
Apply the top coat evenly over each nail, ensuring full coverage without disturbing the underlying pattern. Allow the top coat to dry thoroughly for long-lasting results.
Step 5: Clean Up and Moisturize
Once your manicure is dry, take a moment to clean up any excess polish around your nails. Use a small brush or a cotton swab dipped in nail polish remover to carefully tidy up the edges. Afterward, revitalize your hands with nourishing hand cream or cuticle oil. This moisturizes your skin and enhances the overall appearance of your nails, leaving them looking polished and professional.
Step 6: Proper Maintenance
To keep your manicure looking its best, practice regular maintenance. Avoid exposing your nails to harsh chemicals or prolonged contact with water, as these can cause the polish to wear off more quickly.
Wearing gloves while performing household chores can help protect your design. If any chips or fading occur, carefully touch up the affected areas with the same nail polish and reapply a top coat for a refreshed look. Proper care allows your magnetic manicure to stay vibrant and beautiful for days.
Step 7: Removal of Magnetic Nail Polish
When it’s time to remove your magnetic nail polish, do so gently to avoid damaging your nails. Start by soaking a cotton pad in nail polish remover. Place the soaked pad on your nail and press it down lightly for a few seconds to allow the remover to break down the polish.
Then, slowly swipe the pad from the base to the tip of your nail. Repeat the process as needed for any stubborn areas. After removing all the polish, wash your hands thoroughly and apply hydrating cuticle oil or hand cream to restore moisture and keep your nails healthy.
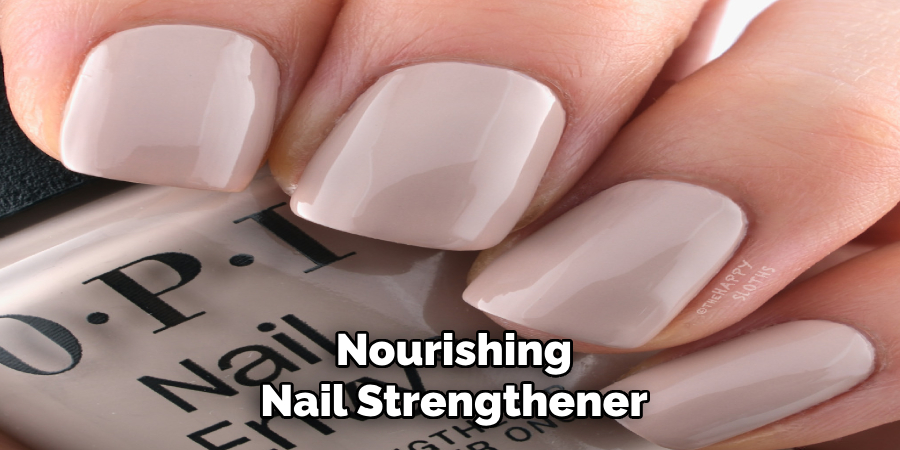
Step 8: Caring for Your Nails After Removal
Focus on proper nail care to maintain healthy nails after removing magnetic nail polish. Start by gently buffing the nail surface to smooth out any rough spots. Trim your nails and shape them with a file to prevent splitting.
Use a nourishing nail strengthener to reinforce your nails and protect them from future damage. Regularly apply cuticle oil to keep your cuticles hydrated and healthy. A consistent nail care routine will not only help your nails recover but also prepare them for your next stunning magnetic manicure.
By following these simple steps, you can easily create a show-stopping magnetic manicure from the comfort of your own home.
5 Things You Should Avoid
- Skipping the Base Coat: Always apply a base coat before using magnetic nail polish. This step helps protect your natural nails and ensures better polish adhesion for a smoother application.
- Not Shaking the Bottle: Magnetic nail polish contains metallic particles that tend to settle over time. Make sure to shake the bottle thoroughly before use so the metallic pigments are evenly distributed.
- Holding the Magnet Too Far Away: Keep the magnet close to your nail (but not touching) right after application for the best results. Holding it too far away may result in weaker or less defined patterns.
- Applying Too Thick of a Coat: Using a thick layer of magnetic polish can lead to uneven finishes and difficulty creating sharp designs. Apply a thin, even layer for optimal results.
- Rushing the Drying Process: Magnetic nail polish requires some time to dry completely. Rushing this step can smudge the design and ruin the polished look, so always allow adequate drying time.
How Can You Combine Magnetic Nail Polish with Other Nail Techniques?
Magnetic nail polish can be combined with other nail techniques to create unique, eye-catching designs. Here are a few ideas to get you started:
- Gradient Effect: Create a gradient effect using two different shades of magnetic nail polish on each nail. Apply the lighter shade as the base color, then use the magnet to create a pattern with the darker shade on top.
- Glitter Accents: Add some sparkle to your magnetic manicure by applying glitter or shimmer polish on the magnetic design. This will give your nails an extra dimension and make them stand out even more.
- Stamping: Use stamping plates and unique stamping polishes to add intricate patterns or designs to your magnetic polish. This technique allows for endless customization and creativity.
- Negative Space: Leave some areas of your nail bare to create a negative space effect. Apply the magnetic polish in a pattern, leaving gaps between the design, then fill in the spaces with a contrasting color or glitter for a unique look.
You can create personalized and stunning manicures that showcase your style and creativity by experimenting with different techniques.
Conclusion
How to use magnetic nail polish can create stunning and unique designs when applied correctly.
You can achieve professional-looking results at home by following the steps outlined above—preparing your nails, properly shaking the bottle, keeping the magnet at the right distance, applying thin coats, and allowing adequate drying time. Practice and patience are key to mastering the technique, so don’t be discouraged if it takes a few tries to perfect your design.
With attention to detail and care, magnetic nail polish can become a go-to choice for creating eye-catching manicures.
About the Author
Jane Hubbard is a passionate beauty expert with a wealth of experience in makeup, hair, and overall beauty techniques. After years of working as a hairdresser specialist, she followed her entrepreneurial spirit and started her own consultancy business.
Jane has always been driven by her desire to help others feel confident in their own skin, and she does this by sharing her knowledge, experiences, and practical beauty tips. Through her consultancy, she empowers individuals to embrace their unique beauty, offering tailored guidance that boosts both self-esteem and personal style.
Professional Focus
- Specializes in makeup, hairstyling, and beauty consulting.
- Provides personalized beauty advice, tips, and techniques to help individuals feel confident in their appearance.
- Dedicated to staying up-to-date with the latest industry trends and developments.
- Passionate about creating a comfortable and empowering experience for every client.
Education History
- University of Craft and Design – Bachelor of Fine Arts (BFA) in Woodworking and Furniture Design
- Woodworking Apprenticeships – Extensive hands-on training with skilled craftsmen to refine carpentry and furniture making techniques
- Online Courses & Masterclasses – Continued education in advanced woodworking techniques, design principles, and specialized tools
Expertise:
- Makeup artistry, hairstyling, and beauty consulting.
- Personalized beauty techniques to enhance confidence and self-expression.
- Educating clients on how to maintain their beauty routines at home.