
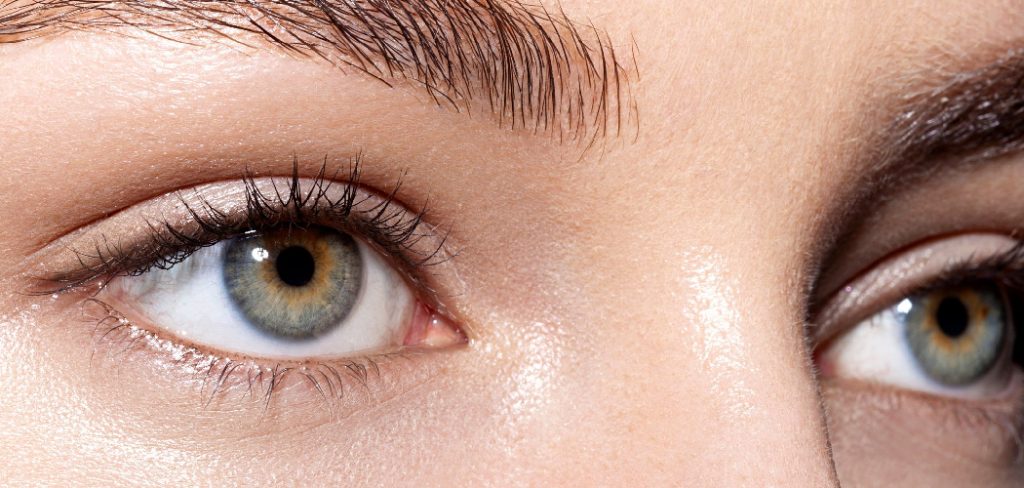
Are you plagued with dark circles and puffiness under your eyes? An eye brightener can be a game-changer in your makeup routine. Not only does it cover up imperfections, but it also adds a luminous glow to the delicate skin under your eyes.
Under eye brightener is a versatile cosmetic product designed to reduce the appearance of dark circles, brighten the under-eye area, and give your face a refreshed and radiant look. Whether you’re battling tiredness, combating discoloration, or simply enhancing your makeup routine, applying an under-eye brightener correctly can transform your overall appearance.
By following a few simple steps on how to use under eye brightener, you can achieve a seamless and natural finish, ensuring your under-eye area looks well-rested and illuminated throughout the day.
What Are the Benefits of Using Under Eye Brightener?
Before diving into the application process, let’s explore the benefits of incorporating under eye brightener into your makeup routine.
- Reduces Dark Circles: The main purpose of an under eye brightener is to cover up those pesky dark circles that may be caused by lack of sleep, genetics, or aging. By applying a light-reflecting formula to this area, you can effectively minimize the appearance of dark circles and create a more even-toned complexion.
- Brightens the Under-Eye Area: Not only does under eye brightener conceal darkness, but it also adds radiance and brightness to the under-eye area. This can instantly make you look more awake and refreshed, even when you feel less than well-rested.
- Prevents Creasing: Under eye brightener is typically formulated to be lightweight and hydrating, which can help prevent your concealer from creasing throughout the day. This ensures that your makeup stays in place and looks flawless for more extended periods.
Now that we’ve established the benefits of using under eye brightener, let’s dive into the steps on how to use it correctly.
What Will You Need?
Before getting started, make sure you have the following items on hand:
- Under Eye Brightener: This can come in various forms, such as creams, liquids, or sticks. Choose one that works best for your skin type and desired level of coverage.
- Moisturizer: Prepare your under-eye area with a moisturizer before applying any makeup products. This will ensure your skin is hydrated and create a smooth base for the brightener to glide on.
- Foundation/Concealer: Optional, but if you want additional coverage, you may opt to use these products in conjunction with an under-eye brightener.
- Makeup Sponge or Brush: These tools can help blend the product seamlessly and create a natural finish.
- Setting Powder: To ensure your makeup stays in place, you can use a setting powder to lock it in.
Once you have all your necessary items, let’s move on to the steps for applying an eye brightener.
9 Easy Steps on How to Use Under Eye Brightener
Step 1: Choose the Right Shade
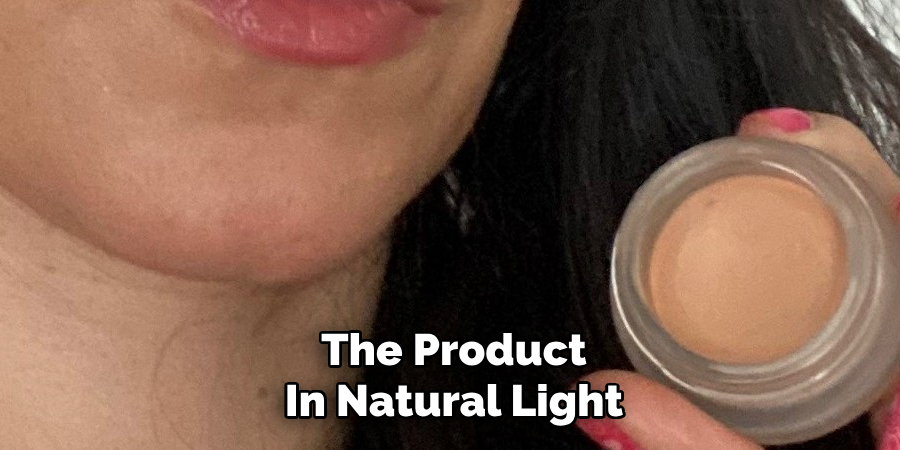
Selecting the correct shade of under eye brightener is crucial for achieving a natural and luminous look. Start by assessing your skin tone and undertones. If you have warm undertones, opt for a peach or orange-based shade to effectively neutralize blue or purple dark circles.
For cooler undertones, a pink or light salmon shade works best to counteract discoloration. Those with neutral undertones can look for a shade that closely matches their skin tone or leans slightly yellow to brighten the area gently.
Testing the product in natural light is also important to ensure it blends seamlessly with your skin and complements your complexion. Keep in mind that the brightener should ideally be one to two shades lighter than your foundation or skin tone for a noticeable yet balanced brightening effect.
Step 2: Prepare Your Skin
Before applying an under-eye brightener, ensure your skin is clean, hydrated, and primed. Start by gently cleansing your face to remove any dirt or oil. Follow this with a lightweight eye cream or moisturizer to keep the under-eye area hydrated and create a smooth application base.
If you’re applying other makeup, consider using a primer around the under-eye area to help the product adhere better and last longer throughout the day. Proper preparation ensures a flawless finish and prevents the brightener from creasing or looking cakey.
Step 3: Apply the Under Eye Brightener
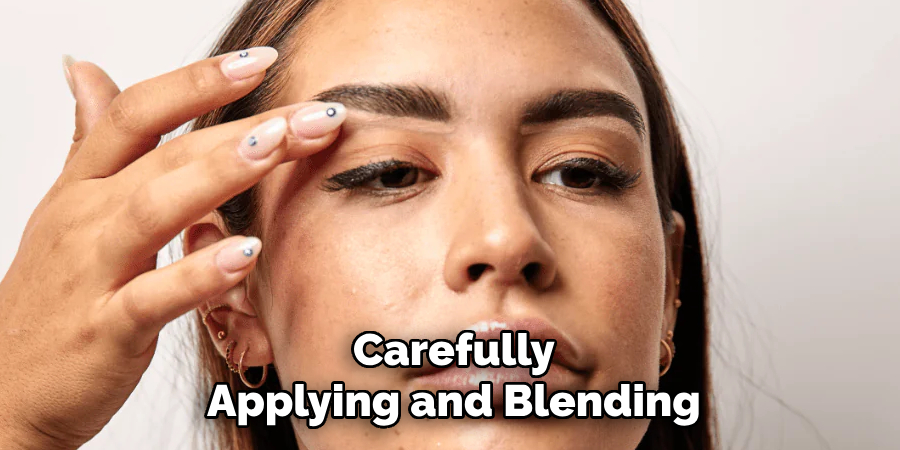
Using a small, precise applicator or your fingertips, apply a small amount of the under eye brightener in a triangular shape beneath each eye. Begin at the inner corner, extending down towards the top of your cheekbone and outward toward the outer corner of your eye.
Blend the product gently using a damp makeup sponge, brush, or ring finger, as this finger applies the least pressure. Be sure to blend the edges seamlessly to avoid harsh lines and create a natural, lifted look. Start with a light layer and build up coverage to achieve your desired effect without over-applying.
Step 4: Set the Under Eye Brightener
To ensure the under-eye brightener stays in place throughout the day, lightly set it with a translucent setting powder. Tap a minimal amount of powder onto the under-eye area using a small, fluffy brush, focusing on where the product was applied.
Be careful not to over-powder, as this can lead to a dry or cakey appearance. Setting the product helps to lock it in place, reduce creasing, and maintain a smooth, brightened finish.
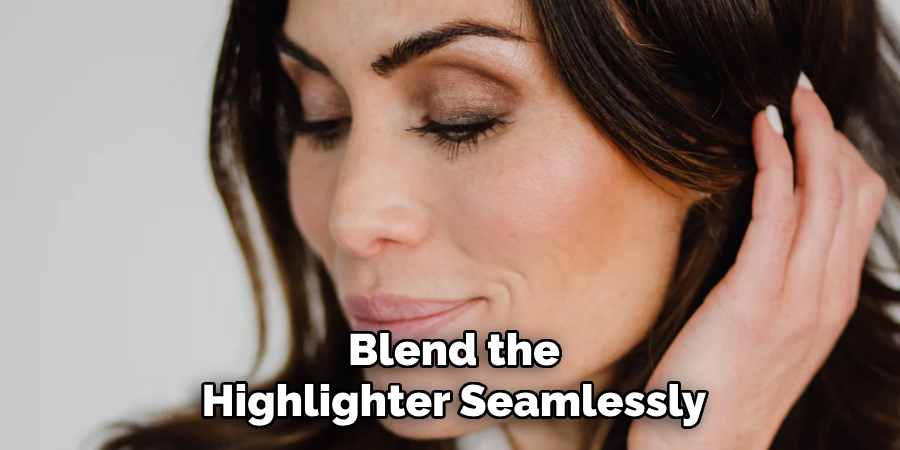
Step 5: Add a Touch of Highlighter
To further enhance the brightened under-eye effect, gently apply a small amount of highlighter to the high points of your face. Focus on the tops of your cheekbones, the inner corners of your eyes, and just below the brow bone.
Use a soft brush or your fingertip to blend the highlighter seamlessly into the skin, creating a luminous and radiant finish. This step complements the under-eye brightening process by adding dimension and a subtle glow.
Step 6: Complete the Look with Setting Spray
To ensure your makeup stays flawless all day, finish by applying a setting spray. This step not only locks your makeup in place but also helps to create a seamless, natural finish by melting the layers of makeup together. Hold the setting spray about 8–10 inches away from your face and mist evenly in an “X” and “T” motion, ensuring all areas of your makeup are lightly covered.
Be careful not to oversaturate your skin; a few spritzes are enough to do the job. For a dewy look, opt for a hydrating or glow-boosting setting spray, while a matte setting spray is ideal for controlling shine throughout the day. Allow the spray to dry naturally, and resist the temptation to touch your face while it sets. This final step will enhance the longevity of your makeup and leave your look polished and camera-ready.
Step 7: Double-Check and Touch Up
Before heading out, take a moment to double-check your makeup in natural lighting. This step helps ensure that all elements of your application—foundation, contour, eyeshadow, and lipstick—are perfectly blended and cohesive. Make minor touch-ups to areas such as the edges of your lipstick or the blend of your eyeshadow.
Keep a small makeup bag with essentials like pressed powder, lipstick, and a small blending brush on hand for quick touch-ups throughout the day. This attention to detail ensures your look remains flawless and fresh no matter the occasion.
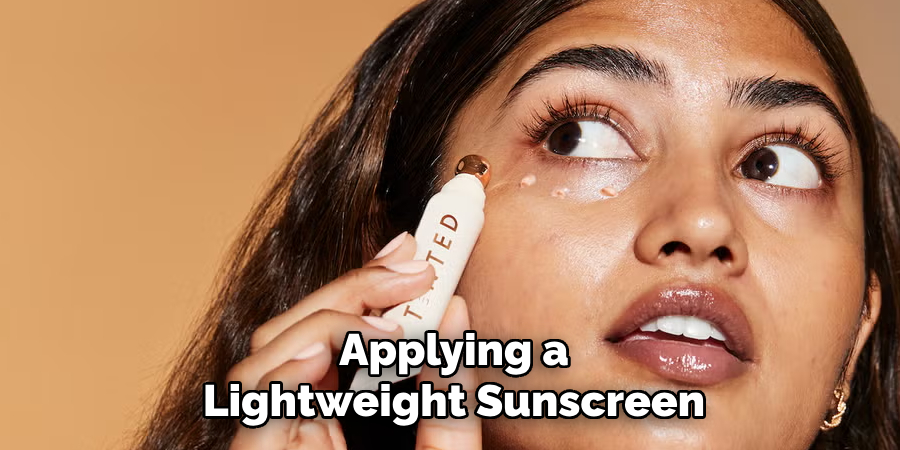
Step 8: Protect Your Skin
To complete your routine, don’t forget to protect your skin by applying a lightweight sunscreen. This crucial step shields your skin from harmful UV rays and prevents premature aging, dark spots, and sun damage.
Opt for a broad-spectrum sunscreen with at least SPF 30, ensuring it suits your skin type and complements your makeup. Apply it gently over your finished look, or choose a sunscreen spray over makeup. A well-protected complexion is the foundation for maintaining your skin’s health and flawless appearance.
Step 9: Set Your Makeup
To ensure your makeup lasts all day, finish your routine by setting it with a setting spray or powder. A setting spray locks in your look, giving your makeup a seamless, dewy finish while helping to control shine.
Alternatively, a translucent setting powder can minimize oiliness and provide a matte effect. Lightly mist your setting spray over your face from a distance or dust a small amount of powder onto areas that tend to become oily, such as your T-zone. This final step helps your makeup withstand the day’s challenges, keeping it fresh and intact for hours.
By following these simple steps, you can achieve a brightened, flawless under-eye area that will enhance your overall makeup look.
Conclusion
How to use under eye brightener is a simple yet effective way to enhance your overall makeup routine and refresh your look.
By preparing your skin, carefully applying and blending the product, and setting it appropriately, you can achieve a smooth, illuminated under-eye area that lifts and brightens your face. With the right techniques and products, under-eye brighteners diminish the appearance of dark circles and create a radiant, well-rested complexion.
Incorporating this essential step into your makeup can make a noticeable difference in achieving a polished and confident appearance.
About the Author
Jane Hubbard is a passionate beauty expert with a wealth of experience in makeup, hair, and overall beauty techniques. After years of working as a hairdresser specialist, she followed her entrepreneurial spirit and started her own consultancy business.
Jane has always been driven by her desire to help others feel confident in their own skin, and she does this by sharing her knowledge, experiences, and practical beauty tips. Through her consultancy, she empowers individuals to embrace their unique beauty, offering tailored guidance that boosts both self-esteem and personal style.
Professional Focus
- Specializes in makeup, hairstyling, and beauty consulting.
- Provides personalized beauty advice, tips, and techniques to help individuals feel confident in their appearance.
- Dedicated to staying up-to-date with the latest industry trends and developments.
- Passionate about creating a comfortable and empowering experience for every client.
Education History
- University of Craft and Design – Bachelor of Fine Arts (BFA) in Woodworking and Furniture Design
- Woodworking Apprenticeships – Extensive hands-on training with skilled craftsmen to refine carpentry and furniture making techniques
- Online Courses & Masterclasses – Continued education in advanced woodworking techniques, design principles, and specialized tools
Expertise:
- Makeup artistry, hairstyling, and beauty consulting.
- Personalized beauty techniques to enhance confidence and self-expression.
- Educating clients on how to maintain their beauty routines at home.