
Achieving a flawless, natural complexion does not require thick, heavy liquid foundations. Many makeup lovers are discovering the magic of mineral makeup for a lightweight, breathable finish. However, learning how to apply bare minerals powder correctly can feel intimidating if you are used to traditional liquid or cream products. You might wonder how a loose powder can possibly provide enough coverage to hide blemishes while still looking like real skin.
This guide will demystify the famous “Swirl, Tap, Buff” method and give you the confidence to perfect your base makeup. We will cover everything from skin preparation to the final setting touches. By following these simple steps, you will quickly master the technique and achieve that highly coveted, radiant glow. Let us dive into the best practices for achieving a stunning, natural complexion.
Why Learning Minerals Powder Matters
Mastering mineral foundation completely transforms your daily beauty routine. Traditional liquid foundations often contain heavy oils, synthetic fragrances, and harsh preservatives that can clog pores and irritate sensitive skin. Mineral makeup, on the other hand, consists of crushed natural minerals that sit gently on the skin’s surface. This allows your pores to breathe freely throughout the day. When you use the proper application techniques, you unlock incredible skin health benefits alongside beautiful coverage.
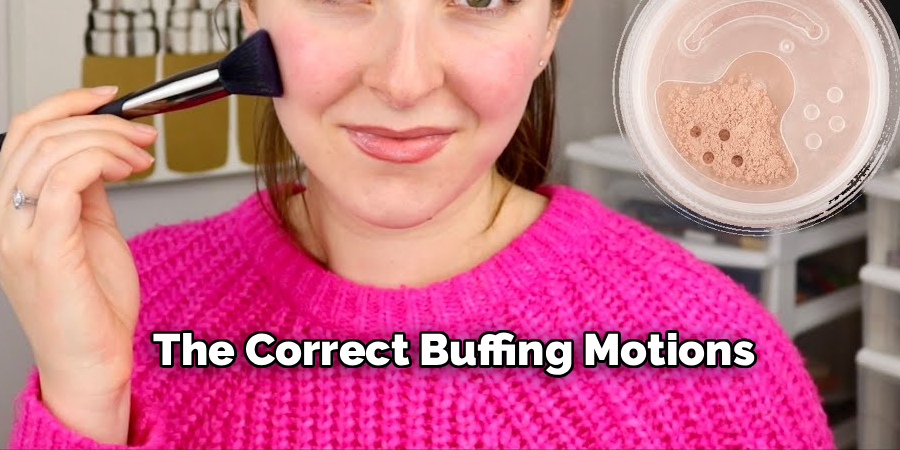
Understanding the application process is the key to achieving the trendy “no-makeup” makeup look. Mineral powder possesses a unique, light-reflecting quality that blurs imperfections without masking your natural skin texture. If you apply it incorrectly, the powder can look heavy, cakey, or uneven. But when you use the right brush and the correct buffing motions, the minerals melt seamlessly into your natural oils. This creates a smooth, luminous finish that looks exactly like your skin, only better.
Step-By-Step Guide to How to Apply Bare Minerals Powder
Step 1: Prepare Your Canvas with Skincare
A flawless makeup application always begins with excellent skin preparation. Wash your face with a gentle cleanser to remove any dirt, oil, or leftover makeup from the previous night. Follow up with a high-quality, lightweight moisturizer suited for your specific skin type. Give your moisturizer at least five full minutes to absorb completely into your skin before moving on to makeup. If your face remains wet or sticky, the loose powder will cling to those damp patches and create an uneven, patchy appearance.
Step 2: Pick the Best Brush Powder
The tool you use is just as important as the makeup itself. For the best possible results, you need a brush specifically designed for loose mineral foundation. Look for a dense, flat-topped kabuki brush or a domed brush with tightly packed synthetic bristles. The density of the brush determines how much coverage you will achieve. A fluffier brush yields a sheer, natural tint, while a dense brush packs the minerals tightly together for maximum opacity. Avoid using standard fluffy powder brushes, as they will scatter the product rather than pressing it into your skin.
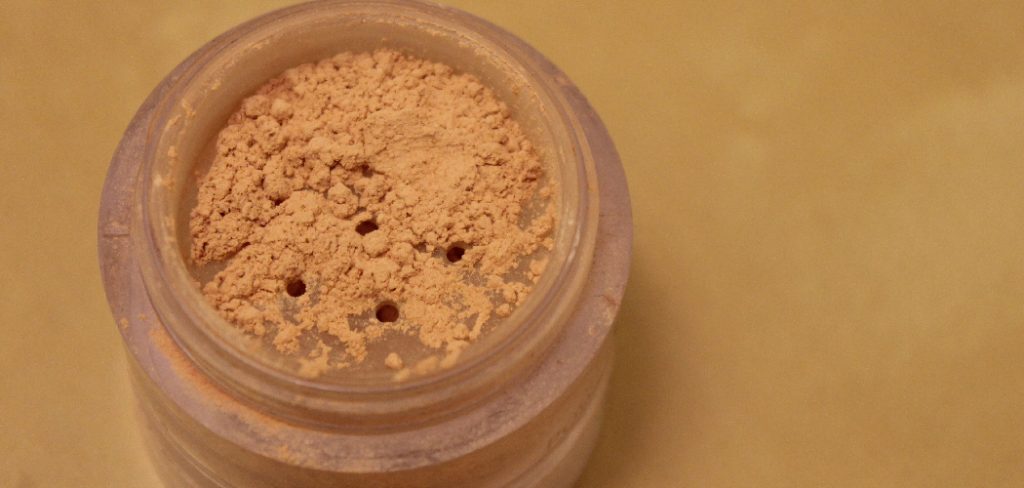
Step 3: Dispense the Product into the Lid
One of the biggest mistakes beginners make is dipping their brush directly into the main powder jar. You need a very small amount of product to achieve great coverage. Open your foundation jar and carefully tap a tiny amount of the loose powder into the plastic lid. You should start with a portion no larger than the size of a dime. It is always easier to add more product later if you need extra coverage. Starting with a small amount prevents wasting your expensive makeup and keeps your application looking beautifully natural.
Step 4: The Swirl Technique for Minerals Powder
Now it is time to load your brush using the lid. Take your chosen kabuki brush and press the bristles directly into the powder sitting in the lid. Swirl the brush around the lid in firm, circular motions. You want the crushed minerals to tuck themselves deep inside the bristles, rather than just sitting on the very top. Continue swirling until all the visible powder in the lid disappears completely into your brush. This warming action activates the natural minerals and prepares them to bind smoothly to your skin.
Step 5: Tap Away the Excess Powder
After swirling, you must remove any loose, unattached powder from the outside of your brush. Hold the brush over the lid or a sink and give the handle a firm tap against the edge. You should see a small cloud of excess dust fall away from the bristles. This tapping step is absolutely crucial for a flawless finish. If you skip this part, the excess product will immediately drop onto your cheeks, creating heavy, concentrated spots of color that are incredibly difficult to blend out evenly.
Step 6: The Buffing Motion
Bring the loaded brush to your face and prepare to apply the foundation. Start at the outer edges of your face, near your cheekbones or jawline, rather than placing the brush directly in the center of your forehead or nose. Press the bristles gently against your skin and begin moving the brush in continuous, sweeping circles. This circular buffing motion creates friction, which melts the powdered minerals into your skin’s natural oils. The powder will miraculously transform into a smooth, creamy finish as you blend it across your cheeks, chin, and forehead.
Step 7: Build Your Desired Coverage Gradually
Mineral makeup is incredibly buildable, meaning you can add layers without looking cakey. Assess your complexion in natural lighting after you finish buffing the first light layer over your entire face. If you have areas with redness, acne scars, or hyperpigmentation that need more help, repeat the swirl, tap, and buff process. Focus only on those specific trouble spots rather than applying a second layer all over. Using this targeted layering approach ensures your overall makeup remains lightweight and natural while still providing the exact level of flawless coverage you desire.
Step 8: Lock It In with a Setting Spray
While mineral foundation boasts excellent staying power, a setting product guarantees your makeup survives a long, busy day. You can use a translucent mineral setting powder if you prefer a completely matte finish. However, a hydrating setting spray works beautifully to lock the minerals in place while adding a fresh, dewy glow. Hold the spray bottle about ten inches away from your face and mist lightly. The moisture from the spray settles the powder completely, melting it perfectly into your skin and erasing any lingering powdery texture.
Frequently Asked Questions
Can I Use Mineral Powder on Dry Skin?
Absolutely. Many people with dry skin worry that loose powder will emphasize dry patches, but mineral foundation actually works beautifully when prepped correctly.
- Exfoliate regularly to remove dead skin cells.
- Apply a rich, hydrating moisturizer and let it sink in completely.
- Use a hydrating face primer before applying the powder.
- Finish with a moisture-boosting setting spray to eliminate any dry, powdery finish.
How Do I Conceal Dark Circles with Mineral Powder?
You can actually use your mineral foundation as a highly effective concealer.
- Take a small, precise concealer brush and dip it lightly into the powder.
- Swirl and tap as usual.
- Gently press and pat the concentrated powder directly over your dark circles or blemishes.
- For very stubborn spots, you can mix a tiny bit of powder with your daily eye cream to create a custom liquid concealer.
Does Mineral Foundation Provide Sun Protection?
Yes, most high-quality mineral foundations offer natural sun protection. Ingredients like titanium dioxide and zinc oxide act as physical sunscreens, sitting on the skin to reflect harmful UV rays. While the powder usually provides an SPF of 15 or 20, you should still wear a dedicated facial sunscreen underneath your makeup for complete, broad-spectrum protection during long days outdoors.
How Often Should I Wash My Mineral Makeup Brush?
To achieve the best application and maintain healthy skin, you should wash your kabuki brush every one to two weeks. Dense brushes hold onto old makeup, dead skin cells, and facial oils. A dirty brush will apply makeup patchily and can easily trigger acne breakouts. Wash the bristles gently with a mild baby shampoo or specialized brush cleanser, and always let the brush air dry completely by laying it flat on a towel.
Why Does My Mineral Makeup Look Cakey and Heavy?
If your mineral foundation looks heavy or settles into fine lines, you are likely using far too much product. The golden rule of mineral makeup is that less is more. Always start with a very small amount in the lid and buff it completely into the skin before deciding if you need more. Additionally, ensure your moisturizer has fully dried; applying powder over wet skin instantly creates a thick, cakey texture.
Conclusion
Switching to mineral foundation is a fantastic way to enhance your natural beauty while protecting your skin’s long-term health. By preparing your canvas, choosing the right tools, and utilizing the famous swirl, tap, and buff method, you can easily achieve a luminous, airbrushed complexion. Remember that patience and a light hand are your best friends during this process. Now that you know exactly how to apply bare minerals powder, it is time to grab your kabuki brush and practice. Enjoy your beautiful, breathable makeup, and step out with absolute confidence in your glowing skin.
You may read also- How to Wash Out Texture Powder
About the Author
Jane Hubbard is a passionate beauty expert with a wealth of experience in makeup, hair, and overall beauty techniques. After years of working as a hairdresser specialist, she followed her entrepreneurial spirit and started her own consultancy business.
Jane has always been driven by her desire to help others feel confident in their own skin, and she does this by sharing her knowledge, experiences, and practical beauty tips. Through her consultancy, she empowers individuals to embrace their unique beauty, offering tailored guidance that boosts both self-esteem and personal style.
Professional Focus
Specializes in makeup, hairstyling, and beauty consulting.
Provides personalized beauty advice, tips, and techniques to help individuals feel confident in their appearance.
Dedicated to staying up-to-date with the latest industry trends and developments.
Passionate about creating a comfortable and empowering experience for every client.
Education History
University of Craft and Design – Bachelor of Fine Arts (BFA) in Woodworking and Furniture Design
Woodworking Apprenticeships – Extensive hands-on training with skilled craftsmen to refine carpentry and furniture making techniques
Online Courses & Masterclasses – Continued education in advanced woodworking techniques, design principles, and specialized tools
Expertise:
Makeup artistry, hairstyling, and beauty consulting.
Personalized beauty techniques to enhance confidence and self-expression.
Educating clients on how to maintain their beauty routines at home.