
Are you tired of constantly buying new sets of mink lashes because your old ones are clumpy and dirty? Cleaning your mink lashes properly can extend their lifespan and save you money in the long run.
Maintaining the longevity and allure of your mink lashes requires proper cleaning and care. Unlike synthetic lashes, mink lashes are crafted from natural fibers, which means they need a gentler touch and specific cleaning techniques to keep them looking their best. Whether you’re a makeup enthusiast or use mink lashes for special occasions, learning how to clean them effectively will extend their lifespan and ensure they remain hygienic and beautiful.
In the following sections, we will guide you through the step-by-step process of how to clean mink lashes, ensuring they stay in optimal condition for as long as possible.
What Will You Need?
Before we dive into the cleaning process, let’s first gather all the necessary tools and products you will need. The good news is that you already have most of these items at home. Here’s what you’ll need:
- Tweezers
- Bowl or cup
- Oil-free makeup remover
- Cotton swabs
- Gentle soap or baby shampoo
- Towel
Once you have all the items on hand, let’s get started!
10 Easy Steps on How to Clean Mink Lashes
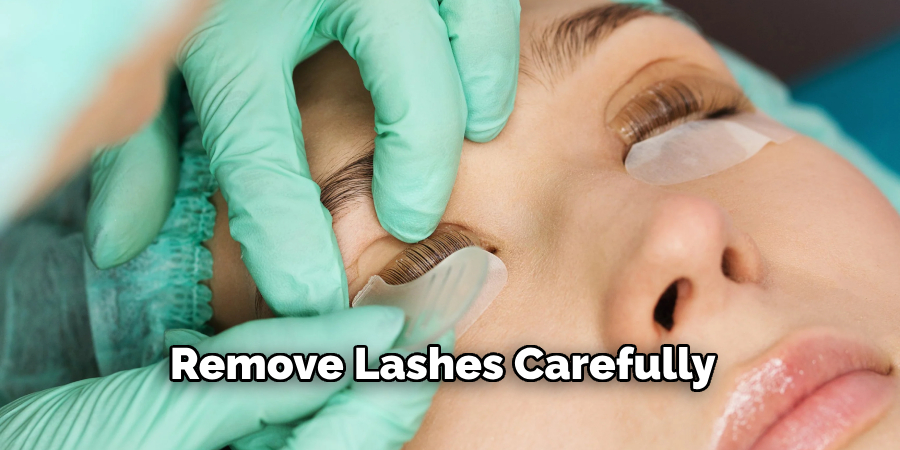
Step 1. Remove the Lashes Carefully:
Begin by washing your hands thoroughly to avoid any transfer of dirt or bacteria onto your mink lashes. Gently grasp the outer edge of the lash band using your fingertips or a pair of tweezers. Slowly and carefully peel the lash band away from your eyelid, starting from the outer corner and moving towards the inner corner. Avoid tugging or pulling too hard, as this can damage both the lashes and your natural lash line. Place each lash strip in a clean and dry designated spot, ready for the cleaning process. By ensuring a gentle removal, you prevent any unnecessary strain or tearing of the delicate mink fibers.
Step 2. Soak the Lashes:
Fill a small bowl or cup with lukewarm water. Add a few drops of gentle soap or baby shampoo to the water, creating a mild cleaning solution. Submerge the mink lashes in the soapy water, allowing them to soak for about five to ten minutes. This soaking process helps to loosen any makeup, glue, or debris that may be stuck to the lashes without being too harsh on the natural fibers. Be careful not to oversaturate the lashes, as too much exposure to water can cause them to lose their curl or shape.
Step 3. Remove Residual Glue:
After soaking, take the lashes out of the water and place them on a clean towel. Using a pair of tweezers, delicately pick off any remaining adhesive residue from the lash band. This step is crucial to ensure that the lashes are clean and ready for the next use. Be patient and gentle during this step to avoid breaking or deforming the lash band.
Step 4. Clean with Oil-Free Makeup Remover:
Dampen a cotton swab with an oil-free makeup remover. Gently swipe the swab along the lash band and fibers to remove any remaining traces of makeup or impurities. Focus on the lash band and avoid rubbing the lashes themselves too vigorously, as this might alter their shape or damage the fibers. Using an oil-free makeup remover is essential, as oils can weaken the lash adhesive and reduce the lifespan of your mink lashes.
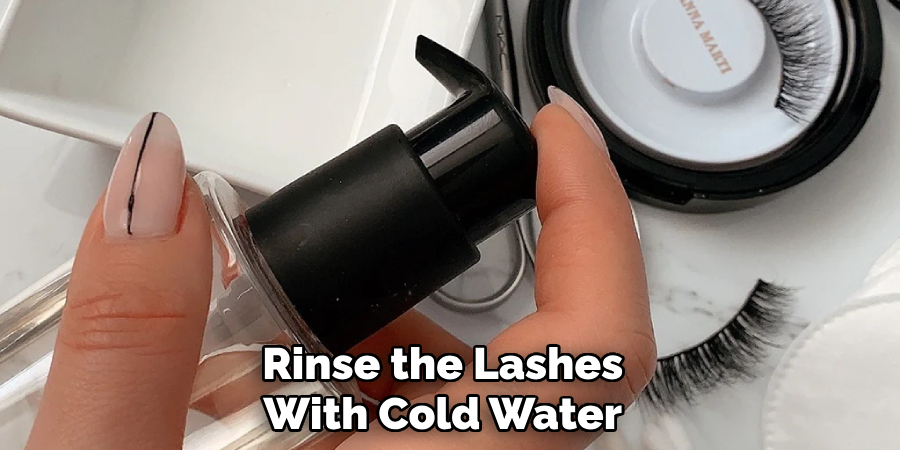
Step 5. Rinse and Dry:
Once all residues have been cleaned off with the makeup remover, rinse the lashes with cold water. Place them on a clean towel and gently pat them dry, avoiding any excessive rubbing or tugging. Use a blotting motion to soak up excess moisture, ensuring the lashes retain their proper shape. Lay them flat on the towel and allow them to air dry completely.
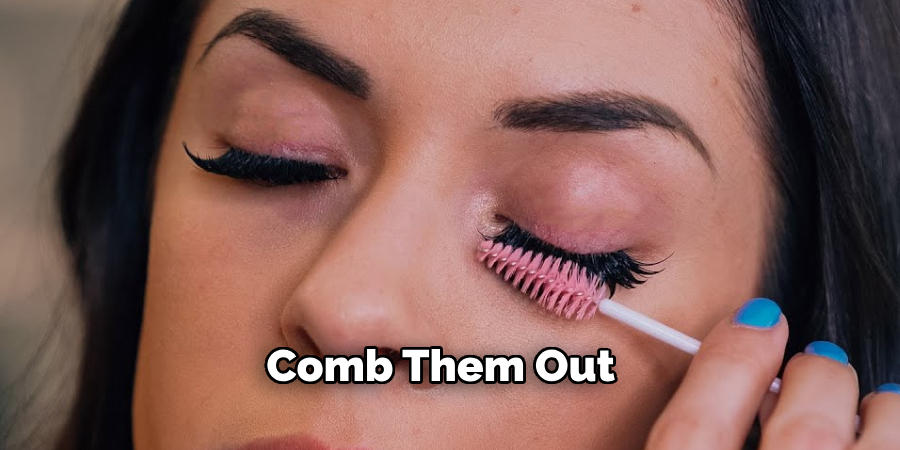
Step 6. Comb and Reshape the Lashes:
After the lashes are dry, take a clean spoolie brush or lash comb and carefully comb through the lashes. This helps to separate any clumped fibers and restore their natural, fluffy appearance. Gently reshape the lash band with your fingers to ensure they maintain the desired curve that fits the natural contour of your eyelid.
Step 7. Store Properly:
Store your mink lashes in tip-top shape in their original packaging or a designated lash case. Proper storage prevents dust accumulation and damage from occurring between uses. Ensure they are stored in a cool, dry place, away from direct sunlight and humidity, which can affect the lashes’ durability and appearance.
Step 8. Avoid Mascara:
One of the advantages of mink lashes is that they are naturally full and lush, eliminating the need for mascara. Applying mascara to your mink lashes can clump the fibers together, making them harder to clean and reducing their lifespan. If you desire extra volume or drama, apply mascara to your natural lashes before putting on them, avoiding any product on them. This ensures that your mink lashes remain in pristine condition and free from buildup that could diminish their quality.
Step 9. Avoid Oil-Based Products:
Keep your mink lashes away from any oil-based products, including cleansers and makeup removers, as these can break down the lash adhesive and cause the fibers to clump together. Stick to oil-free options to prolong the lifespan of your mink lashes. If you use eye creams or other skin care products around your eyes, make sure they are fully absorbed before applying your lashes to prevent any adverse effects.
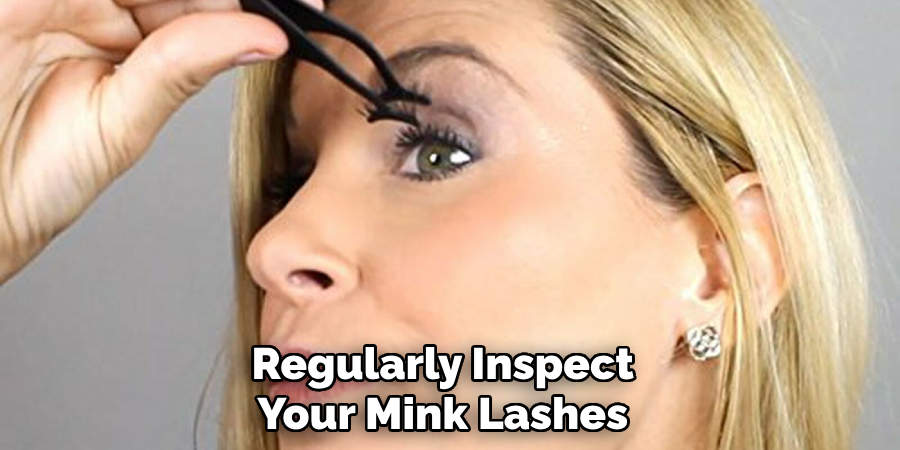
Step 10. Inspect and Revive:
Regularly inspect your mink lashes for any signs of wear and tear. If you notice that the fibers are becoming tangled or losing their shape, consider giving them a gentle steam treatment to revive their form. Hold the lashes over a pot of steaming water for a few seconds, which can help refresh and rejuvenate the natural fibers. Always handle them delicately during this process to avoid damaging the lash band or fibers.
By following these steps, you can ensure that your mink lashes remain in excellent condition, allowing you to enjoy their luxurious look and feel for many uses.
5 Additional Tips and Tricks
- Use a Gentle Cleanser: Opt for a gentle, oil-free makeup remover or a specialized lash cleanser. Oils can break down the fibers of mink lashes, reducing their lifespan.
- Avoid Soaking: Instead of soaking the lashes, lightly dampen a cotton swab or pad with the cleanser and gently wipe off any makeup residue. Soaking can loosen the glue holding the lashes together.
- Comb Them Out: After cleaning, use a clean lash brush or spoolie to comb through the mink lashes gently. This helps maintain their shape and smooths out any tangles.
- Dry Properly: Allow the lashes to air dry naturally on a clean surface. Using a blow dryer or towel can damage delicate hair. It’s best to leave them undisturbed until they’re scorched.
- Check for Loose Hairs: As time goes on, some of the mink lashes may start to loosen or fall out. Check for any loose hairs and gently remove them with tweezers to maintain the fullness of the lashes.
With these additional tips and tricks, you can ensure that your mink lashes stay clean and in top condition for multiple uses.
5 Things You Should Avoid
- Using Harsh Chemicals: Avoid using harsh chemicals or alcohol-based products when cleaning your mink lashes. These substances can break down the lash fibers and irritate your eyes.
- Tugging or Pulling: Do not tug or pull on the lashes while cleaning them. This can deform their shape and lead to hair loss, reducing the longevity of your mink lashes.
- Applying Mascara: Never apply mascara directly onto mink lashes. This can clump the fibers together, making them difficult to clean and potentially damaging the delicate hairs.
- Sleeping with Lashes: Avoid sleeping with your mink lashes still applied. This can lead to potential eye infections, and the lashes are more likely to become damaged or lose their shape.
- Using Waterproof Products: Avoid waterproof makeup or cleansers when wearing mink lashes. These products are generally harder to remove and require more intensive cleaning methods that can harm the lashes.
By steering clear of these common pitfalls, you can help ensure your mink lashes remain in pristine condition for as long as possible.
Conclusion
Properly caring for your mink lashes extends their lifespan and maintains their luxurious appearance. By following our recommended tips and avoiding common mistakes, you ensure that your lashes remain clean, well-shaped, and free from damage. Using gentle cleansers, avoiding harsh chemicals, and being mindful of handling techniques are crucial steps.
Additionally, thorough but delicate cleaning and proper storage will keep your mink lashes looking fresh and beautiful through multiple uses. With a little effort and attention to detail, you can repeatedly enjoy the elegance of mink lashes.
Hopefully, this guide has provided you with the knowledge and techniques on how to clean mink lashes. Now go out and rock those gorgeous, fluttery lashes with confidence!
About the Author
Jane Hubbard is a passionate beauty expert with a wealth of experience in makeup, hair, and overall beauty techniques. After years of working as a hairdresser specialist, she followed her entrepreneurial spirit and started her own consultancy business.
Jane has always been driven by her desire to help others feel confident in their own skin, and she does this by sharing her knowledge, experiences, and practical beauty tips. Through her consultancy, she empowers individuals to embrace their unique beauty, offering tailored guidance that boosts both self-esteem and personal style.
Professional Focus
Specializes in makeup, hairstyling, and beauty consulting.
Provides personalized beauty advice, tips, and techniques to help individuals feel confident in their appearance.
Dedicated to staying up-to-date with the latest industry trends and developments.
Passionate about creating a comfortable and empowering experience for every client.
Education History
University of Craft and Design – Bachelor of Fine Arts (BFA) in Woodworking and Furniture Design
Woodworking Apprenticeships – Extensive hands-on training with skilled craftsmen to refine carpentry and furniture making techniques
Online Courses & Masterclasses – Continued education in advanced woodworking techniques, design principles, and specialized tools
Expertise:
Makeup artistry, hairstyling, and beauty consulting.
Personalized beauty techniques to enhance confidence and self-expression.
Educating clients on how to maintain their beauty routines at home.