
Are you looking for a cute and stylish hairstyle to try on your short hair? Look no further—the perfect choice is bubble braids! Bubble braids not only add volume and texture to your hair, but they also create a fun and playful look.
Creating bubble braids on short hair can seem daunting, but anyone can achieve this trendy and playful hairstyle with the right technique. Bubble braids are a fantastic way to add texture and dimension to your hair, making them perfect for casual or special occasions.
This step-by-step guide will walk you through the process of how to do bubble braids short hair, ensuring you can master the look with ease. Whether you’re a hairstyling novice or a seasoned pro, you’ll find these instructions simple to follow and highly effective.
What Will You Need?
Before diving into the steps, let’s review the essential tools you’ll need to create bubble braids on short hair. These include:
- Hair elastics
- Bobby pins
- Texturizing spray or dry shampoo
- Comb or brush
With these four items, you’ll have everything you need to create perfect bubble braids on your short hair.
10 Easy Steps on How to Do Bubble Braids Short Hair
Step 1: Prepare Your Hair
Start by ensuring your hair is clean and dry. Apply a lightweight texturizing spray or dry shampoo to add some grip and volume if you have freshly washed hair. This will make it easier to create the bubbles and ensure they hold their shape throughout the day. Brush your hair thoroughly to remove tangles and distribute the texturizing product evenly.
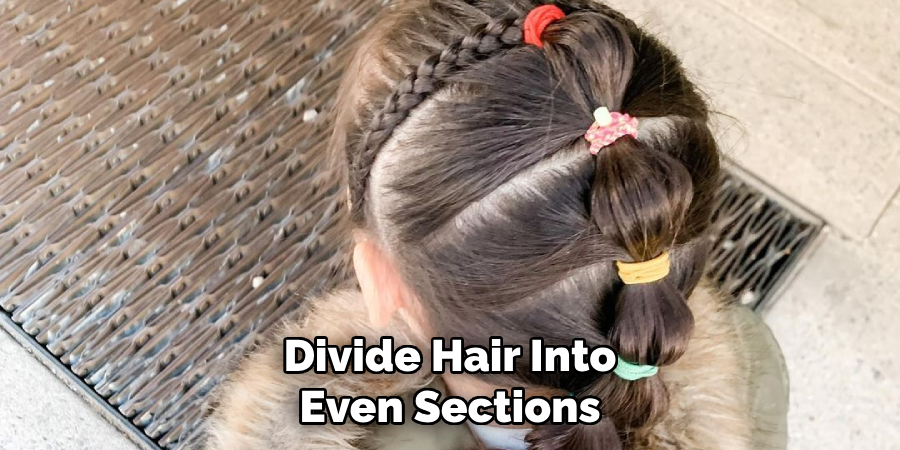
Step 2: Section Your Hair
Divide your hair into sections depending on how many bubble braids you want to create. For a dramatic look, section your hair into three or four equal parts. Use a comb to create clean, straight lines and secure each section with a hair elastic to separate them while working on one braid at a time.
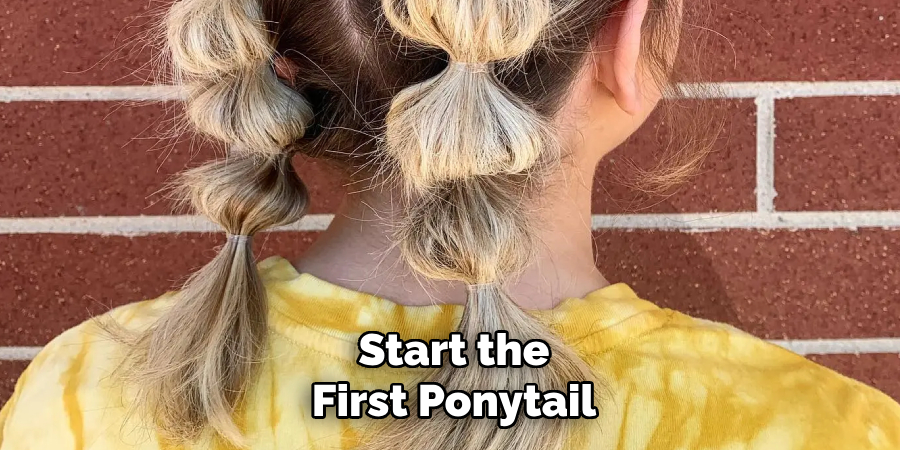
Step 3: Start the First Ponytail
Gather the first section of your hair at the base of your neck or the desired starting point for your braid. Secure this section with a hair elastic, ensuring it’s snug but tight. The aim is to create a firm foundation for your bubble braid without causing any discomfort. Once the ponytail is secure, gently tug at the top to make a bit of volume and lift at the roots, giving your braid a more relaxed and fuller appearance.
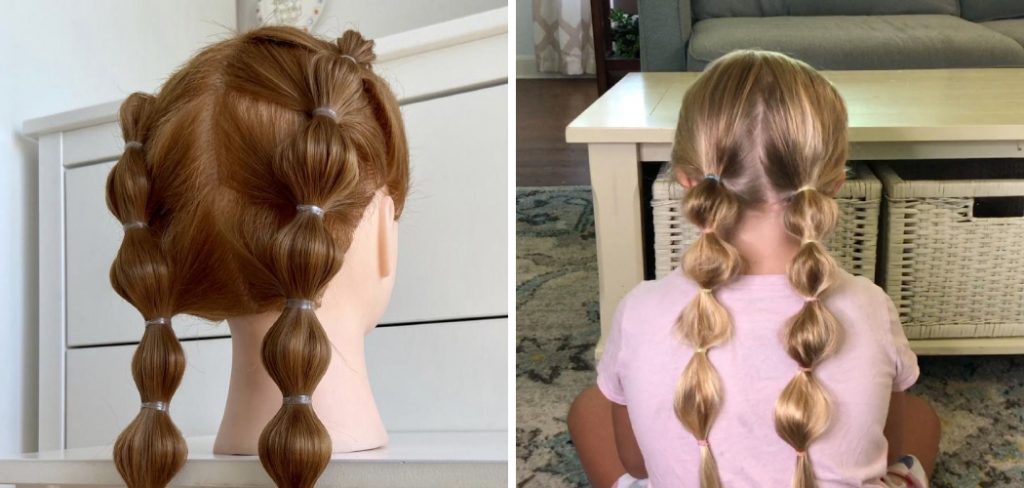
Step 4: Create the First Bubble
Move a couple of inches down from the first hair elastic and tie another hair elastic around the ponytail. To form the bubble, carefully pull on the sides of the hair segment between the two elastics to spread it out and create that signature bubble effect. Ensure the bubble is symmetrical by adjusting both sides evenly. Don’t be afraid to add more texture here; you can use your fingers or a comb to tease the hair inside the bubble, giving it even more volume.
Step 5: Continue Forming Bubbles
Repeat the process of tying another hair elastic a couple of inches below the previous one and pulling on the hair between elastics to form bubbles. Continue this pattern down the ponytail’s length, ensuring each bubble is roughly the same size for a cohesive look. The number of bubbles you create will depend on the length of your hair and personal preference. Shorter hair may have fewer bubbles, but you can still achieve a stunning visual impact with careful spacing and volumizing.
Step 6: Secure the End
Secure the tip with a hair elastic once you’ve reached the end of the first ponytail and formed your final bubble. If your hair is concise, you may only have space for a few bubbles, which is perfectly okay. The key is consistency in bubble size and spacing to maintain the overall aesthetic of the braid.
Step 7: Repeat on the Remaining Sections
Now that you’ve mastered the technique on the first section, repeat the process on the remaining sections of your hair. Take your time to ensure each bubble braid matches the others in size and spacing. This will create a uniform, polished, stylish, and eye-catching look.
Step 8: Tame Flyaways
After you’ve created bubble braids on all sections of your hair, you may notice a few stray hairs or flyaways that need attention. Use bobby pins to secure any loose strands, ensuring they blend seamlessly with the rest of your hair. For a sleeker finish, apply a small amount of lightweight hairspray or a smoothing serum to tame any remaining flyaways. This step will help give your bubble braids a cleaner and more refined appearance, making them suitable for any occasion.
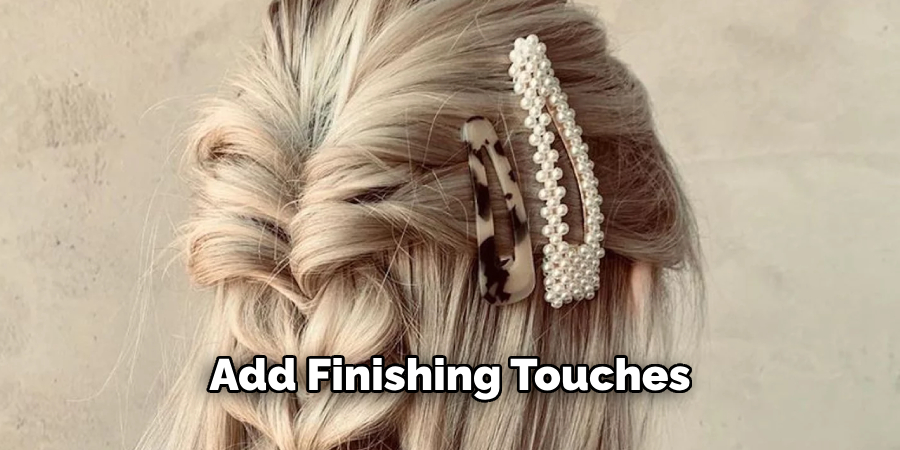
Step 9: Add Finishing Touches
To personalize your bubble braids and add a touch of flair, consider incorporating accessories such as colorful hair ties, decorative bobby pins, or small hair clips. These additions can elevate your hairstyle, making it more unique and stylish. If you’re preparing for a special event, you might even weave in some ribbons or small flowers for an extra touch of elegance and creativity.
Step 10: Final Adjustment and Setting
Once you are satisfied with the overall look of your bubble braids, take a few moments to make any final adjustments. Ensure each bubble is symmetrical and that the braids are evenly spaced. Lightly mist your entire hairstyle with hairspray to set the braids in place and provide lasting hold. If you wish, you can also use a shine spray to add a glossy finish to your bubble braids, giving them a polished look.
You’ve successfully created chic and playful bubble braids on your short hair with these steps. Whether you’re heading out for a casual day with friends or attending a more formal event, this versatile hairstyle ensures you look stylish and put-together.
5 Additional Tips and Tricks
- Prep Your Hair: Start with clean and slightly damp hair. Use a lightweight mousse or texturizing spray to add some grip, making the braids easier to manage.
- Use Small Elastics: Opt for small, clear elastics to create the “bubbles.” They are less noticeable and easily hidden within the braid for a seamless look.
- Section Evenly: Divide your hair into even sections before creating the bubbles. This ensures uniformity and gives your bubble braids a more polished appearance.
- Pancake the Bubbles: Gently pull on the sides of each bubble to fluff them out. This “pancaking” technique adds volume and makes the bubbles stand out more.
- Accessorize: Add small decorative clips or ribbons to each bubble for extra flair. This personalizes the style and helps secure the bubbles in place, especially with shorter hair.
With these extra tips and tricks, you can elevate your bubble braid game and create a unique and eye-catching hairstyle.
5 Things You Should Avoid
- Skipping the Prep Step: Avoid starting with unprepared hair. Dirty or overly silky hair can be challenging and may not hold the braids as effectively. Always prep your hair with the right products before you begin.
- Using Large Elastics: Big, bulky elastics can be hard to conceal and may weigh down the bubbles, ruining the intended look. Stick to small, clear elastics to keep things looking neat and stylish.
- Neglecting Even Sections: Uneven sections can make the final result look messy and unbalanced. Take the time to divide your hair evenly to ensure a polished and uniform appearance.
- Skipping the Pancaking: Not pulling on the bubbles to fluff them out can result in a flat and lackluster look. Pancaking adds the necessary volume and texture, making the braids more dynamic and eye-catching.
- Overloading on Accessories: While accessorizing can enhance your bubble braids, going overboard can make the hairstyle look cluttered. Choose a few tasteful accessories to maintain a balanced and sophisticated appearance.
Avoiding these common mistakes will help you achieve a flawless bubble braid style for your short hair, making the process smoother and the result more stunning.
Is It Ok to Braid Thin Hair?
Yes, it is okay to braid thin hair. However, there are a few things to keep in mind when braiding thinner hair:
- Use Smaller Sections: When braiding thin hair, it’s important to use smaller sections of hair to avoid creating bulky and heavy-looking braids.
- Be Gentle: Thin hair is more delicate and prone to breakage, so be gentle when handling the hair during the braiding process.
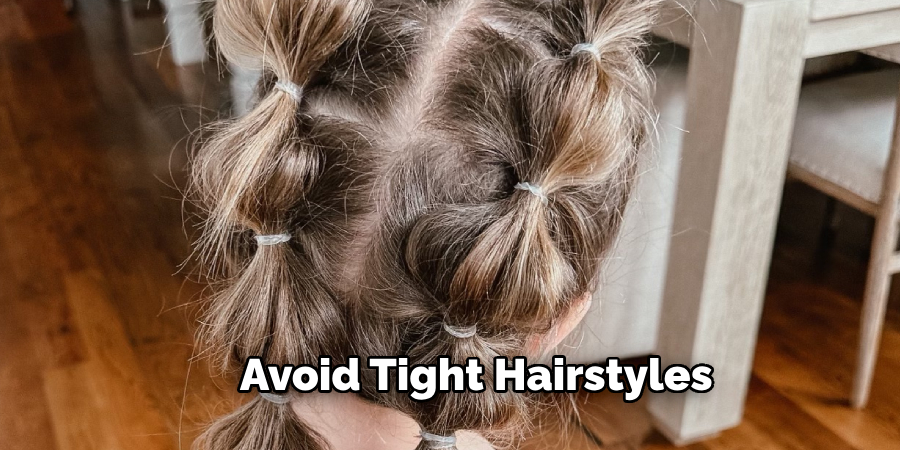
- Avoid Tight Hairstyles: Tight braids or updos can cause strain on thin hair and potentially lead to damage or discomfort. Instead, opt for looser styles that are easier on the hair.
- Use Gentle Products: Choose lightweight and gentle hair products, such as a leave-in conditioner or a texturizing spray, to avoid weighing down thin hair.
Overall, braiding thin hair is fine as long as you take the necessary precautions and listen to your hair’s needs. It may also be helpful to consult with a hairstylist for tips on how to braid thin hair properly.
Conclusion
How to do bubble braids short hair may seem challenging at first, but with the right techniques and tools, it is entirely achievable.
Starting with well-prepped hair and using small, clear elastics ensures a neat and seamless look. By sectioning the hair evenly and employing the pancaking technique, you can add volume and definition to the bubbles, making them pop. Personalizing your style with tasteful accessories can further enhance the overall appearance. Avoid common pitfalls such as using large elastics or neglecting hair prep to achieve the best results.
With patience and practice, you can master bubble braids on short hair and enjoy a versatile and trendy hairstyle.
You can also check it out to Use Clarins Double Serum
About the Author
Jane Hubbard is a passionate beauty expert with a wealth of experience in makeup, hair, and overall beauty techniques. After years of working as a hairdresser specialist, she followed her entrepreneurial spirit and started her own consultancy business.
Jane has always been driven by her desire to help others feel confident in their own skin, and she does this by sharing her knowledge, experiences, and practical beauty tips. Through her consultancy, she empowers individuals to embrace their unique beauty, offering tailored guidance that boosts both self-esteem and personal style.
Professional Focus
Specializes in makeup, hairstyling, and beauty consulting.
Provides personalized beauty advice, tips, and techniques to help individuals feel confident in their appearance.
Dedicated to staying up-to-date with the latest industry trends and developments.
Passionate about creating a comfortable and empowering experience for every client.
Education History
University of Craft and Design – Bachelor of Fine Arts (BFA) in Woodworking and Furniture Design
Woodworking Apprenticeships – Extensive hands-on training with skilled craftsmen to refine carpentry and furniture making techniques
Online Courses & Masterclasses – Continued education in advanced woodworking techniques, design principles, and specialized tools
Expertise:
Makeup artistry, hairstyling, and beauty consulting.
Personalized beauty techniques to enhance confidence and self-expression.
Educating clients on how to maintain their beauty routines at home.