
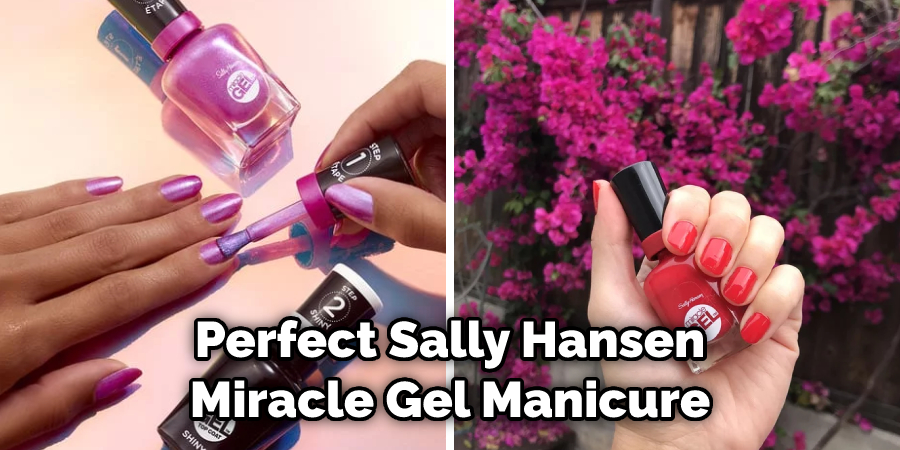
Are you tired of your nails chipping hours after applying a Sally Hansen Miracle Gel manicure? You don’t have to worry anymore! With proper drying techniques, you can ensure that your nails are chip-free and look beautiful for up to two weeks.
Sally Hansen miracle gel is a two-step process that needs proper drying to set your nails and prevent chipping. And the good news is that it’s easy to do! Here are the steps for how to dry Sally Hansen Miracle Gel.

In this blog post, we’ll show you how to get the most out of your miracle gel mani by providing helpful tips and tricks on properly drying your delicious color. With our simple steps, you will be able to enjoy long lasting manicures and learn how to extend your life even further with available optional coatings.
What Will You Need?
Before you start, you’ll need to gather the necessary supplies:
- Sally Hansen Miracle Gel polish
- Topcoat
- Nail dryer
Once you have all the necessary items for application, you can begin drying your Sally Hansen Miracle Gel.
10 Easy Steps on How to Dry Sally Hansen Miracle Gel
Step 1: Apply the Color:
Start by applying the Sally Hansen Miracle Gel color. Make sure to shake the bottle before use and apply two coats for the best results. You can also use an optional base coat if desired.
Step 2: Let It Dry:
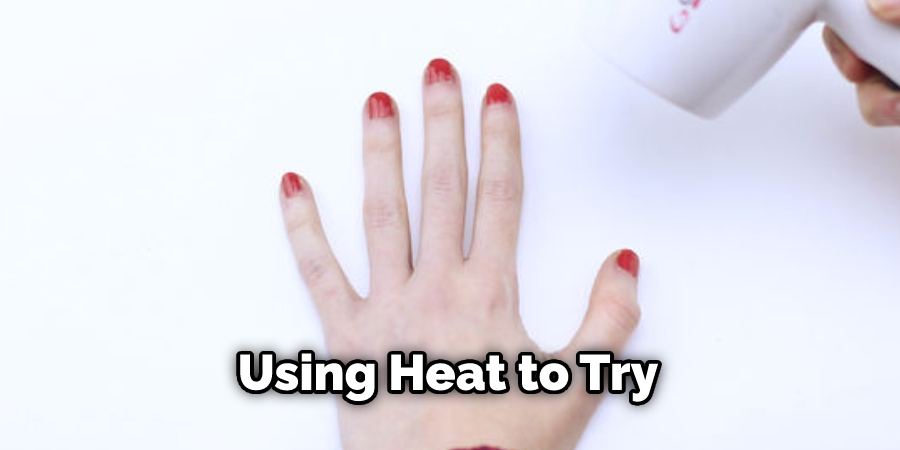
Allow the color to dry for 10 minutes before proceeding to the next step. Use a fan to speed up the drying process. Don’t use a hairdryer, as this will damage the nail color.
Step 3: Apply Top Coat:
Once your Sally Hansen Miracle Gel is dry, apply the top coat. This will seal in your color and also make it last longer. Additionally, it will also add a glossy finish and make your manicure look even better. Allow the top coat to dry for 10 minutes. Again, you can use a fan or air conditioner to speed up the process.
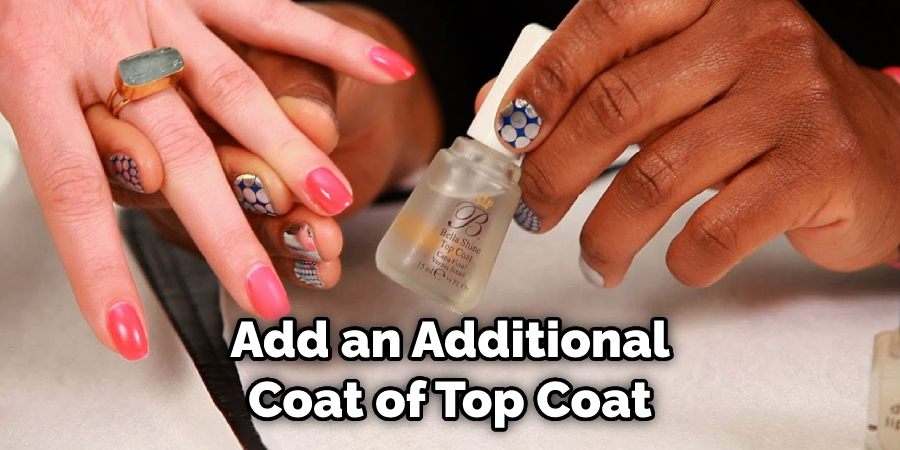
Step 4: Add Optional Coatings:
If desired, you can add an additional coat of top coat or color after the first layer has dried. This will further extend the life of your manicure. If you’re using color, make sure to let it dry completely before applying the top coat.
Step 5: Use a Nail Dryer:
Place your nails under a nail dryer for up to four minutes. This will help to cure the manicure and make it last longer. If you don’t have a nail dryer, you can use an alternate drying method, such as submerging your hands in cold water for a few minutes.
Step 6: Remove Excess Polish:
If there is any excess polish on the sides of your nails, gently remove it with a cotton swab. This will help to make your manicure look neat and clean. As an alternative, you can also use a nail brush to remove the excess polish.
Step 7: Apply Cuticle Oil:
To keep your cuticles looking healthy, apply some cuticle oil after the drying process is over. This will help to hydrate and prevent damage from occurring. You can use a cotton swab to apply the oil.
Step 8: Apply Nail Finishing Spray:
Finish off your manicure with a nail finishing spray. This will give your nails extra protection and make them look even better. When applying the spray, hold the bottle at least 10 inches away from your nails.
Step 9: Re-apply Top Coat Every Few Days:
To ensure your manicure lasts as long as possible, re-apply the top coat every few days. This will help to keep your nails looking fresh and chip-proof! Don’t forget to apply cuticle oil and finish off with a nail finishing spray. As an added bonus, you can also add a little glitter or nail art if desired.
Step 10: Enjoy Your Manicure:
You’re all done! Now it’s time to enjoy your perfect Sally Hansen Miracle Gel manicure. With the right preparation and drying steps, your nails will look amazing for days to come! Remember to re-apply the top coat every few days for maximum wear time.
You can get the most out of your Sally Hansen Miracle Gel manicure by following these simple steps. Not only will it last longer, but it will also look better for days to come. So make sure to take care of your nails, and never forget the top coat!
5 Additional Tips and Tricks
1. To speed up drying time after applying Sally Hansen Miracle Gel, use a hair dryer in its cool setting. Direct the air over your nails while they are still wet. This will help the gel dry more quickly and reduce any smearing or streaking.
2. Place your hands in front of a fan or oscillating fan to help speed up drying time for Sally Hansen Miracle Gel. The air movement from the fan can disperse any excess moisture, so you don’t have to worry about streaky nails when the product dries.
3. To further protect your manicure, try applying a top coat after drying your Sally Hansen Miracle Gel. A good quality top coat will add an extra layer of protection and shine to your manicure, lasting even longer than the gel itself.
4. Never use heat on your nails while trying to dry Sally Hansen Miracle Gel, as too much heat can damage the polish and cause it to melt.
5. When drying Sally Hansen Miracle Gel, make sure that you keep your hands away from any areas with water or steam, as this can lead to smearing or streaking of the product. It’s best to avoid these areas altogether until the polish is completely dry.
By following these simple tips and tricks, you can help ensure that your Sally Hansen Miracle Gel manicure lasts longer and looks better! Try it out today and see the difference for yourself! With a little extra effort, you’ll have perfectly dried nails in no time!
5 Things You Should Avoid
1. Do not over apply Sally Hansen Miracle Gel. Too much gel will take longer to dry and can leave behind a streaky, uneven finish.
2. Avoid using any polish remover or acetone to remove the Sally Hansen Miracle Gel, as this can damage the product and strip away its color and shine.
3. Don’t expose your nails to water or steam while drying Sally Hansen Miracle Gel; this could lead to smearing and streaking on your manicure.
4. Never put your hands in direct sunlight while drying Sally Hansen Miracle Gel, as too much heat can cause the product to become brittle and chip off easily.
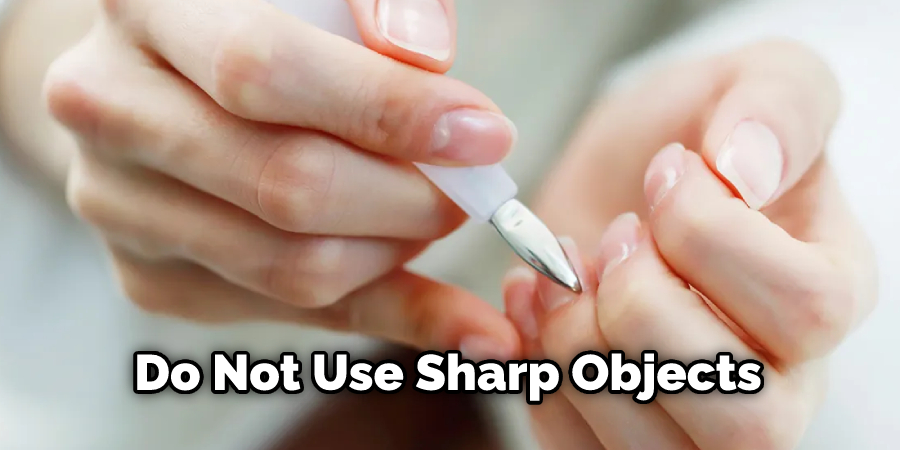
5. Do not use sharp objects such as tweezers or scissors when removing your Sally Hansen Miracle Gel manicure. Doing so can damage your nails and make them more prone to breaking and splitting. Use an acetone-free remover or soak your fingers in warm water for a few minutes before gently peeling off the product.
By avoiding these five things, you can help ensure that your Sally Hansen Miracle Gel manicure looks flawless every time! Try it out today and see the difference yourself! With a little extra effort and care, you’ll be able to create beautiful manicures with lasting results.
Why is Your Sally Hansen Gel Not Drying?
If your Sally Hansen Miracle Gel is not drying, there could be a few reasons why. For example, it may be because you applied too much gel or did not allow enough time for the product to dry on its own. Additionally, using heat to try and speed up the process can damage the product and make it less likely to stay in place.
Another reason why your Sally Hansen Miracle Gel may not be drying is that there is too much air humidity in the environment. This can prevent the product from completely drying out, leaving you with streaky nails or smudging.
Be sure to follow all of the tips and tricks listed above when applying and drying your Sally Hansen Miracle Gel manicure so that you get the best results every time! With a little extra effort, you’ll have beautifully dried nails each and every time!
Conclusion
All in all, the Sally Hansen Miracle Gel is a great way to get salon quality results at home. You will be sure to appreciate the long-lasting finish and vibrant color that this nail polish provides. Remember, letting it air dry on your nails for 5-10 minutes will ensure maximal results. You also need to ensure sufficient curing time with an LED/UV lamp before you can use your hands again.
Be sure to apply two coats per nail, and you’ll be ready to show off your perfect pedicure or manicure! With careful preparation and attention to detail, you should have no trouble achieving salon-like results with the Sally Hansen Miracle Gel at home.
Hopefully, the article on how to dry Sally Hansen Miracle Gel has been helpful! Good luck with your next manicure or pedicure, and have fun! Happy Drying! 🙂
About the Author
Jane Hubbard is a passionate beauty expert with a wealth of experience in makeup, hair, and overall beauty techniques. After years of working as a hairdresser specialist, she followed her entrepreneurial spirit and started her own consultancy business.
Jane has always been driven by her desire to help others feel confident in their own skin, and she does this by sharing her knowledge, experiences, and practical beauty tips. Through her consultancy, she empowers individuals to embrace their unique beauty, offering tailored guidance that boosts both self-esteem and personal style.
Professional Focus
Specializes in makeup, hairstyling, and beauty consulting.
Provides personalized beauty advice, tips, and techniques to help individuals feel confident in their appearance.
Dedicated to staying up-to-date with the latest industry trends and developments.
Passionate about creating a comfortable and empowering experience for every client.
Education History
University of Craft and Design – Bachelor of Fine Arts (BFA) in Woodworking and Furniture Design
Woodworking Apprenticeships – Extensive hands-on training with skilled craftsmen to refine carpentry and furniture making techniques
Online Courses & Masterclasses – Continued education in advanced woodworking techniques, design principles, and specialized tools
Expertise:
Makeup artistry, hairstyling, and beauty consulting.
Personalized beauty techniques to enhance confidence and self-expression.
Educating clients on how to maintain their beauty routines at home.