
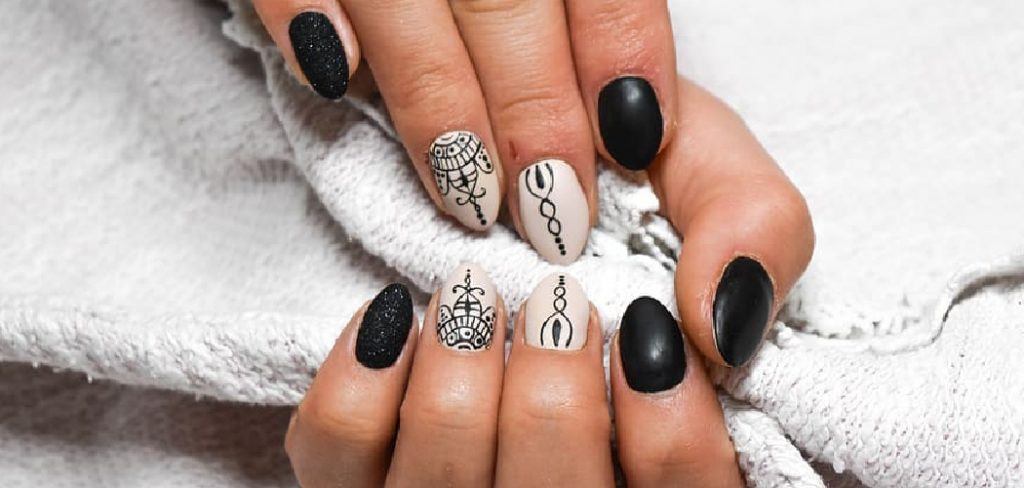
Are you tired of having to fix your gel nails constantly? Whether it’s from everyday wear and tear or a clumsy accident, chipped gel nail polish can be frustrating. But don’t worry, how to fix gel nail chip is actually quite simple and can save you time and money from going to the salon for a touch-up.
Gel nails are popular for those looking to have long-lasting and glossy nails. However, even the toughest gel manicure can sometimes chip, leaving an unsightly mark on your otherwise perfect nails. Whether dealing with a minor imperfection or a more prominent chip, fixing it doesn’t necessarily require a trip to the nail salon.
With the right tools and patience, you can easily repair your gel nail at home and restore its flawless finish.
What Will You Need?
Before you get started, make sure you have the following items on hand:
- Nail polish remover
- Lint-free wipes or cotton pads
- A nail file or buffer
- Clear base coat
- Gel polish in the same color as your chipped nail
- Gel top coat
Once you have these items, you’re ready to fix your gel nail chip!
10 Easy Steps on How to Fix Gel Nail Chip
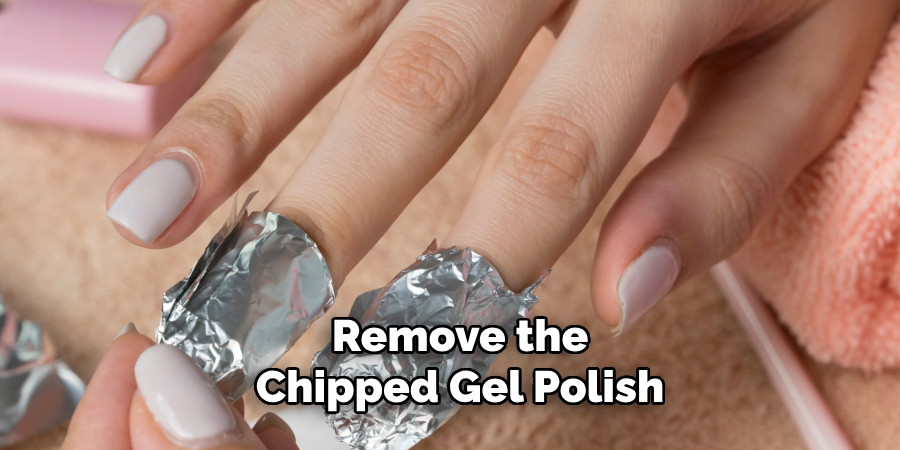
Step 1: Remove the Chipped Gel Polish
Remove the chipped gel polish from your nail to begin the repair process. Use a small amount of nail polish remover on a lint-free wipe or cotton pad and gently rub it over the chipped area. Be careful not to remove the surrounding polish if it is still intact, as you want to limit the area you’re working on to just the chip itself. Once the damaged polish is removed, use a nail file or buffer to gently smooth the chip’s edges. This step is crucial for creating a smooth surface to which the new gel polish can adhere and will help prevent further chipping.
Step 2: Clean the Nail
Before you apply any new polish, it’s essential to ensure that your nail is completely clean and free of any oils, dust, or residual polish. Take a lint-free wipe or cotton pad soaked in nail polish remover and gently swipe it over the entire nail surface, paying particular attention to the chipped area you just filed. This step removes any remaining debris but also helps to dehydrate the nail, creating a better bond for the new gel polish. Make sure to allow the nail to dry thoroughly before moving on to the next step. A clean, dry nail is crucial for achieving a smooth, long-lasting finish.
Step 3: Apply the Clear Base Coat
Now that your nail is clean and dry, it’s time to begin the application process. Start by applying a thin layer of clear base coat to the entire nail, including the chipped area. This base coat acts as a primer, promoting better adhesion of the gel polish and providing a smooth surface. Be sure to apply the base coat evenly, without adding too much product, to avoid any pooling or unevenness. Once applied, cure the base coat under a UV or LED lamp according to the manufacturer’s instructions. Depending on your lamp and base coat formula, this typically takes around 30 seconds to a minute.
Step 4: Apply Gel Polish
After curing the base coat, it’s time to apply the gel polish. Using the same color as your original manicure, apply a thin and even layer of gel polish over the entire nail, focusing mainly on the chipped area. Make sure to cover the whole surface smoothly and blend the chip’s edges to create a seamless finish. Once you’re satisfied with the application, cure the gel polish under the UV or LED lamp according to the gel polish manufacturer’s instructions, typically about 30 seconds to one minute. If the chip is still visible through the first coat, you may need to apply a second thin layer and cure it again to achieve full coverage.
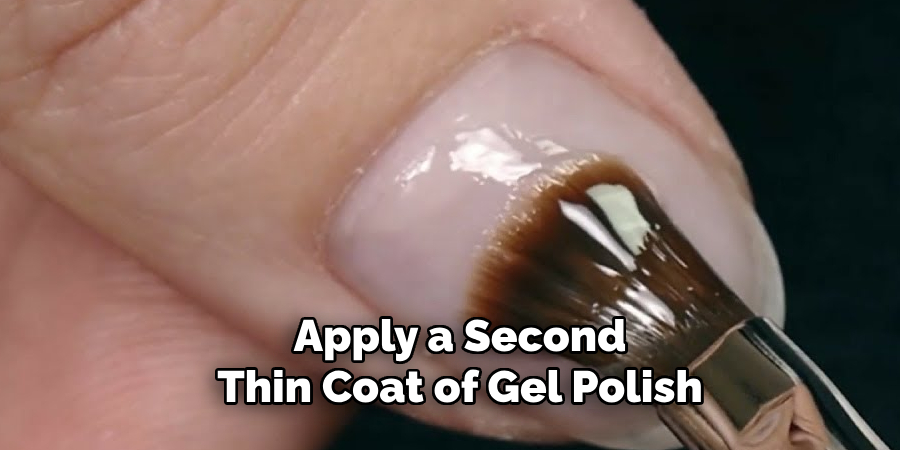
Step 5: Apply a Second Coat of Gel Polish
If necessary, apply a second thin coat of gel polish to ensure the chip is fully covered and blends seamlessly with the rest of the nail. Be sure to use the polish evenly and avoid adding too much at once, which can lead to a lumpy finish. Once the second coat is applied, cure it under the UV or LED lamp for the time specified by the gel polish manufacturer, usually around 30 seconds to one minute.
Step 6: Apply the Gel Top Coat
Once you’re satisfied with the coverage of the gel polish, it’s time to seal your work with a clear gel top coat. Apply a thin, even layer of the gel top coat over the entire nail, including the previously chipped area. This top coat will add a durable, glossy finish and help protect your nail from future chips. Cure the top coat under the UV or LED lamp according to the manufacturer’s instructions.
Step 7: Wipe Off the Sticky Layer
After curing the top coat, your nail will likely have a sticky residue known as the inhibition layer. Take a lint-free wipe or cotton pad soaked in nail polish remover or rubbing alcohol and gently wipe off the sticky layer from the nail. This step will reveal your repaired gel nail’s smooth and shiny finish.
Step 8: Moisturize Your Cuticles
The nail repair process can dry out the skin around your nails, so it’s important to rehydrate your cuticles once you’re finished. Apply a drop of cuticle oil to each nail and gently massage it into the skin. This will help condition and nourish your cuticles, keeping them healthy and soft.
Step 9: Check for Any Imperfections
Look closely at your nail to ensure the chip is completely covered and the finish is smooth. If you notice any imperfections, you can lightly buff the nail and reapply a thin layer of top coat, curing it once more. This added step ensures a flawless finish.
Step 10: Enjoy Your Perfect Gel Manicure
Congratulations, you’ve successfully repaired your chipped gel nail! With your nails now looking as good as new, you can enjoy your polished, glossy finish without needing an extra salon trip. Remember to take care of your nails to prevent future chips and maintain their flawless appearance.
By following these easy steps, you can effortlessly fix a chipped gel nail and keep your manicure looking flawless for longer.

5 Additional Tips and Tricks
- Use a Fine-Tipped Brush for Precision: A fine-tipped brush can offer greater control and precision when applying gel polish to a chipped area. This tool allows you to target only the chipped part without affecting the surrounding polish, ensuring a seamless repair.
- Keep Your Nails Hydrated: Dry nails are more prone to chipping. Regularly applying cuticle oil and hand cream can help keep your nails and the surrounding skin hydrated, reducing the likelihood of chips occurring in the first place.
- Consider a Bonding Agent: Using a bonding agent designed for gel nails before applying the base coat can enhance adhesion for stubborn chips that recur frequently. This extra step can significantly improve the durability of your manicure.
- File the Edges Gently: Overzealous filing can weaken the nail and make it more prone to further damage. Always file in one direction and use a gentle touch to smooth out the chipped edges without compromising the nail’s integrity.
- Avoid Using Your Nails as Tools: One of the main reasons gel nails chip is that they are used as tools for opening packages or scratching surfaces. Be mindful and use the proper tools for such tasks to preserve the longevity of your gel manicure.
With these additional tips and tricks, you can not only fix a chipped gel nail but also prevent it from occurring in the first place.

5 Things You Should Avoid
- Skipping the Base Coat: Always apply a base coat before the gel polish. Skipping this step can lead to poor polish adhesion, making it more susceptible to chipping and peeling.
- Applying Thick Layers of Gel Polish: Thick layers of gel polish may appear uneven and are more likely to peel or chip. Always apply thin, even coats and cure each layer properly under a UV or LED lamp for the best results.
- Ignoring the Importance of Proper Curing: Inadequate curing can result in a sticky or weak gel polish that doesn’t last. Always follow the manufacturer’s instructions for curing times and ensure your UV or LED lamp functions correctly.
- Over-Buffing the Nail Surface: Buffing the nail too much can thin the nail plate, making it more prone to damage and causing the gel polish to lift. Use a gentle touch and avoid excessive buffing to maintain the nail’s integrity.
- Skipping Cuticle Care: Neglecting your cuticles can lead to lifting and chipping of the gel polish. Always push back your cuticles and remove any excess skin before applying the gel polish to ensure a smooth and enduring finish.
Avoiding these common mistakes can ensure a longer-lasting and more durable gel manicure.
Conclusion
In conclusion, how to fix gel nail chip is a straightforward process that can be accomplished at home with the right tools and techniques. By following the step-by-step guide outlined, you can restore your nail’s flawless appearance and extend the life of your manicure.
Remember to pay attention to every step, from proper nail preparation to precise application and curing of gel polish. Incorporating additional tips, such as using a fine-tipped brush for precision and keeping your nails hydrated, can further enhance the durability of your manicure. Lastly, avoiding common mistakes can ensure your nails remain chip-free and beautiful for more extended periods.
With these pointers, you can confidently manage any gel nail chips and continue to enjoy your elegant, long-lasting manicure.
About the Author
Jane Hubbard is a passionate beauty expert with a wealth of experience in makeup, hair, and overall beauty techniques. After years of working as a hairdresser specialist, she followed her entrepreneurial spirit and started her own consultancy business.
Jane has always been driven by her desire to help others feel confident in their own skin, and she does this by sharing her knowledge, experiences, and practical beauty tips. Through her consultancy, she empowers individuals to embrace their unique beauty, offering tailored guidance that boosts both self-esteem and personal style.
Professional Focus
Specializes in makeup, hairstyling, and beauty consulting.
Provides personalized beauty advice, tips, and techniques to help individuals feel confident in their appearance.
Dedicated to staying up-to-date with the latest industry trends and developments.
Passionate about creating a comfortable and empowering experience for every client.
Education History
University of Craft and Design – Bachelor of Fine Arts (BFA) in Woodworking and Furniture Design
Woodworking Apprenticeships – Extensive hands-on training with skilled craftsmen to refine carpentry and furniture making techniques
Online Courses & Masterclasses – Continued education in advanced woodworking techniques, design principles, and specialized tools
Expertise:
Makeup artistry, hairstyling, and beauty consulting.
Personalized beauty techniques to enhance confidence and self-expression.
Educating clients on how to maintain their beauty routines at home.