

Makeup pilling happens when your skincare and makeup don’t bind together properly, leaving flaky, ball-like bits across your skin. The fix usually comes down to three things: adjusting how you layer products, giving each one time to settle, and making sure your formulas actually get along. The seven steps below show you how.
Few beauty problems feel as defeating as pilling. You spend a good ten minutes building your base, and then—out of nowhere—your foundation starts rolling into tiny clumps that drag across your cheeks. The finish is ruined. Your pores look worse than when you started. And you’re left wondering whether to wipe it all off and begin again.

Here’s the encouraging part. Pilling is almost always preventable, and when it does show up, it’s fixable. Maybe your serum is quietly arguing with your primer. Maybe your foundation just won’t sit on top of your moisturizer. Whatever the cause, a few practical changes can get you back to a smooth base that holds up through the day. In this guide on how to fix pilling makeup, we’ll cover some common causes and their solutions.
Tools and Materials You’ll Need
Before you start, pull together a few essentials:
- Gentle facial cleanser – to prep your skin properly
- Lightweight, fast-absorbing moisturizer – silicone-free formulas tend to behave best
- Makeup sponge or damp beauty blender – for seamless blending
- Primer (optional, but worth having) – ideally one that matches your foundation’s base
- Setting spray – helps the layers melt into each other
- Makeup remover or micellar water – for fixing slip-ups
- Clean brushes or applicators – grimy tools make pilling worse than you’d think
7 Simple Step-By-Step Guidelines on How to Fix Pilling Makeup
Step 1: Start With a Clean, Well-Prepped Face
It all begins with clean skin. Wash your face with a gentle cleanser to lift away oil, grime, and yesterday’s leftover product. When residue lingers, it creates an uneven surface, and makeup tends to bunch up on that surface almost the moment it touches down.

Then dry your face completely. This part gets skipped constantly. Applying anything to damp skin may be one of the sneakiest causes of pilling out there—the trapped moisture stops products from absorbing and throws off the way each layer bonds to the next.
Step 2: Apply Skincare Products in the Right Order
Layering things in the wrong sequence is a frequent offender. As a rule, work from thinnest to thickest: serums first, moisturizer next, then SPF if it’s a separate step.
And give each layer a minute or two to actually sink in before piling on the next. This is where most routines fall apart. If a product hasn’t dried, it just blends into whatever comes after it and starts forming those little clumps long before your makeup enters the picture.
Step 3: Choose Compatible Formulas
Not every product is built to share space on your face. A common reason for pilling is mixing silicone-based formulas with water-based ones. The two don’t mesh—they essentially push against each other, and the result is a patchy, textured film.
So read the labels on your moisturizer, primer, and foundation. Where you can, keep the same base throughout, whether that’s water or silicone. If pilling keeps coming back, swapping in a lighter, non-comedogenic moisturizer could make a real difference.
Step 4: Use Less Product Than You Think You Need
More coverage doesn’t come from more product. Thick layers of moisturizer, primer, or foundation leave each one with less room to absorb, so the excess simply rolls up and off.
A pea-sized blob of moisturizer is plenty. Same idea with foundation—thin and even, built up slowly if you want more. This one tweak alone has rescued people who’d been battling pilling for years without realizing the problem was just volume.

Step 5: Blend With a Damp Beauty Sponge
The applicator matters more than people give it credit for. A dry brush tends to drag foundation across the skin, nudging the layers underneath out of place and setting off pilling in the process.
A damp sponge works differently. It presses and bounces product into the skin rather than smearing it. Wet the sponge, squeeze out the extra water, and pat your foundation on with gentle pressing motions. That bouncing action binds the layers together far better than dragging ever could.
Step 6: Set Your Makeup With a Finishing Spray
Once your base is down, a setting spray acts like glue between the layers. It softens everything into one cohesive film, which cuts down the odds of pilling as the hours pass.
Hold the bottle roughly 8 to 10 inches from your face and apply a light, even mist. Resist the urge to rub it in—just let it dry on its own. A good setting spray stretches the wear of your makeup too, and tends to leave a more skin-like finish instead of that flat, cakey look.
Step 7: Touch Up Strategically Throughout the Day
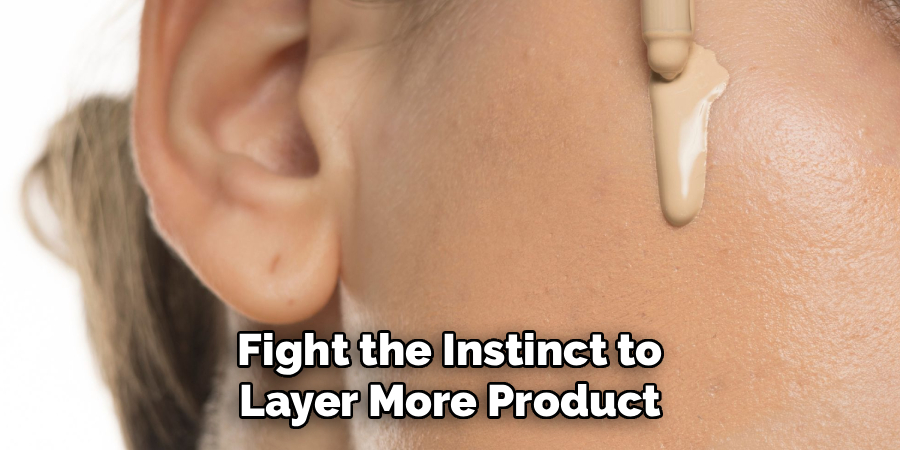
If pilling shows up midday, fight the instinct to layer more product on top. That only digs the hole deeper. Instead, dab the patchy spot with a damp sponge to smooth it, then press a small amount of setting powder over it to lock things back down.
Keep a travel-size setting spray or facial mist in your bag. A quick mist can wake up tired makeup and help reconnect any layers that have started drifting apart, so you get a fresh look without scrubbing everything off.
Following these steps on how to fix pilling makeup can save you from having to start your makeup routine all over again.
Common Mistakes to Avoid
- Skipping wait time between layers — far and away the most frequent cause of pilling
- Using too many heavy products — a dense serum under a dense moisturizer creates more bulk than your skin can handle
- Applying makeup right after sunscreen — SPF needs a little extra time to settle.
- Using old or dirty applicators — dried-on product disrupts a smooth application
- Mixing incompatible formulas — check whether your products share the same base.
Do You Need to Use Professionals?
For most people, sorting out pilling is a do-it-yourself affair. No appointment necessary. That said, a couple of situations may genuinely warrant outside help.
If you live with eczema, rosacea, or stubbornly dry skin, a dermatologist can map out a routine that gives makeup a steadier surface to sit on. The pilling here might be a clue pointing to something happening with the skin itself, rather than a simple product mismatch.
A professional makeup artist can also earn their fee for a big event. They know which products tend to cooperate and which don’t, and they’ll diagnose your routine far quicker than you’d manage through guesswork alone. Plenty of artists offer one-on-one sessions, too, which can help you build something that fits your particular skin over the long haul.
How Much Will It Cost?
Fixing pilling needn’t drain your wallet. If the root cause is technique—rushing, overapplying—the repair costs you nothing beyond a bit of patience.
If you do need to replace a clashing product, drugstore options hold their own here. e.l.f. Primers and CeraVe moisturizers work well and usually land between $10 and $20. Mid-range picks from Neutrogena or NYX play nicely with other products and sit in roughly the same bracket.
A decent beauty blender runs around $10 to $25, and it can noticeably change how your makeup settles. Setting sprays fall somewhere between $10 and $30, depending on the label.
Booking a professional for tailored advice is the pricier route. Expect to pay anywhere from $50 to $150 for a consultation or tutorial, though that swings with your location and how seasoned the artist is.
Frequently Asked Questions
Why Does My Makeup Keep Pilling Even After I Wait for Products to Dry?
If you’re giving products time to dry and still seeing pilling, the culprit is probably formula incompatibility rather than timing. Look at whether your moisturizer and foundation share a base—silicone and water-based products simply don’t stack well. Moving to a single-base routine often clears up the kind of pilling that ignores every other fix.
Can Pilling Makeup Be Fixed Without Starting Over?
Usually, yes. Press and smooth the affected patch with a damp beauty sponge, then set it lightly with translucent powder or a spritz of setting spray. Steer clear of rubbing, which only roughens the texture further. This approach works best on minor pilling and can spare you a full redo.
Is Pilling More Common With Certain Skin Types?
It does seem to crop up more on dry and combination skin. Dry skin can carry a flaky texture that unsettles how products lie, while combination skin has oilier zones that break makeup down faster. A hydrating but lightweight moisturizer—paired with avoiding heavy, occlusive products beforehand—can cut down pilling noticeably for either type.

Smooth Skin Starts With the Right Routine
Pilling is annoying, but it rarely sticks around for good. Most cases trace back to a handful of fixable habits: waiting between layers, picking formulas that get along, and easing off the amount you apply. Change one step at a time rather than tearing your whole routine apart, and you’ll spot the real offender much faster.
Once your routine clicks into place, a smooth, long-wearing base stops feeling like luck. The right tools, products that cooperate, and a bit of patience will carry you toward a finish that actually stays where you put it. Thanks for reading this guide on how to fix pilling makeup.

About the Author
Jane Hubbard is a passionate beauty expert with a wealth of experience in makeup, hair, and overall beauty techniques. After years of working as a hairdresser specialist, she followed her entrepreneurial spirit and started her own consultancy business.
Jane has always been driven by her desire to help others feel confident in their own skin, and she does this by sharing her knowledge, experiences, and practical beauty tips. Through her consultancy, she empowers individuals to embrace their unique beauty, offering tailored guidance that boosts both self-esteem and personal style.
Professional Focus
Specializes in makeup, hairstyling, and beauty consulting.
Provides personalized beauty advice, tips, and techniques to help individuals feel confident in their appearance.
Dedicated to staying up-to-date with the latest industry trends and developments.
Passionate about creating a comfortable and empowering experience for every client.
Education History
University of Craft and Design – Bachelor of Fine Arts (BFA) in Woodworking and Furniture Design
Woodworking Apprenticeships – Extensive hands-on training with skilled craftsmen to refine carpentry and furniture making techniques
Online Courses & Masterclasses – Continued education in advanced woodworking techniques, design principles, and specialized tools
Expertise:
Makeup artistry, hairstyling, and beauty consulting.
Personalized beauty techniques to enhance confidence and self-expression.
Educating clients on how to maintain their beauty routines at home.