
Are you struggling to get stencil off your fake skin after a long day at the tattoo shop? Don’t worry. We’ve got you covered. In this guide, we’ll discuss some easy and effective ways to remove stencils from fake skin without causing any damage.
How to get stencil off fake skin can be a crucial step, especially for those practicing tattooing techniques. Whether you’re a beginner or a seasoned artist, ensuring a clean slate after each practice session is essential for accurate learning and skill development. While fake skin provides an excellent medium that closely mimics the human surface, the process of removing stencil material can be tricky without the right methods.

This guide aims to provide you with effective techniques and tips for effortlessly erasing stencils, allowing you to focus on honing your craft.
What Will You Need?
Before we discuss the various methods of removing stencils from fake skin, let’s briefly review the materials you’ll need. These are readily available and can be found in most households or purchased at a low cost.
- Baby oil or olive oil
- Rubbing alcohol
- Paper towels
- Cotton pads or balls
- Glycerine soap
Once you have these essentials, you can proceed with any of the following methods to remove stencils from fake skin.
10 Easy Steps on How to Get Stencil Off Fake Skin
Step 1: Baby Oil or Olive Oil
Start by applying a generous amount of baby oil or olive oil to the area of the fake skin where the stencil is located. These oils are known for their ability to break down the stencil ink without causing any harm to the synthetic material. Use a cotton pad or ball to rub the oil into the stencil in circular motions gently. Allow the oil to sit on the surface for a few minutes, as this will give it enough time to penetrate the ink and loosen its grip on the skin.
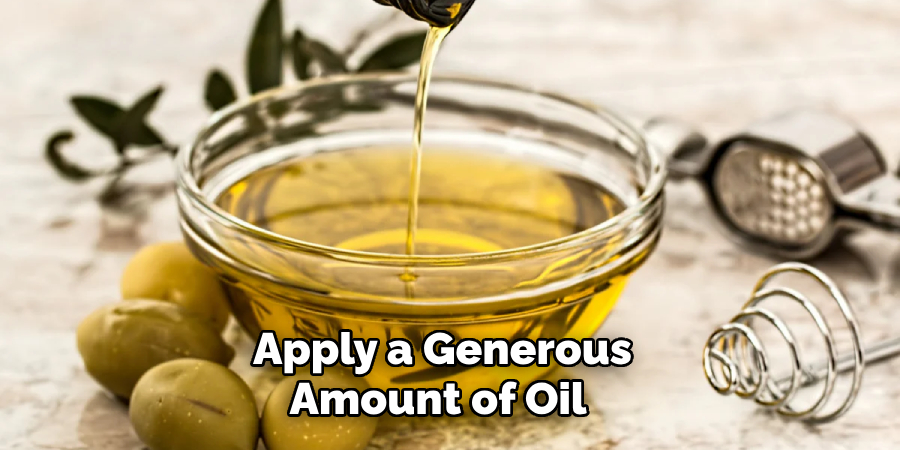
After a few minutes, use a paper towel to wipe away the oil and stencil residue. Repeat this process if necessary until the stencil is completely removed. Baby oil and olive oil are gentle and effective options, making them a great first choice when cleaning fake skin.
Step 2: Rubbing Alcohol
If baby oil or olive oil doesn’t completely remove the stencil, you can use rubbing alcohol as an alternative. Dampen a cotton pad or ball with rubbing alcohol and gently rub it over the stencil. The alcohol will help dissolve the ink, making it easier to wipe away. Continue to use light circular motions to avoid damaging the fake skin. After a few moments, use a paper towel to wipe off the stencil and any excess alcohol. Repeat the process if necessary until the stencil is fully removed.
Step 3: Glycerine Soap
Glycerine soap is another effective option for removing stencils from fake skin. Wet the area of the fake skin with warm water, ensuring it is thoroughly moistened. Lather up the glycerine soap and apply it to the stencil. Gently scrub the area with your fingers or a soft brush in circular motions. Rinse the fake skin with warm water, and then dry it with a paper towel. Repeat this method if needed until the stencil is no longer visible.
Step 4: Combination Method
In some cases, combining the above methods may be necessary to remove stubborn stencil marks fully. For example, you can start by applying baby oil or olive oil to break down the ink, then follow up with rubbing alcohol to dissolve any remaining residue, and finally use glycerine soap to cleanse the area thoroughly. This multi-step approach can be particularly effective for more persistent stencils.
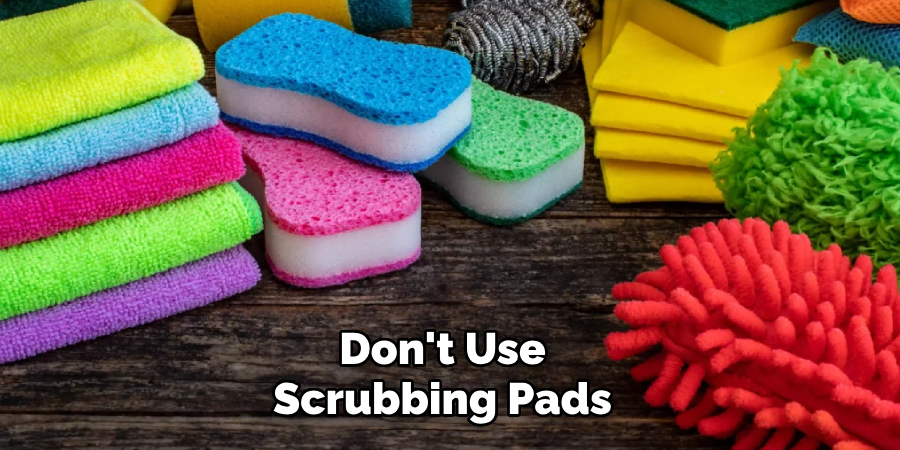
Step 5: Avoid Abrasives
While it might be tempting to use abrasive materials such as scrubbing pads or harsh chemicals to hasten the stencil removal process, it’s important to avoid these methods. Abrasives can damage the surface of the fake skin, causing scratches or tears that can affect its usability for future practice. Additionally, harsh chemicals can degrade the synthetic material and potentially render it unusable.
Step 6: Cold Cream Application
Another gentle method for stencil removal is the use of cold cream. Cold cream is a moisturizing product that effectively breaks down stencil inks. Apply a generous amount of cold cream to the stencil, making sure to cover the entire area. Allow the cream to sit for a few minutes to soften the ink. Using a cotton pad, gently rub the area in circular motions. The stencil ink should start to lift off the fake skin. Use a paper towel to wipe away the cold cream and any remaining ink. Repeat as necessary to ensure the stencil is fully removed.
Step 7: Baby Wipes
Baby wipes can serve as a quick and convenient solution for minor stencil removal. They are gentle on the synthetic skin and often contain mild moisturizers that can help break down the ink. Simply take a baby wipe and gently scrub the stencil in a circular motion. This method is beneficial for fresh stencils that haven’t fully set into the synthetic material.
Step 8: Hand Sanitizer
Hand sanitizer, due to its alcohol content, can also be used to remove stencils from fake skin. Apply a small amount of hand sanitizer directly onto the stencil. Use a cotton pad to rub it gently over the area in circular motions. The alcohol in the hand sanitizer will help dissolve the ink. After a few moments, wipe away the excess sanitizer and ink with a paper towel. Repeat if necessary until the stencil is completely erased.
Step 9: Skin-Safe Ink Remover
Investing in a skin-safe ink remover designed specifically for tattooing can be a worthwhile decision. These products are formulated to remove ink without harming the surface of synthetic skin. Follow the instructions provided with the product for the best results. Usually, the application involves using a cotton pad to apply the remover and then gently wiping away the stencil.
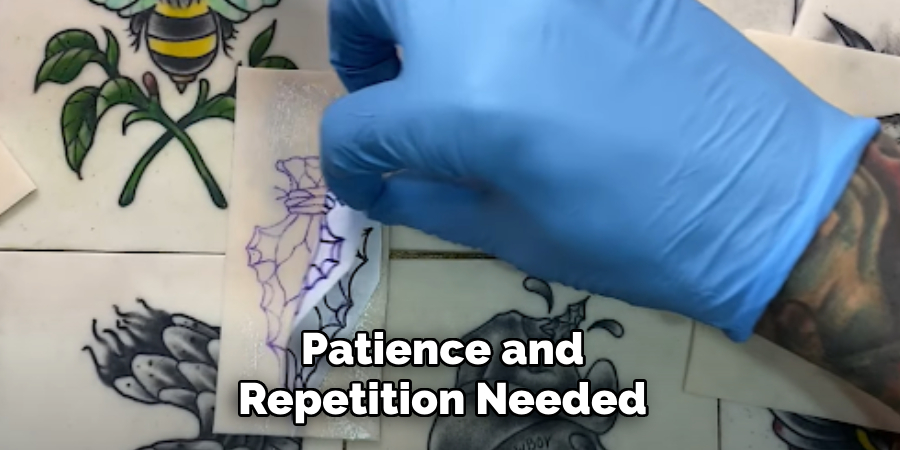
Step 10: Patience and Repetition
The key to effectively removing stencil ink from fake skin is patience and repetition. Sometimes, the stencil won’t come off entirely on the first try. It’s important to be gentle and persistent, reapply your chosen method, and repeat the process until the stencil is completely removed. Avoid rushing the process to prevent any potential damage to the fake skin.
By following these steps and utilizing the right materials, you can ensure that your fake skin remains in good condition for continued practice. Consistently practicing proper stencil removal techniques will maintain the quality of your synthetic skin and enhance your tattooing skills over time.
5 Additional Tips and Tricks
- Use Micellar Water: Micellar water, commonly used for removing makeup, can also effectively break down stencil ink. Soak a cotton pad with micellar water and gently dab it on the stencil. The micelles will attract and lift away the ink particles without damaging the synthetic skin.
- Try Coconut Oil: Similar to baby oil and olive oil, coconut oil is a gentle alternative that can help dissolve stencil ink. Its natural moisturizing properties make it safe and effective. Apply the oil to the stencil and rub gently with a cotton ball or pad in circular motions until the ink starts to lift.
- Utilize Makeup Remover Wipes: Makeup remover wipes are specifically designed to break down and remove stubborn pigments and can be quite useful for stencil removal. They are generally skin-safe and won’t harm your fake skin. Use the wipes to gently rub over the stencil in circular motions until it is fully removed.
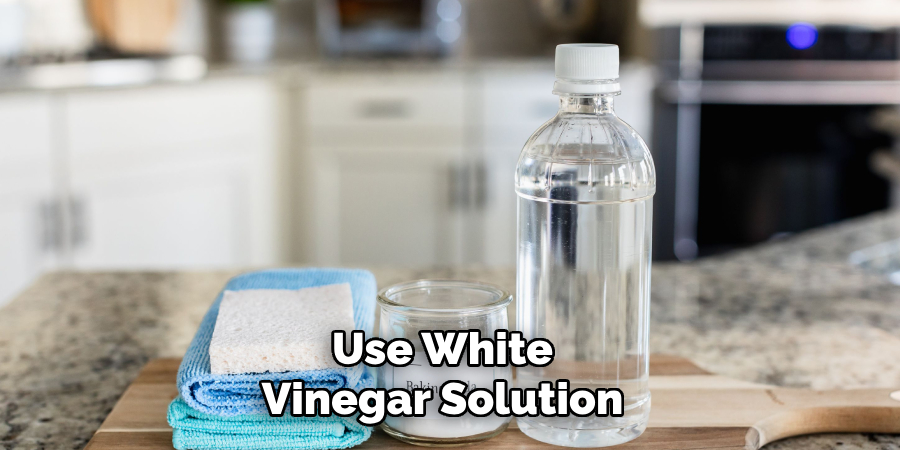
- White Vinegar Solution: For more persistent inks, a diluted white vinegar solution (equal parts vinegar and water) can be used. Soak a cotton pad in the solution and gently rub the stencil. The acidic nature of vinegar helps dissolve the ink without being overly harsh on the fake skin.
- Use a Soft Toothbrush: For areas where the stencil is particularly stubborn, a soft toothbrush can help. After applying your chosen removal agent (oil, soap, or alcohol), gently brush the area in circular motions. The soft bristles can help lift the ink particles while being gentle enough to avoid damaging the synthetic skin.
By incorporating these additional tips and tricks into your routine, you’ll have an even broader arsenal for effectively removing stencils from fake skin.
Conclusion
How to get stencil off fake skin is a crucial skill for tattoo artists to master, ensuring their practice materials remain in top condition for repeated use.
Employing a combination of gentle and effective methods, such as oils, glycerine soap, cold cream, and skin-safe ink removers, you can effectively remove stencils without damaging the synthetic surface. It’s equally important to avoid harsh abrasives and chemicals that could potentially tear or degrade the fake skin. Patience and repetition are key to successfully lifting all ink residues.
By integrating these techniques and tips into your routine, you’ll enhance the longevity of your practice materials and refine your tattooing skills, setting a solid foundation for future artistry.
About the Author
Jane Hubbard is a passionate beauty expert with a wealth of experience in makeup, hair, and overall beauty techniques. After years of working as a hairdresser specialist, she followed her entrepreneurial spirit and started her own consultancy business.
Jane has always been driven by her desire to help others feel confident in their own skin, and she does this by sharing her knowledge, experiences, and practical beauty tips. Through her consultancy, she empowers individuals to embrace their unique beauty, offering tailored guidance that boosts both self-esteem and personal style.
Professional Focus
Specializes in makeup, hairstyling, and beauty consulting.
Provides personalized beauty advice, tips, and techniques to help individuals feel confident in their appearance.
Dedicated to staying up-to-date with the latest industry trends and developments.
Passionate about creating a comfortable and empowering experience for every client.
Education History
University of Craft and Design – Bachelor of Fine Arts (BFA) in Woodworking and Furniture Design
Woodworking Apprenticeships – Extensive hands-on training with skilled craftsmen to refine carpentry and furniture making techniques
Online Courses & Masterclasses – Continued education in advanced woodworking techniques, design principles, and specialized tools
Expertise:
Makeup artistry, hairstyling, and beauty consulting.
Personalized beauty techniques to enhance confidence and self-expression.
Educating clients on how to maintain their beauty routines at home.