
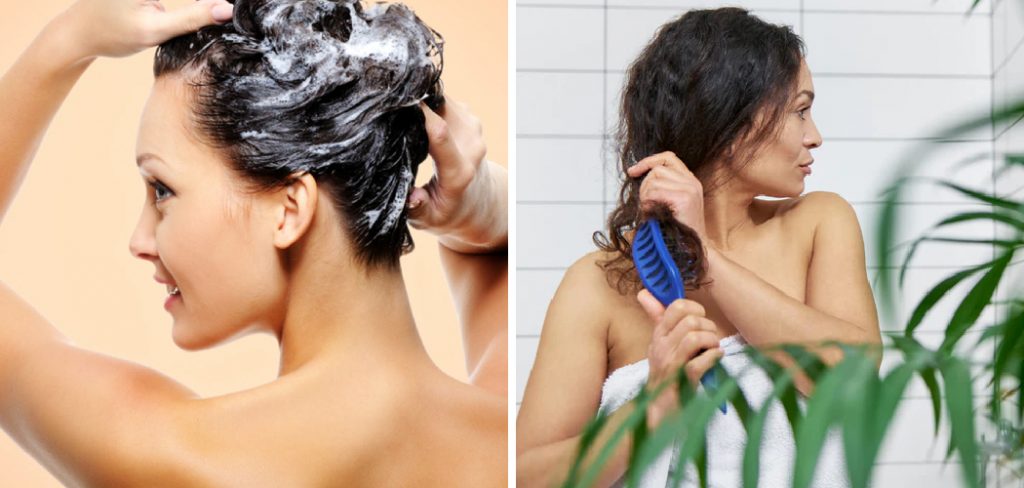
Are you looking for a way to keep your hair healthy and moisturized? Pre-pooing may be the answer.
How to pre poo hair is a vital step that many individuals overlook in their hair care routines. This practice involves applying a nourishing treatment to your hair before washing it with shampoo, allowing for added moisture and protection against the drying effects of cleansing products. Incorporating pre-pooing into your regimen can enhance your hair’s health, improve manageability, and reduce damage from washing. Whether you have curly, straight, or textured hair, understanding how to effectively pre-poo can lead to shinier, softer, and more resilient locks.
In the following sections, we’ll explore suitable products, techniques, and tips to help you master the art of pre-pooing for optimal hair care.
What Will You Need?
To pre-poo your hair, you will need a few essential items:
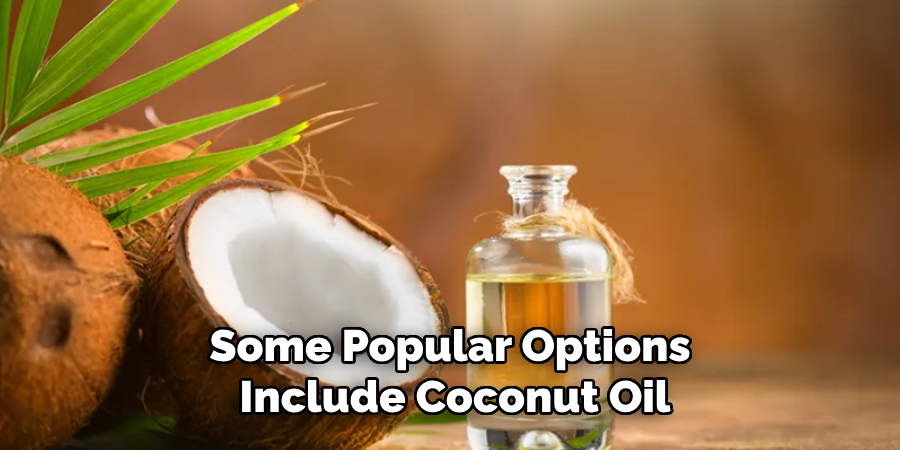
- Pre-poo Treatment: This can be any nourishing oil or conditioner you prefer. Some popular options include coconut oil, olive oil, shea butter, and avocado.
- Wide-tooth Comb: A wide-tooth comb is best for detangling hair without causing breakage. It also helps distribute the pre-poo treatment evenly throughout your hair.
- Shower Cap or Plastic Bag: After applying the pre-poo treatment to your hair, you should cover it with a shower cap or plastic bag to create a warm environment for better absorption.
- Warm Towel: Wrapping a warm towel around your head after covering it with a shower cap can help the pre-poo treatment penetrate deeper into your hair.
Once you have these items, you can begin pre-pooing your hair.
10 Easy Steps on How to Pre Poo Hair
Step 1: Choose Your Treatment
Selecting the proper pre-poo treatment is critical to reaping the benefits of this process. Consider your hair type and specific needs when making your choice. For instance, if your hair is dry and needs hydration, a rich oil like coconut or olive oil can provide deep moisture. Shea butter is excellent for those with thicker or coarser hair, as it aids in sealing moisture effectively. Avocado oil is another versatile option packed with vitamins and fatty acids, perfect for promoting overall hair health.
Additionally, you might opt for a commercial pre-poo product specifically formulated for this purpose, which often includes a blend of nourishing ingredients designed to condition and protect your hair before shampooing. Remember to conduct a patch test with any new product to ensure that your scalp does not react negatively. Once you’ve determined the right treatment for your hair type, you’re well on your way to incorporating an effective pre-poo routine into your hair care regimen.
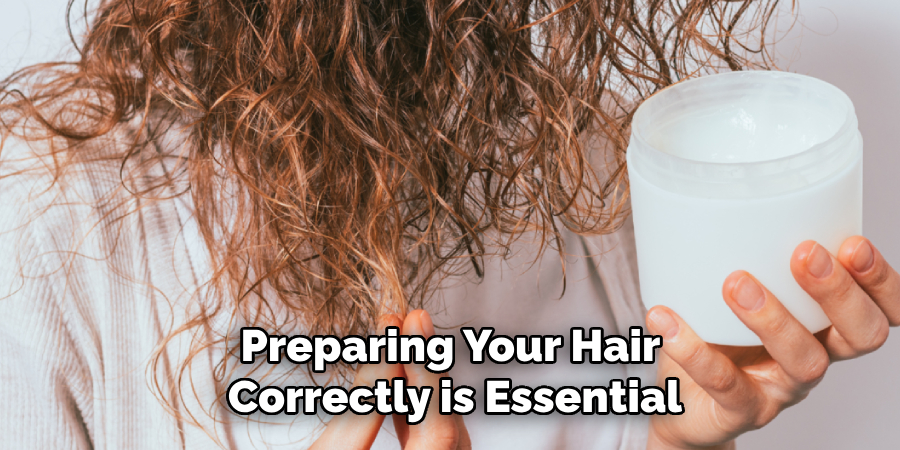
Step 2: Prepare Your Hair
Before applying your chosen pre-poo treatment, preparing your hair correctly is essential. Start by gently detangling your hair with a wide-tooth comb, beginning from the tips and working up to the roots. This will help minimize breakage and ensure even distribution of the treatment. If your hair is particularly tangled, consider using a bit of water or a leave-in conditioner to make this process easier. Once your hair is detangled, it’s ready for the pre-poo treatment, setting the stage for enhanced moisture and protection.
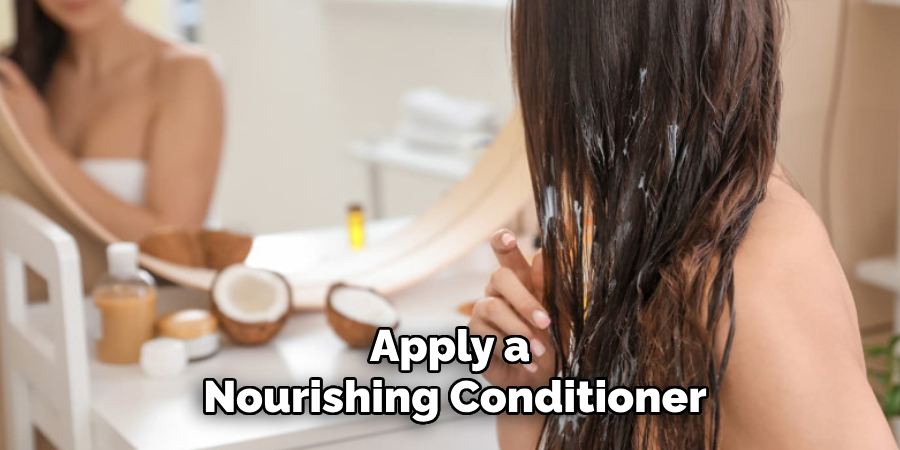
Step 3: Apply the Pre-Poo Treatment
Once your hair is prepared correctly, it’s time to apply the pre-poo treatment. Begin by dividing your hair into sections to ensure that every strand receives adequate coverage. Warm a small amount of your chosen treatment slightly in your hands to make it easier to apply.
Starting from the ends of your hair, work the treatment toward the roots. This technique helps nourish the oldest parts of your hair first, typically the most damaged and in need of care. Be generous with the treatment, especially on the ends where dryness and split ends are more likely to occur. As you apply the treatment, use your fingers to work it through your hair, ensuring it’s evenly distributed.
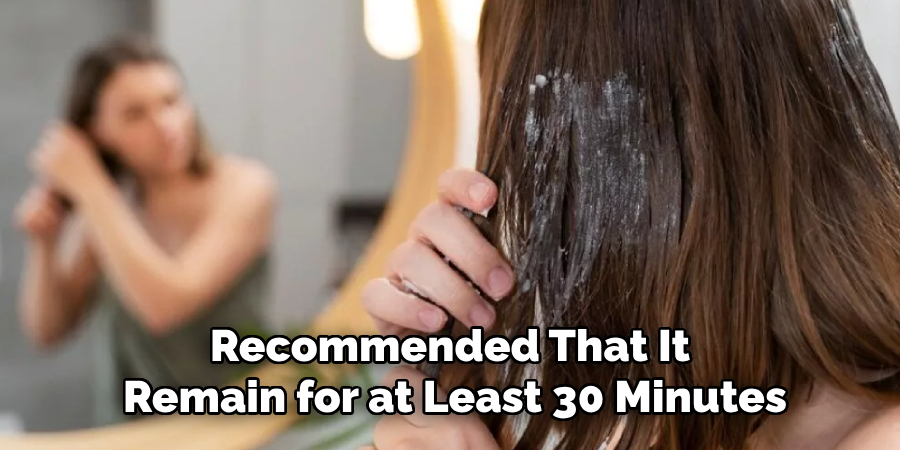
You can also use the wide-tooth comb to gently comb through your hair gently, ensuring the product penetrates profoundly and thoroughly. Pay special attention to areas that feel particularly dry or damaged, as these spots may require extra care. Allow the treatment to sit for at least 30 minutes—or longer if you have time—to maximize its effectiveness. For an even more intense experience, consider wrapping your hair in a warm towel or using a heat cap, which can help open up the hair cuticles and allow better absorption of the nourishing ingredients.
Step 4: Cover Your Hair
After applying the pre-poo treatment, it’s essential to cover your hair to create a warm and humid environment that enhances the treatment’s effectiveness. Use a shower cap or a plastic bag to enclose your hair thoroughly. This keeps the treatment in place and helps trap heat, which can significantly improve absorption. If you prefer a more luxurious approach, you can opt for a heat cap that gently warms your hair, further opening the cuticles for better penetration. Ensure the covering fits snugly but is comfortable, allowing for movement without undue pressure on your scalp.
Step 5: Let It Sit
The duration for which you let the pre-poo treatment sit can vary, but generally, it is recommended that it remain for at least 30 minutes. Consider leaving it on for several hours or even overnight for optimal results. This extended time permits the nourishing ingredients to fully penetrate your hair shafts, providing deep hydration and promoting improved manageability. If you’re short on time, even a 15-minute treatment can offer benefits, but more prolonged exposure will yield more dramatic results.
Step 6: Rinse Thoroughly
Once your pre-poo treatment has sufficient time to work its magic, it’s time to rinse it thoroughly. Begin using lukewarm water to help remove the product without stripping your hair of its natural oils. Gently rinse your hair while massaging the scalp to ensure that all residual treatment is eliminated. Avoid using hot water, as it can dry out your hair and scalp, negating the benefits of your pre-poo. After rinsing, follow up with your regular shampoo and conditioner to clean and nourish your hair.
Step 7: Shampoo Your Hair
After rinsing out the pre-poo treatment, it’s time to cleanse your hair with a gentle shampoo. Choose a sulfate-free product if possible, as sulfates can strip moisture and essential oils from your hair. Apply a quarter-sized amount of shampoo to your scalp, and using your fingertips, massage it into your scalp using circular motions. This helps cleanse the scalp effectively and stimulates blood circulation, promoting healthier hair growth.
As you work the shampoo through your hair, focus more on the roots where oil and buildup tend to accumulate. Allow the shampoo to work its way down the lengths of your hair, but avoid harsh scrubbing to prevent tangling and breakage. Rinse thoroughly with lukewarm water to remove all products, preparing your hair for conditioning.
Step 8: Condition Your Hair
Following the shampooing process, apply a nourishing conditioner to help restore moisture and smooth the hair cuticles. Like the pre-poo treatment, choose a conditioner that suits your hair’s unique needs, whether hydration, volume, or repair. Divide your hair into sections again for even application, focusing on the mid-lengths to ends, where hair is often drier and more prone to damage. Leave the conditioner in for a few minutes to allow it to penetrate effectively, and consider using a wide-tooth comb to distribute the product evenly and further detangle your hair. For an extra boost of hydration, you can also opt for a deep conditioner or a hair mask at this stage, letting it sit for a longer duration before rinsing.
Step 9: Rinse and Detangle
Once the conditioner has soaked in, rinse your hair thoroughly with cool water to seal the hair cuticles, which helps to lock in moisture and enhance shine. While rinsing, use your fingers to detangle any knots or tangles gently. If you’ve used a leave-in conditioner or a detangling spray post-wash, applying a wide-tooth comb again can help ease through any stubborn knots without causing breakage. Ensure all product is rinsed away, leaving your hair cleansed, conditioned, and ready for styling.
Step 10: Style Your Hair
After cleansing and conditioning, gently towel-dry your hair by patting it rather than rubbing, which can cause frizz and damage. Depending on your desired look, you can apply any styling products, such as leave-in conditioners, oils, or styling creams. When styling, consider air-drying for a more natural finish, using a heat protectant to blow-dry, or using heat-styling tools. Remember to complete your routine with occasional trims and treatments to maintain the health and beauty of your hair between pre-poo sessions.
By following these steps, you can effectively incorporate a pre-poo treatment into your hair care routine and reap its many benefits, such as nourishment, hydration, and improved manageability.
Conclusion
Incorporating a pre-poo treatment into your hair care routine can be a game-changer for maintaining healthy, hydrated locks.
By following the outlined steps on how to pre poo hair—from carefully selecting your pre-poo product and allowing it to sit effectively to properly rinsing, shampooing, and conditioning your hair—you set the foundation for optimal moisture retention and damage prevention. Consistency is vital; making pre-pooing a regular part of your regimen, tailored to your hair’s specific needs, can lead to noticeable texture, shine, and overall manageability improvements.
Embrace the power of pre-poo treatments and watch as your hair transforms into its healthiest state yet.
About the Author
Jane Hubbard is a passionate beauty expert with a wealth of experience in makeup, hair, and overall beauty techniques. After years of working as a hairdresser specialist, she followed her entrepreneurial spirit and started her own consultancy business.
Jane has always been driven by her desire to help others feel confident in their own skin, and she does this by sharing her knowledge, experiences, and practical beauty tips. Through her consultancy, she empowers individuals to embrace their unique beauty, offering tailored guidance that boosts both self-esteem and personal style.
Professional Focus
Specializes in makeup, hairstyling, and beauty consulting.
Provides personalized beauty advice, tips, and techniques to help individuals feel confident in their appearance.
Dedicated to staying up-to-date with the latest industry trends and developments.
Passionate about creating a comfortable and empowering experience for every client.
Education History
University of Craft and Design – Bachelor of Fine Arts (BFA) in Woodworking and Furniture Design
Woodworking Apprenticeships – Extensive hands-on training with skilled craftsmen to refine carpentry and furniture making techniques
Online Courses & Masterclasses – Continued education in advanced woodworking techniques, design principles, and specialized tools
Expertise:
Makeup artistry, hairstyling, and beauty consulting.
Personalized beauty techniques to enhance confidence and self-expression.
Educating clients on how to maintain their beauty routines at home.