
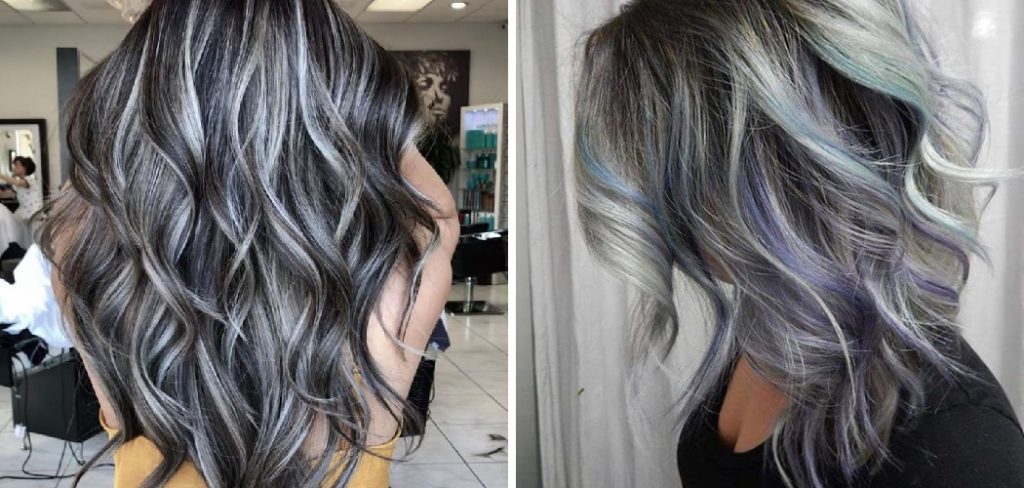
Are you tired of your gray hair? Do you want to color it but are unsure how to prepare it first? Look no further!
How to pretreat gray hair before coloring is essential to achieving a prosperous, even tone and ensuring the longevity of the color. Gray hair often has a different texture and porosity compared to pigmented hair, which can lead to uneven absorption of color. Therefore, taking the proper steps to pretreat is crucial. This includes nourishing the hair to soften it, using a clarifying shampoo to remove any buildup, and applying a suitable conditioner or treatment to provide extra moisture and protection.
By following these pretreatment practices, you can create the perfect canvas for a successful color application, allowing the shades to shine vibrantly and last longer.
What Will You Need?
Before starting the pretreatment process, ensure you have all the necessary tools and products. Here is a list of items that will help you achieve the best results:
- A nourishing hair oil or mask
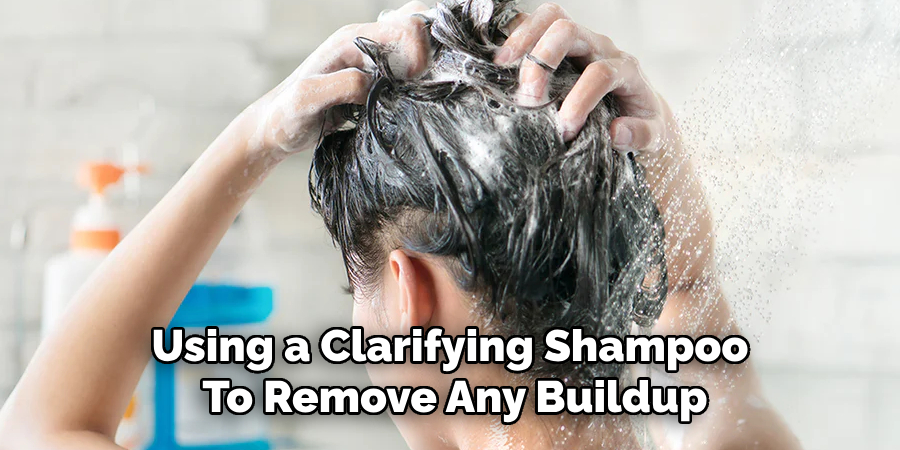
- A clarifying shampoo
- A color-safe conditioner or treatment
- Wide-toothed comb
Once you have these items, you are ready to start the pretreatment process.
10 Easy Steps on How to Pretreat Gray Hair Before Coloring
Step 1: Nourish Your Hair
One of the most crucial steps in prepping gray hair for coloring is nourishing it with a moisturizing oil or mask. Our hair loses its natural oils and becomes drier as we age, making it more brittle and prone to breakage. This can result in an uneven color application and a lackluster finish. Therefore, it is vital to replenish the hair’s moisture before coloring to ensure it can withstand the chemical process.
Step 2: Wash Your Hair
Before applying any products, make sure your hair is clean. Use warm water to wet your hair thoroughly, then apply a clarifying shampoo. This will remove any buildup or residue from previous hair products that may interfere with color absorption. Massage the shampoo into your scalp and hair for at least one minute before rinsing it off thoroughly.
Step 3: Rinse and Repeat
After thoroughly massaging the clarifying shampoo into your hair, it’s essential to rinse it out thoroughly with warm water. This step removes all product buildup, leaving your hair fresh and ready for the next phase. If your hair still feels weighed down or your scalp feels greasy, consider applying the clarifying shampoo again. This will further ensure that your hair is devoid of any leftover residues. However, be cautious not to overdo it, as repeat washing can strip your hair of its natural oils if done excessively.
Once you’re satisfied that your hair is clean, rinse thoroughly and prepare for conditioning. This step is vital in setting the stage for effective moisture retention and color application, creating a balanced environment that will make your grey hair more responsive to the dye.
Step 4: Condition Your Hair
After thoroughly cleansing your hair, it’s time to apply a color-safe conditioner or treatment. This step is essential as it helps to restore moisture, smooth the hair cuticles, and prepare your strands for the coloring process. Apply the conditioner generously, focusing on the mid-lengths and ends where dryness is often more pronounced. Use a wide-toothed comb to evenly distribute the product and detangle any knots, ensuring the conditioner penetrates deeply.
Allow the conditioner to sit for at least five to ten minutes—this can be enhanced with the heat for better absorption, such as by wrapping your hair in a warm towel. Once the time is up, rinse your hair thoroughly with cool water to seal the cuticles and lock in the moisture, leading to a more vibrant and even color result.
Step 5: Dry Your Hair Gently
After rinsing out the conditioner, it’s essential to dry your hair gently to avoid damage. Instead of rubbing your hair vigorously with a towel, which can lead to frizz and breakage, opt for a patting motion to remove excess water. If you prefer, use a microfiber towel or an old T-shirt, as these materials are less abrasive on the hair. Allow your hair to air dry before you begin the coloring process. This will ensure your hair is not dripping wet, which can dilute the dye and affect its adherence and absorption during application. Patience at this step helps maintain the health and integrity of your strands, setting the stage for a successful color transformation.
Step 6: Prepare Your Hair for Coloring
Once your hair is dry and ready, it’s time to prepare for the coloring process. Begin by sectioning your hair into manageable parts using clips or hair ties. This will help you apply the color evenly and ensure that every strand is covered. Start at the back and work your way forward, allowing you to focus on one section at a time. Additionally, it can be helpful to put on an old shirt or a cape to protect your clothes from any potential dye stains. Finally, read the instructions for your chosen hair color carefully, as it may provide specific guidance on application techniques or timing to achieve the best results.

Step 7: Apply the Colour
It’s time to apply the hair color with your hair correctly sectioned and prepared. Applying the dye using an applicator brush or bottle starts from the roots, ensuring even distribution throughout the hair. Take your time with each section, thoroughly saturating the strands to achieve a consistent and vibrant result. Pay special attention to areas where grey hair is more prominent, typically at the temples and crown. Once all sections have been dyed, use your fingers or a comb to ensure the color is evenly worked through the hair, which helps to prevent any missed spots.
Step 8: Timer and Total Development Time
After all the colors have been applied, adhering to the recommended development time specified in the product instructions is crucial. Setting a timer will ensure that you keep track of time, which can affect the final color outcome. The development phase can vary depending on the brand and desired intensity. During this time, avoid any activities disrupting the process, such as brushing or tying your hair back.
Step 9: Rinse Out the Colour
Once the timer goes off, it’s time to rinse out the color. Start using lukewarm water to rinse your hair thoroughly until the water runs clear, indicating that most of the dye has been washed out. Be sure not to use shampoo at this stage, as your hair needs time to set in the new color. Follow up with a conditioner, usually provided in the dye kit, which will help to nourish your hair post-coloring and seal the new color.
Step 10: Style Your Hair
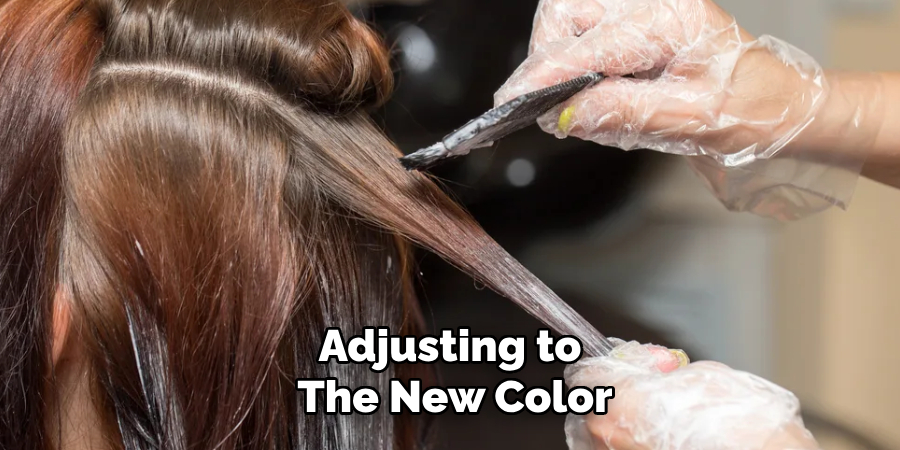
After rinsing and conditioning, gently towel dry your hair using the same patting technique to avoid damage. You can now style your hair as desired. Using a heat protectant before applying heat styling tools will further safeguard your newly colored hair. As your hair is still adjusting to the new color, consider opting for styles that require minimal heat exposure to maintain its vibrancy and health. Enjoy your stunning new look!
You can successfully dye your grey hair at home by following these steps and taking the necessary precautions.
5 Things You Should Avoid
- Skipping the Clarifying Shampoo: Remember to use a clarifying shampoo before applying hair dye, which can result in a less effective coloring process. Residues from previous products can hinder the dye’s ability to penetrate the hair shaft, leading to uneven color.
- Overusing Heat Styling Tools: Excessive use of heat styling tools before dyeing can weaken your hair, making it more susceptible to damage during the coloring process. Opt for heat-free hairstyles in the days leading up to dyeing to keep your strands healthy.
- Ignoring Hair Condition: Failing to address underlying issues with your hair, such as dryness or brittleness, can significantly affect the final result. For optimal health, it’s important to utilize nourishing treatments and conditioners in the weeks leading up to coloring.
- Using the Wrong Conditioner: Not all conditioners are created equal. Avoid regular conditioners containing silicones or heavy oils, as they can make a barrier that prevents dye absorption. Choose a moisture-rich, color-safe conditioner instead.
- Applying Dye on Wet Hair: Colouring hair while still excessively wet can dilute the dye, leading to poor absorption and uneven results. Ensure your hair is damp but not dripping wet to achieve better adherence and vibrant color.

By avoiding these common mistakes, you can confidently dye your hair at home and achieve a beautiful, vibrant result.
Conclusion
How to pretreat gray hair before coloring is essential for achieving a vibrant and lasting colour while maintaining the hair’s health. Begin by using a clarifying shampoo to remove any product buildup, ensuring the dye adheres effectively to the hair shaft.
Follow this with nourishing treatments to combat dryness and brittleness, which can be especially pronounced in grey hair. It’s also crucial to allow your hair to air dry thoroughly before applying the dye, ensuring it’s damp but not dripping wet. Additionally, carefully sectioning your hair correctly and carefully using the color will promote even coverage and a professional finish.
Following these steps sets a solid foundation for a successful at-home hair coloring experience.
About the Author
Jane Hubbard is a passionate beauty expert with a wealth of experience in makeup, hair, and overall beauty techniques. After years of working as a hairdresser specialist, she followed her entrepreneurial spirit and started her own consultancy business.
Jane has always been driven by her desire to help others feel confident in their own skin, and she does this by sharing her knowledge, experiences, and practical beauty tips. Through her consultancy, she empowers individuals to embrace their unique beauty, offering tailored guidance that boosts both self-esteem and personal style.
Professional Focus
Specializes in makeup, hairstyling, and beauty consulting.
Provides personalized beauty advice, tips, and techniques to help individuals feel confident in their appearance.
Dedicated to staying up-to-date with the latest industry trends and developments.
Passionate about creating a comfortable and empowering experience for every client.
Education History
University of Craft and Design – Bachelor of Fine Arts (BFA) in Woodworking and Furniture Design
Woodworking Apprenticeships – Extensive hands-on training with skilled craftsmen to refine carpentry and furniture making techniques
Online Courses & Masterclasses – Continued education in advanced woodworking techniques, design principles, and specialized tools
Expertise:
Makeup artistry, hairstyling, and beauty consulting.
Personalized beauty techniques to enhance confidence and self-expression.
Educating clients on how to maintain their beauty routines at home.