

You take off a dark pedicure, expecting a clean reset, and instead, you find yellowed toenails staring back at you. It is annoying. Sometimes a little alarming too, especially if you were only trying to switch colors. In many cases, though, the explanation is fairly simple: strong dye pigments from nail polish can settle into the upper layers of the nail and leave behind a stain.
The good news is that stained toenails do not always mean something is wrong. Quite often, the discoloration is cosmetic and fades with a bit of care. A few basic supplies, a gentle hand, and some patience may be enough to lighten the yellowing and help your nails look more like themselves again. In this guide on how to remove nail polish stains from toenails, we will discuss some easy and effective methods to get rid of those stubborn stains.
Understand What Kind of Stain You Are Looking At
Before you start scrubbing or soaking, pause for a second. Not every yellow nail is stained from polish, and that distinction matters.
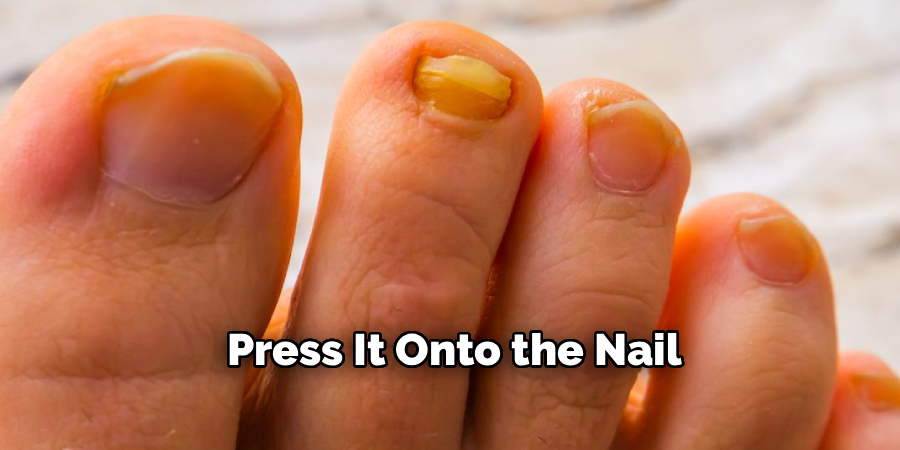
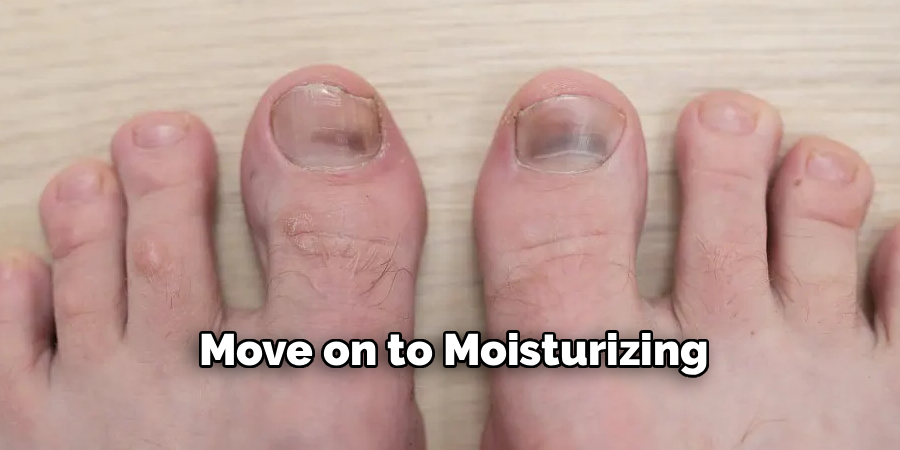
Polish staining usually shows up as a yellow or faint orange cast across the surface of the nail. It is especially common after deep reds, navy shades, black polish, or anything heavily pigmented. If you skipped the base coat, the odds go up. The colorants in polish can cling to keratin, which makes up the nail plate, and standard remover often takes off the lacquer while leaving some of that discoloration behind.
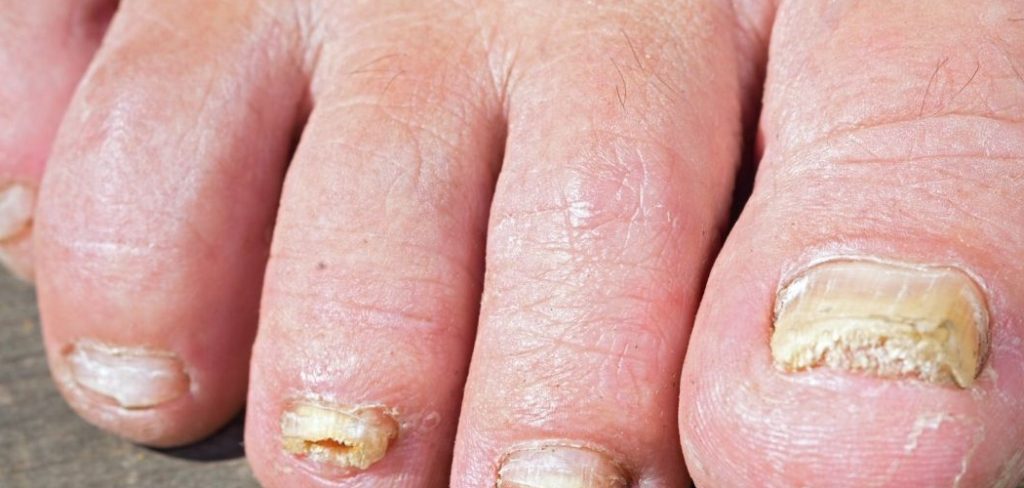
Still, nail polish is not the only possible cause. Toenails can also turn yellow because of a fungal infection, and that picture tends to look a bit different. A fungus may cause thickening, crumbling, brittleness, or an irregular surface. Staining from polish, by contrast, usually leaves the nail smooth and structurally normal. That is not a perfect rule, but it is a useful starting point. If the nail seems distorted rather than simply discolored, home whitening tricks may not be the right fix.
Basic Tools You May Need
- Nail clippers
- Nail file
- Cuticle pusher or trimmer
- Cuticle oil or cream
- A bowl of warm water and soap (for soaking)
- Cotton balls or pads
- Acetone or nail polish remover (if removing polish)
- Base coat, nail polish, and top coat (if painting nails)
8 Step-by-step Guidelines on How to Remove Nail Polish Stains From Toenails
Step 1: Remove Any Remaining Polish
First things first: get the nail completely bare. Even a thin film of leftover polish can interfere with whatever you do next.
Soak a cotton ball or pad with remover and press it onto the nail for 10 to 15 seconds instead of rubbing right away. That short pause helps dissolve the polish, so you are not dragging pigment across the skin or into the cuticle area. Then wipe downward, from base to tip, in one steady motion.
If color is lodged near the edges, use a cotton swab or wooden cuticle stick dipped in remover to clean those tighter spots. It is a small detail, but it makes the next steps more effective. You want to treat the nail itself, not a half-removed layer of leftover polish.
Step 2: Wash Your Feet with Soap and Warm Water
Once the polish is off, wash your feet. This step gets overlooked more than it should.
Fill a basin with warm water and add a little mild soap or body wash. Let your feet soak for five to ten minutes. That brief soak helps remove residue from the remover, softens the nail surface a bit, and makes the whole process feel less clinical and more manageable.
After that, use a washcloth or soft foot brush to clean around the nails. Pay attention to the sides and underneath the free edge if you can. Then dry thoroughly, especially between the toes. Excess moisture sitting there is never helpful, and if you are trying to improve the condition of your feet overall, this part matters.
Step 3: Lightly Buff the Nail Surface
Sometimes the stain is only skin-deep. Or, more accurately, nail-deep but still close to the top layer.
Take a fine-grit buffer and gently pass it over the nail in a few light strokes. You are not trying to sand the nail down. Just skim the surface. Very light pressure is enough. If the discoloration fades quickly, that is a sign the stain had not penetrated very far.
Go carefully here. Over-buffing can thin the nail, leave it tender, and make it more prone to splitting later. If the yellowing disappears after a little buffing, stop and move on to moisturizing. If it does not, resist the temptation to keep filing harder. At that point, a chemical lift is likely the better option.
Step 4: Make a Baking Soda and Peroxide Paste
If the stain is still visible, a simple paste may help lift it.
In a small bowl, mix 1 tablespoon of 3% hydrogen peroxide with about 2½ tablespoons of baking soda. Stir until it forms a thick paste, something close to toothpaste in texture. It should spread without running.
There is a practical reason this mixture is often used. Baking soda gives a bit of mild abrasion, while peroxide may help lighten surface staining. It is not magic, and it will not change the underlying structure of the nail, but for cosmetic discoloration, it can be useful. Apply the paste with a toothbrush, cotton swab, or wooden stick, covering the stained area evenly.
Step 5: Let It Sit Briefly
Now you wait. Not forever, just long enough for the paste to do something.
Leave it on for around 10 to 15 minutes. Try to keep your feet still so the mixture does not slide off onto the floor. If you feel slight tingling, that can happen. Pain or burning is different, though. If that starts, rinse immediately.
For older stains, some people leave the paste on a little longer, up to 20 minutes at most. I would not push past that. There is a point where “more” stops being useful and starts becoming irritating, especially if your nails or skin are already dry.
Step 6: Gently Scrub and Rinse
When the time is up, wet the toothbrush with warm water and lightly scrub each nail in small circles. Think gentle pressure, not deep cleaning grout.
This step helps loosen whatever pigment the paste has started to lift. Spend roughly 20 to 30 seconds per nail, then rinse thoroughly under warm water. Make sure no paste is left around the cuticles or under the nail edge.
Pat your feet dry and take a look. In many cases, the nails appear noticeably brighter after one round. Not always perfectly clear, though. Sometimes the improvement is partial, which is still progress.
Step 7: Try Lemon Juice for Residual Yellowing
If a faint stain remains, lemon juice may help with the last bit of discoloration.
Squeeze fresh lemon juice into a small bowl, or cut a lemon and rub a slice directly over the nails. The citric acid can act as a mild brightening agent. It is a simple remedy, and while it may not work dramatically on every stain, it is often enough for that lingering yellow cast that survives the peroxide paste.
You can soak a cotton pad in lemon juice, place it over the nail, and leave it there for 10 to 15 minutes. Some people wrap the toe loosely with foil to keep the pad in place. Afterward, rinse well and dry thoroughly. One note: if the skin around your toes is cracked, recently shaved, or irritated, lemon juice may sting more than you bargained for.
Step 8: Rehydrate the Nails and Surrounding Skin
This part is easy to skip, but you really should not.
Peroxide, baking soda, remover, lemon juice, even repeated washing, all of it can strip moisture from the nail and the skin around it. Once the stain treatment is done, apply cuticle oil generously and massage it into each nail and the surrounding skin. Follow with a thicker foot cream or lotion.
That moisture helps restore flexibility. Dry nails are more likely to peel, split, and look dull, which can make them seem unhealthy even when the stain is gone. If you can, leave your nails bare for a few days afterward. A short break from Polish gives them time to recover.
Following these steps on how to remove nail polish stains from toenails will help keep your toenails looking healthy and beautiful.
Common Mistakes to Avoid
One of the worst things you can do is scrape at the nail with metal tools, especially if you are frustrated and trying to “get the yellow off” by force. That approach can rough up the nail plate and sometimes injure the skin nearby.
Pure household bleach is another hard no. It is far too harsh for cosmetic stain removal and may irritate or even burn the skin. The same goes for overdoing peroxide treatments or buffing repeatedly in one sitting. More effort does not always mean better results.
It is also tempting to hide the problem under another dark polish right away. Understandable, yes. Helpful, not really. That usually prolongs the cycle and may deepen the staining.
When to Seek Medical Help?
If the yellowing does not improve after a few attempts at cosmetic stain removal, it may be worth checking with a clinician. Persistent discoloration can point to something other than leftover polish.
Pay attention to the texture of the nail. Thickening, crumbling, lifting from the nail bed, odd shape changes, or a strong odor may suggest a fungal infection rather than a simple stain. Redness, swelling, tenderness, or rash around the nail after treatment also deserves caution. In that case, stop the home remedies and get professional advice from a podiatrist, dermatologist, or another qualified medical provider.
Frequently Asked Questions
Q1: Can I Use Whitening Toothpaste to Remove Nail Stains?
Sometimes, yes. Whitening toothpaste often contains mild abrasives and small amounts of whitening agents, which may help with light surface stains. It tends to work better on minor discoloration than on deeper staining. If you want to try it, use a small amount on a soft toothbrush, scrub gently for a minute or two, then rinse.
Q2: Why Do Dark Polishes Stain Toenails So Easily?
Dark shades usually contain stronger pigments, and those pigments can settle into the nail plate over time. Toenails are especially prone because polish often stays on them for weeks, longer than most manicures. Add no base coat, a porous nail surface, or repeated polishing, and staining becomes much more likely.
Q3: How Can I Prevent Nail Polish Stains in the Future?
The simplest preventive step is to use a clear base coat every time, especially under dark colors. That barrier matters. It reduces direct contact between the pigment and the nail itself.
You might also want to avoid leaving polish on for too long. Two weeks is a reasonable upper limit for many people. Giving your nails occasional breaks can help as well, not because they need to “breathe” in a literal sense, but because it gives you a chance to monitor their condition and avoid layering stain over stain.
Enjoy Cleaner, Healthier-Looking Toenails
Yellow polish stains can be frustrating, particularly when you were expecting the opposite of a beauty surprise. Still, they are often manageable at home with a careful approach.
A little soaking, some gentle buffing, and one or two targeted treatments may be all you need. The bigger point, really, is restraint. Go slowly. Do not attack the nail. Once the staining fades, keep up with base coat, moisture, and occasional polish-free days. Your toenails will likely look better for it, and the next pedicure will start on a much cleaner slate. Thanks for reading this guide on how to remove nail polish stains from toenails.

About the Author
Jane Hubbard is a passionate beauty expert with a wealth of experience in makeup, hair, and overall beauty techniques. After years of working as a hairdresser specialist, she followed her entrepreneurial spirit and started her own consultancy business.
Jane has always been driven by her desire to help others feel confident in their own skin, and she does this by sharing her knowledge, experiences, and practical beauty tips. Through her consultancy, she empowers individuals to embrace their unique beauty, offering tailored guidance that boosts both self-esteem and personal style.
Professional Focus
Specializes in makeup, hairstyling, and beauty consulting.
Provides personalized beauty advice, tips, and techniques to help individuals feel confident in their appearance.
Dedicated to staying up-to-date with the latest industry trends and developments.
Passionate about creating a comfortable and empowering experience for every client.
Education History
University of Craft and Design – Bachelor of Fine Arts (BFA) in Woodworking and Furniture Design
Woodworking Apprenticeships – Extensive hands-on training with skilled craftsmen to refine carpentry and furniture making techniques
Online Courses & Masterclasses – Continued education in advanced woodworking techniques, design principles, and specialized tools
Expertise:
Makeup artistry, hairstyling, and beauty consulting.
Personalized beauty techniques to enhance confidence and self-expression.
Educating clients on how to maintain their beauty routines at home.