
Are you looking to add a touch of shimmer and shine to your craft projects or DIY makeup? Look no further than mica powder! This versatile mineral pigment is perfect for adding color, texture, and sparkle to a variety of mediums. But how exactly do you use this magical substance?
Mica powder crafts a versatile and shimmering pigment that can be used in countless creative projects. Known for its vibrant colors and fine texture, this mineral-based powder is a favorite among artists, crafters, and DIY enthusiasts. Whether you’re looking to add a touch of sparkle to resin art, create stunning beauty products like soaps and cosmetics, or enhance your paintings and crafts with metallic hues, mica powder is an essential tool.
With just a few steps on how to use mica powder, you can unlock its full potential and elevate your projects to the next level.
What Are the Benefits of Using Mica Powder?
Mica powder offers a range of benefits that make it a popular choice for various artistic and creative endeavors. Some of the advantages include:
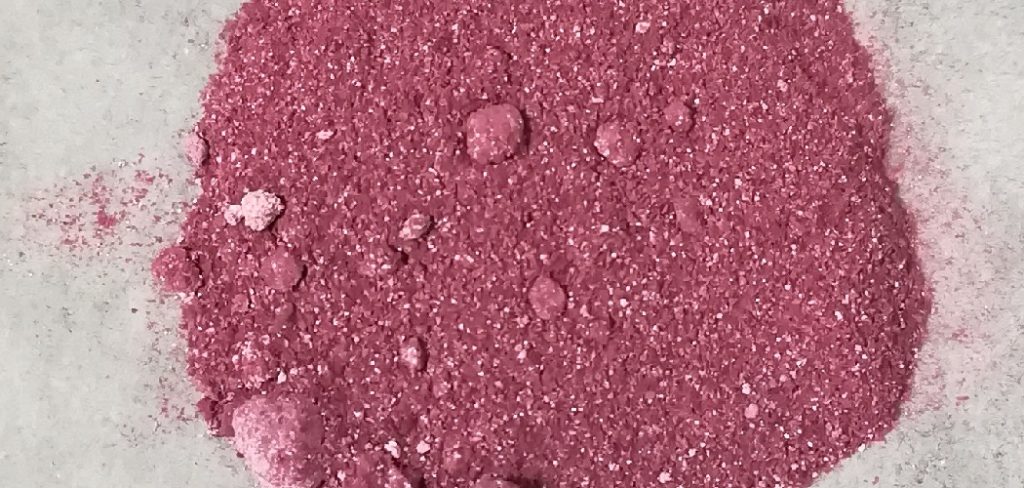
- Vibrant Colors: One of the main reasons artists love mica powder is for its brilliant, eye-catching colors. These powders come in a wide range of shades, from metallic golds and silvers to bright greens, pinks, and blues.
- Texture and Shine: Mica powder has a fine texture that gives it a smooth and silky feel. This not only makes it easy to mix with other mediums but also adds an attractive shimmer or sparkle to any project.
- Versatility: Another benefit of mica powder is its versatility. It can be mixed with a variety of mediums such as water, oil, resin, and clay to create different effects. It can also be used on various surfaces like paper, canvas, wood, and even fabrics.
- Long-lasting: Mica powder is incredibly durable once it has been incorporated into a medium. This means that artworks or crafts created with mica powder will last for years without losing their vibrancy or shine.
- Cost-effective: Compared to other pigments or colorants, mica powder is relatively affordable. A little bit goes a long way, so artists and crafters can use small amounts at a time and still achieve beautiful results.
What Will You Need?
To incorporate mica powder into your artwork or crafts, you will need a few supplies:
- Mica Powder: This can be found at most art and craft stores, as well as online.
- Medium: This can include paint, resin, clay, glue, or any other material that can hold the mica powder and create a desired effect.
- Mixing Tools: Depending on the medium used, you may need to have mixing tools such as brushes or spatulas.
- Protective Gear: Mica powder can be messy and easily dispersed into the air. It is recommended to wear gloves and a mask while working with it.
- Surfaces: You can use various surfaces, such as canvas, wood, or paper, to create your project.
- Techniques: There are endless techniques that can be used with mica powder, such as dry brushing, wet application, or mixing it with other mediums for unique effects.
10 Easy Steps on How to Use Mica Powder
Step 1. Prepare Your Workspace:
Start by selecting a well-ventilated area to work in, as mica powder can become airborne and should not be inhaled in excessive amounts. Cover the surface of your workspace with newspaper, a plastic sheet, or a drop cloth to prevent the powder from scattering and making cleanup easier. Gather all the necessary tools and materials you’ll need, such as brushes, mixing containers, adhesives, or any base surfaces you plan to work with. Make sure to have gloves, a mask, and a clean, dry cloth or paper towels nearby to protect yourself and handle any spills or excess powder during your project. Organizing your workspace ensures a smoother and more enjoyable crafting process.
Step 2. Gather Your Materials:
When gathering your materials, ensure you have all the essential items for your project before you begin. Depending on the type of craft you are working on, this could include powders in the required colors, mixing mediums, sealants, and tools like brushes or spatulas for application. Additionally, have proper storage containers or airtight bags to keep powders dry and prevent contamination. Double-check the list of materials provided in your project plan or instructions to avoid missing any critical components. Having all the necessary supplies at hand will make the process more efficient and help minimize interruptions.
Step 3. Choose a Surface:
Selecting the right surface is crucial to achieving the desired outcome for your project. Consider the characteristics of the surface, such as its texture, porosity, and durability, to ensure it is compatible with the materials you are using. Common surfaces include canvas, paper, wood, glass, or metal, each offering unique effects when combined with powders or mediums. Make sure the surface is clean and free of dust, grease, or debris before starting your work. If necessary, prepare the surface with a primer or base layer to enhance adhesion and improve the final finish. A well-chosen and properly prepared surface can significantly elevate the quality and longevity of your project.
Step 4. Use Protective Gear:
Safety should always be a priority when working with artistic materials, especially those that may release fumes or fine particles. Equip yourself with protective gear such as gloves to prevent skin irritation, a face mask or respirator to avoid inhaling harmful substances, and safety goggles to safeguard your eyes. Additionally, ensure your workspace is well-ventilated to minimize exposure to potentially hazardous chemicals. Taking these precautions not only protects your health but also allows you to focus on creating your art with peace of mind.

Step 5. Measure and Mix:
Accurately measuring and mixing your materials is crucial to achieving the desired outcome for your project. Begin by carefully reading the manufacturer’s instructions for the proper ratios of each component. Use precise measuring tools, such as graduated cups or digital scales, to ensure accuracy. Slowly add each ingredient into a clean mixing container, stirring thoroughly to create a consistent blend. Take your time during this process to prevent clumps, bubbles, or uneven textures. Proper measurement and thorough mixing lay the foundation for a successful and high-quality result.
Step 6. Apply to Surface:
Begin by preparing the surface to ensure it is clean, dry, and free from debris or contaminants that could affect adhesion. Using an appropriate applicator, such as a brush, roller, or spray tool, evenly apply the mixture onto the surface. Work methodically, starting from one edge and moving consistently across to avoid gaps or overlaps. Maintain a steady hand and even pressure to achieve a smooth and uniform application. If additional layers are required, allow the first coat to dry completely before proceeding. Follow the recommended drying and curing times for optimal results.
Step 7. Add Layers if Needed:
If the desired finish or coverage isn’t achieved with the initial coat, additional layers may be necessary. Before applying a second or subsequent layer, ensure the previous coat has dried thoroughly as per the product’s instructions. Lightly sand the surface if required to enhance adhesion between layers. Apply each layer evenly, following the same methodical approach as before. Remember, multiple thinner coats often result in a more professional and durable finish compared to fewer, thicker layers. Repeat this process until the desired outcome is obtained.

Step 8. Seal Your Artwork:
To protect your artwork and ensure its longevity, apply a clear sealant as the final step. Choose a suitable varnish or sealant based on the medium you used, such as matte, satin, or glossy finishes. Use a clean brush, sponge, or spray applicator to evenly coat the surface, avoiding excessive buildup. Allow the sealant to dry completely in a dust-free environment, following the manufacturer’s instructions for drying time. This sealing process not only enhances the appearance of your artwork but also safeguards it from moisture, UV damage, and general wear over time.
Step 9. Clean Tools and Workspace:
After completing your project, it’s important to thoroughly clean your tools and workspace to ensure they are ready for future use. Begin by washing brushes, sponges, and other reusable tools with the appropriate cleaning solution, such as soap and water for water-based mediums or solvent for oil-based products. Wipe down any surfaces and dispose of waste materials responsibly, following local guidelines for hazardous materials if applicable. Proper cleanup not only prolongs the life of your tools but also maintains an organized and safe workspace for your next creative endeavor.
Step 10. Store Properly:
To ensure your tools and materials remain in good condition, store them in a clean, dry, and organized space. Group similar items together, such as brushes, paints, or drawing instruments, and use containers, shelves, or storage bins to keep everything easily accessible. Protect delicate tools by using covers or cases, and ensure all lids and caps are securely closed to prevent drying or leakage. Label storage areas if needed to make future retrieval efficient.
By following these steps, you can prolong the lifespan of your tools and materials, saving you money in the long run.

Conclusion
Mica powder is a versatile and vibrant medium that can enhance a wide range of crafts and projects.
To use mica powder effectively, start by selecting the appropriate type and color for your project. Whether you are mixing it into resin, paint, soap, or cosmetics, ensure that the powder is thoroughly blended to achieve a smooth and even result. Always work in a clean and organized space to prevent contamination or waste. Additionally, remember to wear protective equipment, such as gloves or a mask, when handling mica powder, especially if it is airborne.
Hopefully, the article on how to use mica powder has provided you with valuable information and tips for incorporating this versatile ingredient into your projects.
About the Author
Jane Hubbard is a passionate beauty expert with a wealth of experience in makeup, hair, and overall beauty techniques. After years of working as a hairdresser specialist, she followed her entrepreneurial spirit and started her own consultancy business.
Jane has always been driven by her desire to help others feel confident in their own skin, and she does this by sharing her knowledge, experiences, and practical beauty tips. Through her consultancy, she empowers individuals to embrace their unique beauty, offering tailored guidance that boosts both self-esteem and personal style.
Professional Focus
Specializes in makeup, hairstyling, and beauty consulting.
Provides personalized beauty advice, tips, and techniques to help individuals feel confident in their appearance.
Dedicated to staying up-to-date with the latest industry trends and developments.
Passionate about creating a comfortable and empowering experience for every client.
Education History
University of Craft and Design – Bachelor of Fine Arts (BFA) in Woodworking and Furniture Design
Woodworking Apprenticeships – Extensive hands-on training with skilled craftsmen to refine carpentry and furniture making techniques
Online Courses & Masterclasses – Continued education in advanced woodworking techniques, design principles, and specialized tools
Expertise:
Makeup artistry, hairstyling, and beauty consulting.
Personalized beauty techniques to enhance confidence and self-expression.
Educating clients on how to maintain their beauty routines at home.