
Are you looking for a way to add some sparkle and shine to your nails without needing complicated tools and nail wrapping skills? Self stick silk nail wraps may be the perfect solution for you! Rich in color, luxurious in texture, and easy to apply – what more could a girl ask for? Whether it’s an upcoming special occasion or just because you feel like treating yourself, learn all about how to use self stick silk nail wrap!
Self stick silk nail wrap is a type of nail wrap made from delicate silk material. Unlike regular nail polish, you do not have to wait for it to dry or worry about smudging. It also lasts much longer than traditional manicures and pedicures, making it a popular choice among women who love long-lasting and low-maintenance nails.
What You Will Need
Before we dive into the step-by-step process of applying self stick silk nail wrap, make sure you have everything you need. Here’s what you’ll need to get started:
- Self stick silk nail wraps
- Nail polish remover
- Cuticle pusher or orange stick
- Scissors
- Tweezers (optional)
Once you have all the necessary tools, you’re ready to begin!
8 Easy Steps on How to Use Self Stick Silk Nail Wrap
Step 1: Preparation
Before applying self stick silk nail wrap, ensure your nails are clean and free of any old polish. Use a cotton pad soaked in nail polish remover to remove any traces of previous manicures.
Next, use a cuticle pusher or orange stick to push back your cuticles gently. This will create a smooth surface for the nail wrap to adhere to.
Step 2: Select and Size The Wrap
After preparing your nails, it’s time to choose the appropriate size of the self stick silk nail wrap. Usually, these wraps come in various sizes to fit different nail shapes and sizes. Hold the wrap over your nail to find the closest match – the wrap should cover your nail entirely without overlapping your skin. If it’s too large, you can use scissors to trim it down to size. Remember, it’s better to choose a slightly larger size and trim it than to choose a wrap that doesn’t cover the whole nail.
Step 3: Apply the Wrap
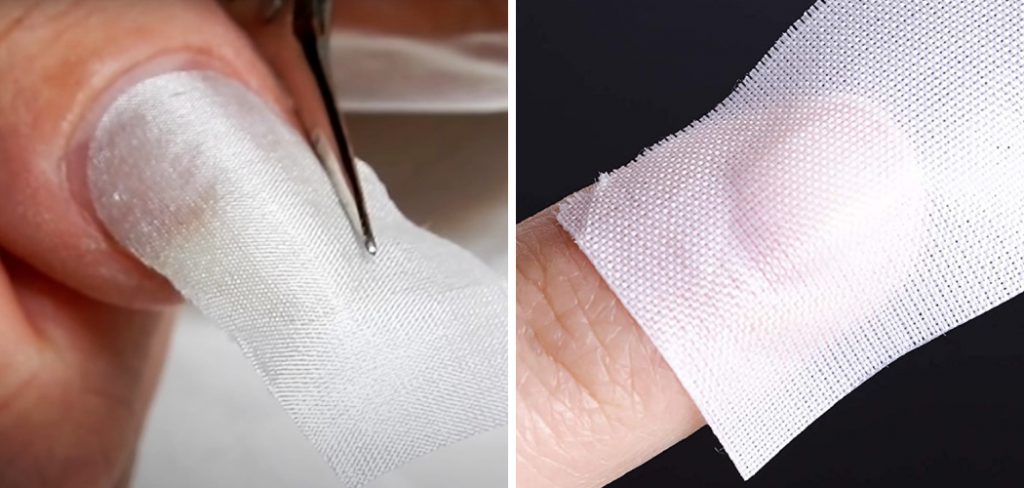
Peel off the backing of the self stick silk nail wrap carefully, taking care not to touch the adhesive side – this is where tweezers can come in handy. Align the round end of the wrap with your cuticle, then slowly press the wrap onto your nail, starting from the base and moving toward the tip. Smooth any bubbles or creases with your thumb, pressing firmly to ensure full adhesion. Don’t worry if it overlaps on the sides or the tip of the nail; we’ll take care of that in the next step.

Step 4: Shape and Seal
Once the self stick silk nail wrap is fully adhered to your nail, it’s time to shape and seal it. If any excess wrap hangs over the sides or the tip of your nail, use a nail file to file nail in a downward motion to remove it. This will give a neat, clean edge that follows the shape of your nail.
Then, run the flat edge of an orange stick or cuticle pusher over the nail’s surface (especially the edges) to ensure a firm seal. Remember, the better the seal, the longer your manicure will last. Finish by smoothing over the wrap one last time with your thumb to remove any potential air bubbles. Repeat this process for all your nails.
Step 5: Apply a Top Coat
After you’ve applied the wrap to all your nails and ensure a snug fit, the final step is to add a layer of clear nail polish or a top coat. This step is optional but highly recommended as it adds an extra layer of protection and enhances the shine of your self stick silk nail wraps.
Apply the top coat just like regular nail polish, making sure to seal the edges of your nails, too. Wait for it to dry completely. Congratulations, you now have a stunning, long-lasting manicure using self stick silk nail wraps! Remember, with proper care, these wraps can last up to two weeks. Simply soak your nails in warm water and gently peel off the wrap from one corner to remove them.
Step 6: Maintenance
Maintaining your new manicure is as easy as avoiding activities that could cause chipping or peeling. This includes avoiding soaking your hands in water for extended periods and using harsh cleaning chemicals without gloves. However, if you notice a corner or edge of your self stick silk nail wrap lifting, simply apply a dab of clear nail polish beneath it and press it down. Allow it to dry completely. Taking these simple steps will ensure your manicure remains vibrant and intact for as long as possible.
Step 7: Enjoy Your Gorgeous Nails
Now that you’ve applied, sealed, and maintained your self stick silk nail wraps, it’s time to show them off! Enjoy the durable, glamorous finish these wraps provide without the time and expense of a salon visit. Whether you’re typing, cooking, or just showing off your stylish hands to friends, love the freedom that comes with gorgeous, worry-free nails. When you’re ready for a new look, simply peel off the wraps, clean your nails, and start the process with a brand new design!
Step 8: Removal
When you’re ready to remove your self stick silk nail wraps, the process is simple and non-damaging to your natural nails. Start by soaking your nails in warm water for about 10 minutes. Once the wraps have softened, gently peel them off from one corner. If any adhesive residue remains on your nails, use a cotton pad soaked in nail polish remover to clean it off. Finish by washing your hands and moisturizing your nails with a nourishing oil or cream. This completes the removal process, leaving your nails ready for a fresh manicure or simply a rest period.
By following these eight easy steps, you can achieve stunning and long-lasting nails using self stick silk nail wraps. This process will become second nature with a little practice, making it the perfect solution for busy women who still want to rock flawless manicures!
5 Additional Tips and Tricks
- If you ever struggle with self stick silk nail wraps, don’t worry; you’re not alone! These wraps may seem easy to apply, but mastering the technique takes practice. You’ll be a pro in no time with these tips and tricks.
- You can use a small pair of scissors to trim the wrap down to your desired size. This is especially helpful for those with shorter nails or creating unique designs.
- Before applying the wrap, ensure your nails are clean and free from oils or lotions. This will help the wrap adhere better and last longer.
- If you’re having trouble getting the wrap to stick to the curved part of your nail, try using a cuticle pusher or an orangewood stick to press it down. This will help ensure the wrap is fully adhered and won’t lift.
- Don’t be afraid to mix and match different self-stick silk nail wrap designs! You can create unique looks by combining different patterns and colors.
With these additional tips and tricks, you can confidently use self stick silk nail wraps and create stunning manicures.
5 Things You Should Avoid
- Avoid applying the self stick silk nail wraps on dirty, oily, or wet nails. This severely impacts adherence, leading to premature nail wrap peeling or lifting.
- Never use a metal file to shape your nails after applying the self stick silk nail wrap, as it could tear the silk.
- Be sure to complete the step of sealing the wrap with a clear top coat. This step is crucial to protect your design and increase the longevity of your manicure.
- Avoid bathing or engaging in water-related activities immediately after applying the wrap. Giving your nails sufficient time to set and adhere properly is best.
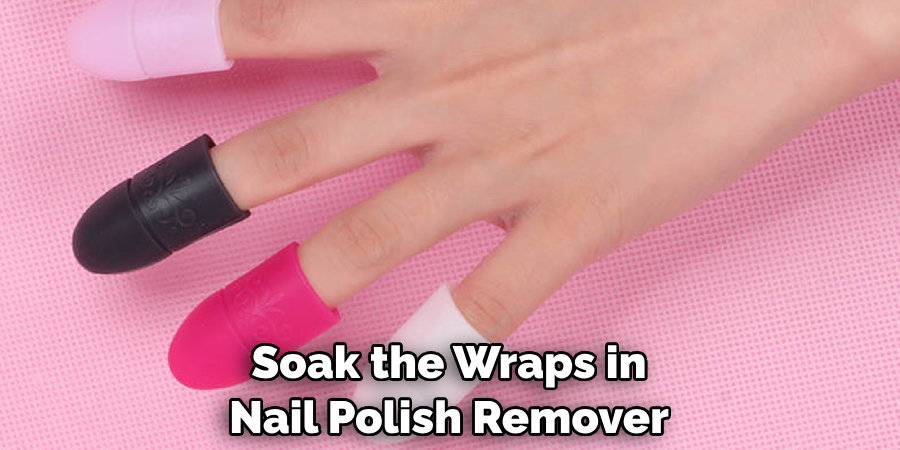
- Refrain from trying to remove the wraps prematurely or in a rush. This may damage your natural nails. Always soak the wraps in nail polish remover and gently peel them off.
By steering clear of these common mistakes, you can enhance the durability of your self stick silk nail wraps and keep your nails looking fabulous for longer.
Conclusion
There you have it! Now that you better understand how to use self stick silk nail wrap, you can create your own unique looks with concordance and confidence. With endless designs to choose from and the convenience of self stick application, these gorgeous manicures are just a few steps away.
Hopefully, these tips and tricks will help you make the most of your self stick silk nail wraps. Remember, practice makes perfect, so don’t be discouraged if it doesn’t go smoothly initially. Keep trying and experimenting with different techniques until you find what works best for you.
So why wait any longer? It’s time to treat yourself and reveal your creative side by trying out this revolutionary nail art technique. Try it out today and find that perfect look that turns heads everywhere you go!
About the Author
Jane Hubbard is a passionate beauty expert with a wealth of experience in makeup, hair, and overall beauty techniques. After years of working as a hairdresser specialist, she followed her entrepreneurial spirit and started her own consultancy business.
Jane has always been driven by her desire to help others feel confident in their own skin, and she does this by sharing her knowledge, experiences, and practical beauty tips. Through her consultancy, she empowers individuals to embrace their unique beauty, offering tailored guidance that boosts both self-esteem and personal style.
Professional Focus
Specializes in makeup, hairstyling, and beauty consulting.
Provides personalized beauty advice, tips, and techniques to help individuals feel confident in their appearance.
Dedicated to staying up-to-date with the latest industry trends and developments.
Passionate about creating a comfortable and empowering experience for every client.
Education History
University of Craft and Design – Bachelor of Fine Arts (BFA) in Woodworking and Furniture Design
Woodworking Apprenticeships – Extensive hands-on training with skilled craftsmen to refine carpentry and furniture making techniques
Online Courses & Masterclasses – Continued education in advanced woodworking techniques, design principles, and specialized tools
Expertise:
Makeup artistry, hairstyling, and beauty consulting.
Personalized beauty techniques to enhance confidence and self-expression.
Educating clients on how to maintain their beauty routines at home.