
Liquid contour can change the whole look of your makeup, though not always in the dramatic, social-media way people promise. Done well, it adds shape and quiet definition. Done badly, it can leave the face looking muddy, striped, or oddly flat. The appeal of liquid formulas is fairly simple: they tend to melt into the skin more naturally than powder, especially if you like a fresher finish and do not want obvious lines sitting on top of foundation.

At its core, contour is less about creating a new face and more about working with the one you already have. That distinction matters. If you understand where your natural shadows fall and how much product your skin can realistically handle, the technique becomes much easier. This guide on how to apply liquid contour walks through the full process, from prep to setting, with a focus on placement, restraint, and blending that actually looks believable in real life.
Tools and Materials You’ll Need
Before you start, it helps to get everything within reach. Liquid formulas do not give you endless time to think once they are on the face, particularly if you are working over a base that sets quickly. You will need a liquid or cream contour shade that is roughly two to three shades deeper than your skin tone. In most cases, a cool or neutral undertone works best because it reads more like a shadow. A warm brown may still be pretty, but it usually behaves more like bronzer than contour.
Your blending tool matters more than people sometimes admit. If you are new to this, a damp sponge is often the easiest option because it softens edges and picks up extra product before things get too intense. Some people prefer a small, angled brush or a dense synthetic complexion brush, which can give a bit more control. Synthetic bristles generally work better with creams and liquids since they do not soak up as much product. It is also worth keeping a translucent setting powder nearby, plus a fluffy brush and, if you have one, a smaller detail brush for areas like the nose.
7 Simple Step-by-Step Guidelines on How to Apply Liquid Contour
Step 1: Prep your skin and finish your base first
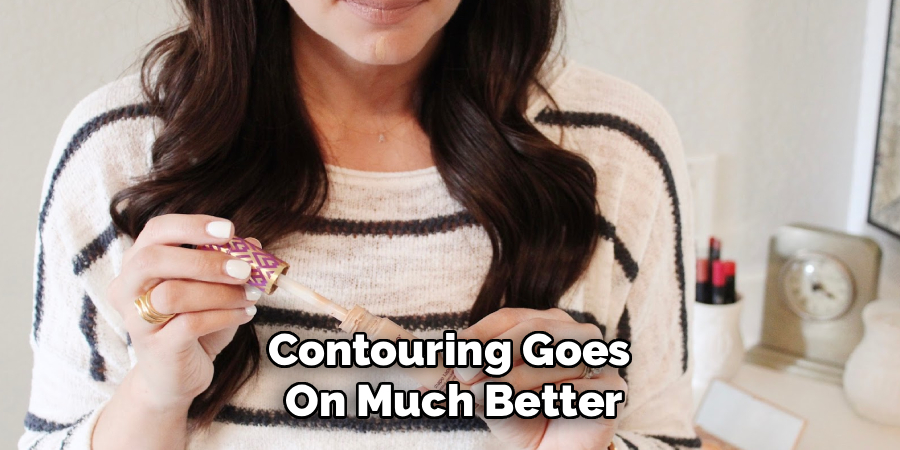
Contouring goes on much better when the skin underneath is properly prepared. Start with clean, moisturized skin so the product does not cling to dry patches or skip over texture. If you use primer, apply that next. Give it a minute to settle rather than rushing straight in with the foundation.
Once the skin is prepped, complete your base makeup first. That usually means foundation, then concealer in the places you normally brighten, such as under the eyes, the center of the forehead, and maybe the bridge of the nose. Blend all of that before contour touches your face. This part is not glamorous, but it matters: liquid contour layered over set powder tends to catch, separate, and turn patchy fast. If your base is still creamy and movable, blending becomes much easier.
Step 2: Find your natural structure before placing the product
This is the part people skip, and it is usually why contour looks off. Do not start drawing random stripes because you saw someone else do it. Look straight into the mirror. Tilt your chin slightly. Use your fingers if needed and feel where your cheekbones sit, where your jaw ends, and where your forehead naturally recedes near the hairline.
The goal is not to invent depth where none exists. It is to lightly exaggerate what is already there. For cheek placement, find the hollow beneath the cheekbone rather than the cheekbone itself. On the forehead, placement depends on your hairline and proportions; a broader forehead may benefit from a little more depth near the outer edges, while a smaller one may need very little. Along the jaw, the product generally belongs underneath the bone, not smeared across the side of the face. That small difference changes everything.
Step 3: Add contour to the cheekbones
For most people, the cheeks make the biggest visual difference. Use the wand, if your product has one, or a small brush to place two or three tiny dots just above the hollow of each cheek. Slightly above is the key here. If the contour sits too low, it can pull the face downward, which is usually the opposite of what you want.
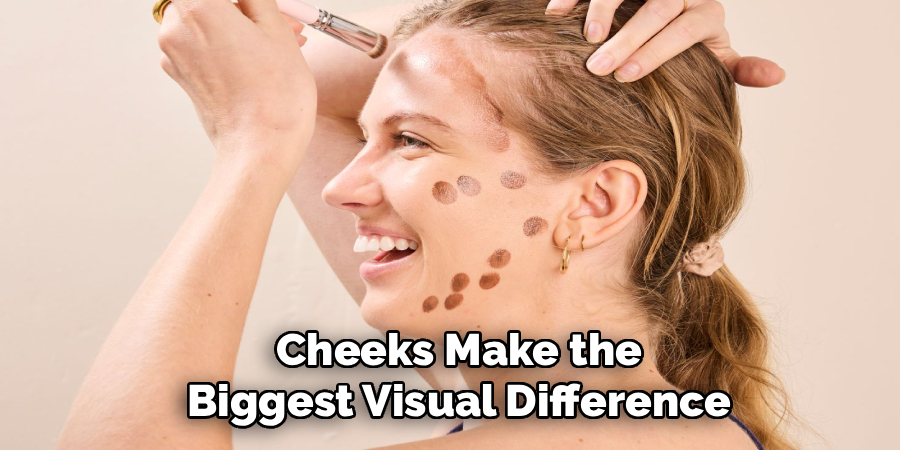
Go in with less than you think you need. Seriously. Liquid contour builds easily, but taking it away once it has spread can be annoying. After placing the product, blend right away with your sponge or brush using tapping motions. Press upward toward the temples rather than dragging back and forth. Swiping tends to move the foundation underneath and leaves a wider patch of pigment than intended. What you are after is not a visible stripe. It should look more like a soft shadow sitting close to the bone.
Step 4: Shape the forehead with a light hand
Forehead contour can help balance the face, though it does not need to be heavy. Place a small amount along the hairline, especially near the temples and outer corners. If your forehead is on the smaller side, you may not need much beyond the temples. This step is flexible, and frankly, some people can skip most of it without losing anything.
Blend back into the hairline first, then soften the lower edge into the foundation. Watch for that pale gap that sometimes appears between makeup and hair. It is subtle until it is not. You want the color to fade gradually, not stop abruptly. If the placement is right, the effect is understated: a bit more depth around the perimeter, a bit more focus toward the center of the face.
Step 5: Define the jawline carefully
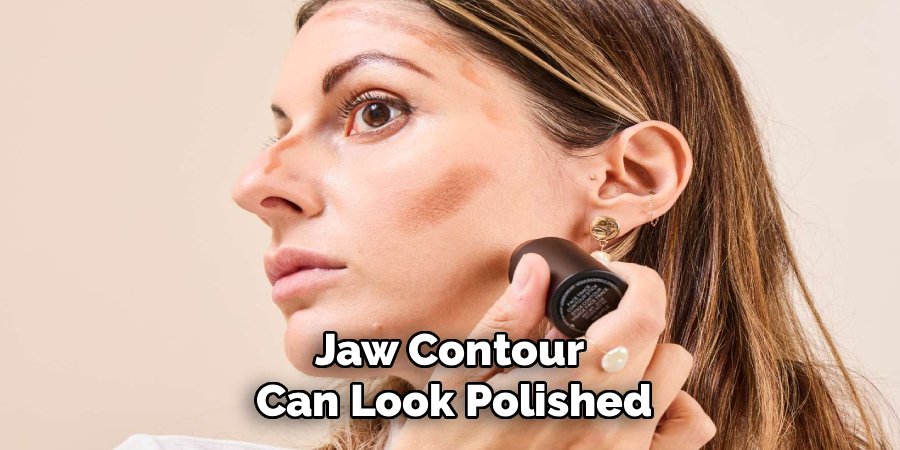
Jaw contour can look polished, but it is also one of the easiest areas to overdo. Place a few dots or a very thin line under the jawbone, beginning near the ear and stopping before the chin. There is no need to carry it all the way across unless you know it suits your face. Too much product here can be read harshly very quickly.
To blend, work downward into the neck rather than upward onto the face. That direction helps mimic the shadow the jaw would naturally cast. A clean sponge or brush helps here because leftover cheek pigment can muddy the area fast. Turn your head and check from the side if you can. Something that looks fine straight on may show a strong stripe in profile.
Step 6: Contour the nose with precision, or skip it
Nose contour is optional. That is worth saying because many guides treat it like a requirement, and it is not. If you do want to add it, use the smallest amount possible. A detail brush works better than applying straight from the wand, which usually deposits far too much product.
Draw two fine lines down the sides of the bridge, starting near the inner brow and stopping near the tip. If you like the effect of a slightly lifted or rounded tip, a tiny mark across the end of the nose may help. Then blend gently with a clean small brush or the pointed end of a sponge. Keep the center of the bridge clear so the nose still reads as narrow and defined. If the lines blur too far inward, a touch of concealer down the middle usually fixes it without much drama.
Step 7: Set the makeup so it stays put
Once everything is blended, you need to set it. Cream and liquid products can look beautiful for a while, but on most skin types, they will shift, fade, or crease if left alone. Use a light layer of translucent powder over the brighter parts of the face first, especially anywhere you applied concealer. Press or tap the powder on rather than sweeping aggressively.

For the contour itself, you have options. A very light dusting of translucent powder may be enough if you want to keep the finish soft and natural. If you prefer a stronger definition, you can set those areas with a matching powder contour or even a muted bronzer, though the undertone still matters. Too warm, and the sculpted effect starts to disappear. Finish with setting spray if that is part of your routine. It can help take down any powdery look and make the whole face feel more like skin again.
Following these steps on how to apply liquid contour will ensure a flawless and effortless application every time.
Common Mistakes to Avoid
The most common mistake is choosing a shade that is too warm. Instead of reading like shadow, it turns orange or overly bronzed, which changes the effect completely. Another issue is applying liquid contour over powdered skin. That combination tends to catch on contact, then break apart as you try to blend it. It rarely ends well.
Using too much product is another frequent problem. People often place a full stripe on each cheek when a couple of dots would have done the job. Then comes the frantic blending, which usually spreads the color too far. Direction matters too. On the cheeks especially, blending upward tends to preserve lift, while dragging the color downward can make the face look heavier than intended.
Do You Need to Use Professional Help?
Usually, no. For everyday makeup, most people can learn liquid contour at home with a bit of patience and some trial and error. It may take a few attempts to understand what placement suits your face, and that is normal. Contour is one of those techniques that looks simple when someone else does it and oddly difficult when you first try it yourself.
That said, there are situations where a makeup artist may be worth hiring. Weddings, studio photography, on-camera work, and other high-pressure events are different from everyday wear. Lighting changes how contour reads. Flash changes it again. A professional is often better equipped to judge how much definition will still look natural under those conditions. For a dinner out or a regular workday, though, you can almost certainly handle it yourself.
Frequently Asked Questions
Q1: What Is the Difference Between Bronzer and Contour?
A1: Contour is meant to imitate shadow, so it usually has a cooler or more neutral undertone. Bronzer adds warmth where the sun would naturally hit, which is why it tends to lean golden, terracotta, or reddish. They can work together, but they are not quite interchangeable.
Q2: Can I Use Concealer as a Liquid Contour?
A2: Yes, sometimes. A concealer that is two to three shades darker than your skin tone can work well if the undertone is right and the formula blends easily. Not every darker concealer makes a good contour, though. If it runs too warm or too full-coverage, it may look heavier than you want.
Q3: How Do I Fix My Contour If I Apply Too Much?
A3: Do not wipe it off. That usually creates a bigger mess. Instead, take the sponge or brush you used for foundation, with little or no added product, and tap over the area to soften the edges. If it still looks strong, add a touch of your foundation or concealer around the perimeter to blur it back into the skin.
Achieve Your Best Sculpted Look
Liquid contour is less about perfection than control. The best results usually come from small amounts, careful placement, and a willingness to step back from the mirror once in a while to see the full picture. Up close, every blend can look unfinished. From a normal distance, it may already be enough.
With practice, the process becomes much more intuitive. You learn where your face naturally wants depth and where it does not. You also learn when to stop, which might be the hardest skill of all. Start light, build slowly, and let the finished result look like your face, only a little more defined. Thanks for reading this guide on how to apply liquid contour.
About the Author
Jane Hubbard is a passionate beauty expert with a wealth of experience in makeup, hair, and overall beauty techniques. After years of working as a hairdresser specialist, she followed her entrepreneurial spirit and started her own consultancy business.
Jane has always been driven by her desire to help others feel confident in their own skin, and she does this by sharing her knowledge, experiences, and practical beauty tips. Through her consultancy, she empowers individuals to embrace their unique beauty, offering tailored guidance that boosts both self-esteem and personal style.
Professional Focus
Specializes in makeup, hairstyling, and beauty consulting.
Provides personalized beauty advice, tips, and techniques to help individuals feel confident in their appearance.
Dedicated to staying up-to-date with the latest industry trends and developments.
Passionate about creating a comfortable and empowering experience for every client.
Education History
University of Craft and Design – Bachelor of Fine Arts (BFA) in Woodworking and Furniture Design
Woodworking Apprenticeships – Extensive hands-on training with skilled craftsmen to refine carpentry and furniture making techniques
Online Courses & Masterclasses – Continued education in advanced woodworking techniques, design principles, and specialized tools
Expertise:
Makeup artistry, hairstyling, and beauty consulting.
Personalized beauty techniques to enhance confidence and self-expression.
Educating clients on how to maintain their beauty routines at home.