
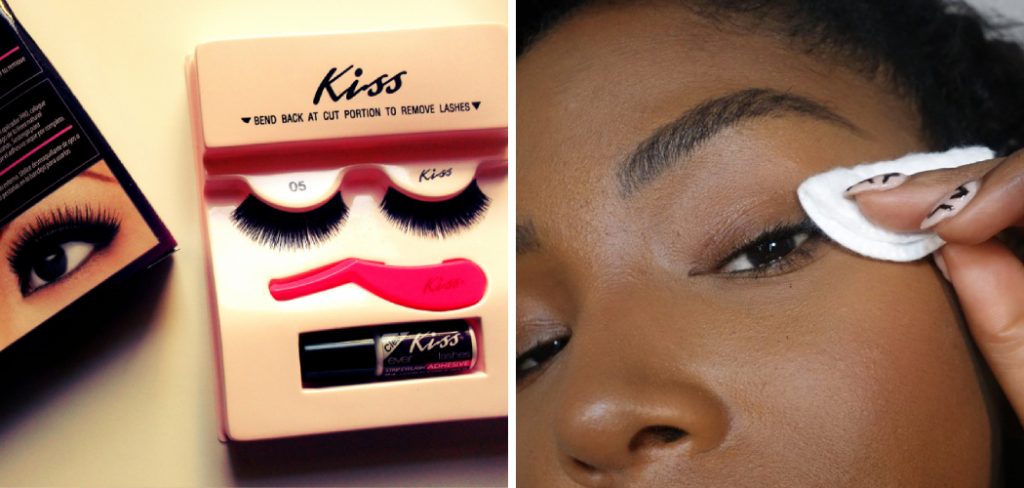
Are you tired of struggling to remove your false lashes with harsh chemicals or rubbing them off, only to damage your natural lashes in the process? Kiss Lash Bond promises to be an easy and safe alternative for lash removal. Here are some tips on effectively removing Kiss Lash Bond without any hassle.
How to get Kiss Lash Bond off can seem daunting, especially if you’re new to applying false eyelashes. Proper removal is essential to avoid damaging your natural lashes and maintaining eye health. This guide will walk you through the steps and tips on how to safely and effectively remove the Kiss lash bond without any hassle.
Whether you’re preparing for bed or simply resting your eyes, follow these instructions for a smooth and gentle removal process.
What Will You Need?
Before removing your Kiss Lash Bond, make sure you have the following items on hand:
- Gentle oil-based makeup remover
- Cotton pads or swabs
- Warm water
Once you have these items, you can start the removal process.
10 Easy Steps on How to Get Kiss Lash Bond Off
Step 1: Prepare Your Tools
Start by gently washing your hands to ensure cleanliness. This step is crucial in preventing any bacteria or dirt from getting into your eyes during removal.
Next, soak a cotton pad or swab in warm water and wring out any excess liquid. This will help soften the lash adhesive and make it easier to remove.
Step 2: Apply Oil-Based Makeup Remover
Take your oil-based makeup remover, which is particularly effective in breaking down the adhesives used in lash bonds. Apply a few drops of the remover onto the soaked cotton pad or swab. Ensure that the pad or swab is generously moistened but not dripping to prevent eye irritation. If you don’t have an oil-based makeup remover, you can use baby or coconut oil as a substitute.
Step 3: Gently Press and Hold
Close your eyes and gently press the soaked cotton pad or swab against the lash line where the Kiss Lash Bond adhesive is applied. Hold it there for about 10-15 seconds to allow the oil-based remover to break down the adhesive effectively. This step is essential to ensure that the bond is sufficiently loosened for easy removal without tugging at your natural lashes.

Step 4: Wipe Away the Adhesive
After allowing the oil-based remover to sit and break down the adhesive, it’s time to gently wipe away the loosened lash bond. Carefully swipe the cotton pad or swab along your lash line in a downward motion. Avoid rubbing or tugging at your lashes, as this can cause irritation or potential damage to your natural lashes. If you find that the adhesive isn’t coming off easily, you can reapply the oil-based remover and hold it for a few more seconds.
Step 5: Repeat if Necessary
It’s not uncommon for some adhesive residue to remain after the first wipe. If this is the case, do not worry. Simply repeat the process: apply the oil-based remover, press, and hold, and then gently wipe away the adhesive. This step ensures that all the lash bond is removed thoroughly, leaving no sticky residue behind.
Step 6: Cleanse Your Eye Area
After successfully removing all traces of the Kiss Lash Bond adhesive, it’s important to cleanse your eye area to ensure no residue or oil remains. Use a gentle, hydrating facial cleanser that is safe for the eye area. Begin by wetting your face with lukewarm water, then apply a small amount of the cleanser to your fingertips. Gently massage the cleanser around your eyes in a circular motion, making sure to avoid pulling or tugging at your skin.
Rinse thoroughly with lukewarm water and pat the area dry with a clean, soft towel. This step not only helps to remove any lingering adhesive or makeup remover but also soothes and hydrates the delicate skin around your eyes.
Step 7: Comb Through Your Lashes
Once your eye area is clean and dry, it’s time to give some attention to your natural lashes. Using a clean spoolie or lash comb, gently comb through your lashes from the roots to the tips. This step helps to remove any remaining adhesive fragments and ensures that your lashes are smooth and free from clumps. Be gentle during this process to avoid pulling out any natural lashes and to maintain their health and strength.
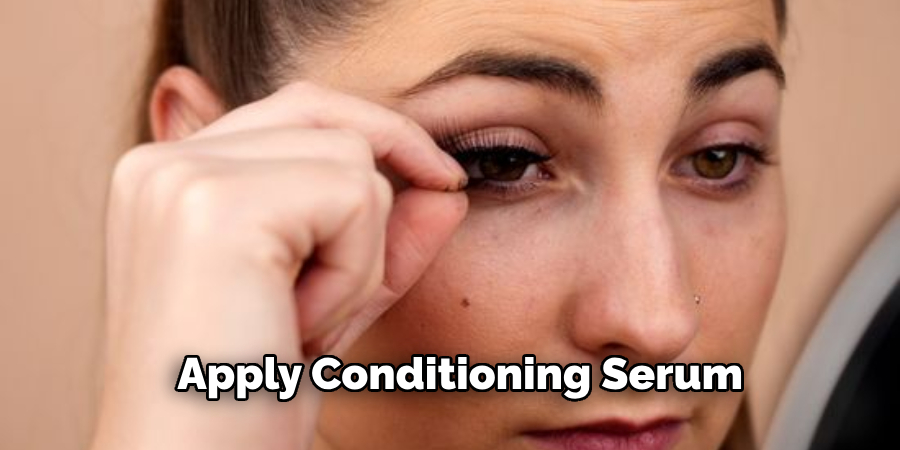
Step 8: Soothe and Hydrate Your Lashes
Your natural lashes may feel a bit dry or brittle after the removal process, so it’s vital to provide them with some nourishment. Apply a small amount of lash conditioning serum or natural oil like castor oil or coconut oil to your lashes. Use a clean cotton swab or a spoolie to apply the product, ensuring it reaches your lashes’ roots. These oils are rich in nutrients and will help to strengthen and moisturize your lashes, promoting healthier and fuller growth over time.
Step 9: Rest Your Eyes
After a thorough removal process, your eyes and lashes deserve a rest. It’s beneficial to take a break from wearing any eye makeup or false lashes for at least 24 hours to allow your eye area to recover. During this period, avoid rubbing your eyes or using any harsh products around the eye area. Allowing your lashes to breathe and recover will help maintain their strength and health in the long run.
Step 10: Follow-Up Care
Taking care of your lashes doesn’t stop with just the removal process. Incorporating lash-friendly habits into your daily routine can make a world of difference in maintaining the health and appearance of your lashes. Consider using a gentle eye makeup remover, avoid rubbing your eyes, and use lash-conditioning serums regularly. These small steps contribute to keeping your natural lashes strong, healthy, and prepared for the next time you choose to apply false lashes.
Following these easy steps and tips can make removing the Kiss Lash Bond straightforward and gentle.
5 Additional Tips and Tricks
- Oil-Based Makeup Remover: Apply an oil-based makeup remover to a cotton pad and gently press it against your lash line. The oil helps break down the adhesive, making it easier to remove the kiss lash bond.
- Steam Treatment: Fill a bowl with hot water and lean over it, creating a tent with a towel to trap the steam. The steam will help loosen the adhesive, allowing the lashes to be removed with minimal effort.
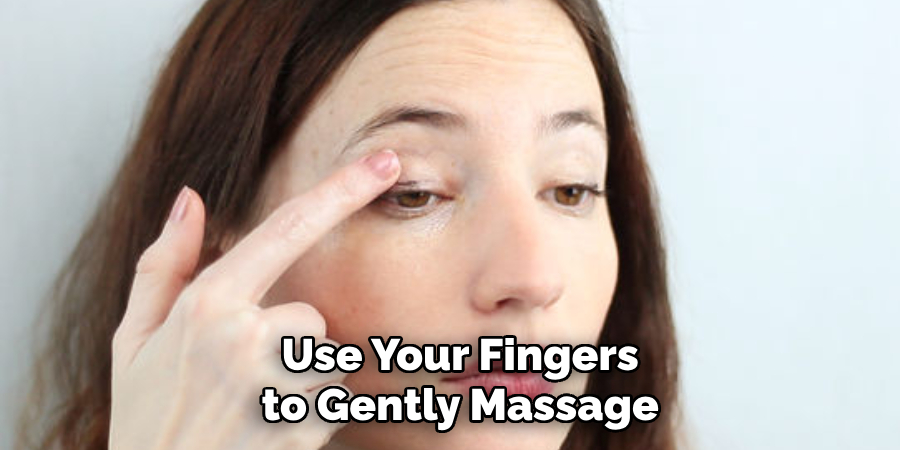
- Gentle Massaging: Use your fingers to gently massage the lash line with a light oil, such as coconut or olive oil. This can help dissolve the bond and make the lashes easier to peel off.
- Micellar Water: Soak a cotton pad with micellar water and place it over your eyes for a few minutes. Micellar water is effective at breaking down makeup and adhesives, aiding in the removal process.
- Eyelash Glue Remover: Consider using a product specifically designed to remove eyelash adhesive. These removers are formulated to safely and effectively dissolve the bond without harming your natural lashes. Apply a small amount to your lash line and wait a few minutes before gently removing the lashes.
With these additional tips and tricks, you can safely and easily remove your kiss lashes without causing any damage to your natural lashes.
5 Things You Should Avoid
- Pulling or Tugging: Avoid forcefully pulling or tugging at your lashes, as this can cause damage to your natural lashes and the delicate skin around your eyes. Instead, be patient and use one of the gentle methods mentioned above.
- Using Harsh Chemicals: Do not use strong chemicals or solvents not designed for lash removal, as they can harm your eyes and skin. Stick to products that are specifically formulated for removing eyelash adhesive.
- Rubbing Your Eyes: Do not rub your eyes with your fingers or a rough cloth. This can irritate the skin and potentially lead to infections. Gentle dabbing with appropriate products is the best approach.
- Skipping a Patch Test: Never skip the patch test when trying a new removal product. Apply a small amount to a less sensitive area first to ensure you don’t have an allergic reaction or irritation.
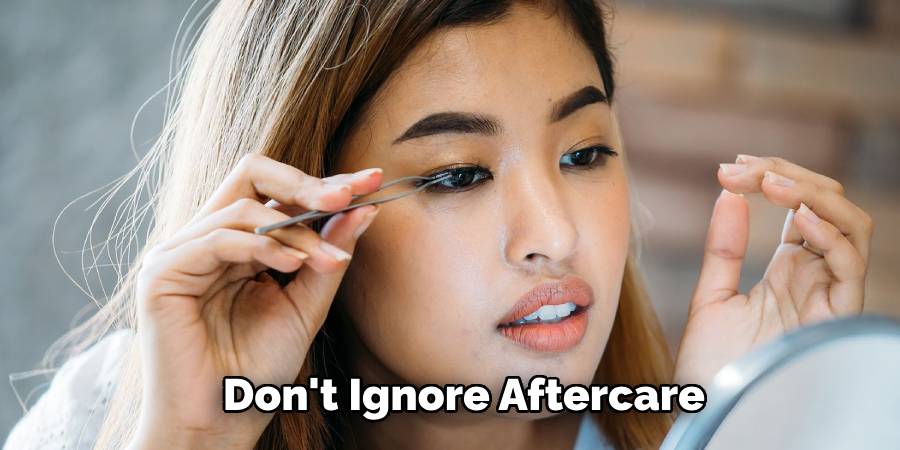
- Ignoring Aftercare: After removal, avoid neglecting your lashes and the skin around your eyes. Cleanse your face thoroughly and apply a soothing eye cream or oil to keep the area hydrated and healthy.
By avoiding these common mistakes, you can ensure a safe and successful removal process for your kiss lashes.
Conclusion
In conclusion, how to get kiss lash bond off requires a combination of patience and the right techniques.
Utilizing products like oil-based makeup removers, micellar water, or specialized eyelash glue removers can significantly ease the process and protect your natural lashes. Steam treatments and gentle massaging with oils can also help in loosening the adhesive without causing harm. It’s crucial to avoid common pitfalls such as pulling or tugging, using harsh chemicals, or neglecting aftercare routines.
By following the tips and tricks outlined and steering clear of damaging practices, you can maintain the health and beauty of your natural lashes while effectively removing the kiss lash bond.
About the Author
Jane Hubbard is a passionate beauty expert with a wealth of experience in makeup, hair, and overall beauty techniques. After years of working as a hairdresser specialist, she followed her entrepreneurial spirit and started her own consultancy business.
Jane has always been driven by her desire to help others feel confident in their own skin, and she does this by sharing her knowledge, experiences, and practical beauty tips. Through her consultancy, she empowers individuals to embrace their unique beauty, offering tailored guidance that boosts both self-esteem and personal style.
Professional Focus
Specializes in makeup, hairstyling, and beauty consulting.
Provides personalized beauty advice, tips, and techniques to help individuals feel confident in their appearance.
Dedicated to staying up-to-date with the latest industry trends and developments.
Passionate about creating a comfortable and empowering experience for every client.
Education History
University of Craft and Design – Bachelor of Fine Arts (BFA) in Woodworking and Furniture Design
Woodworking Apprenticeships – Extensive hands-on training with skilled craftsmen to refine carpentry and furniture making techniques
Online Courses & Masterclasses – Continued education in advanced woodworking techniques, design principles, and specialized tools
Expertise:
Makeup artistry, hairstyling, and beauty consulting.
Personalized beauty techniques to enhance confidence and self-expression.
Educating clients on how to maintain their beauty routines at home.