
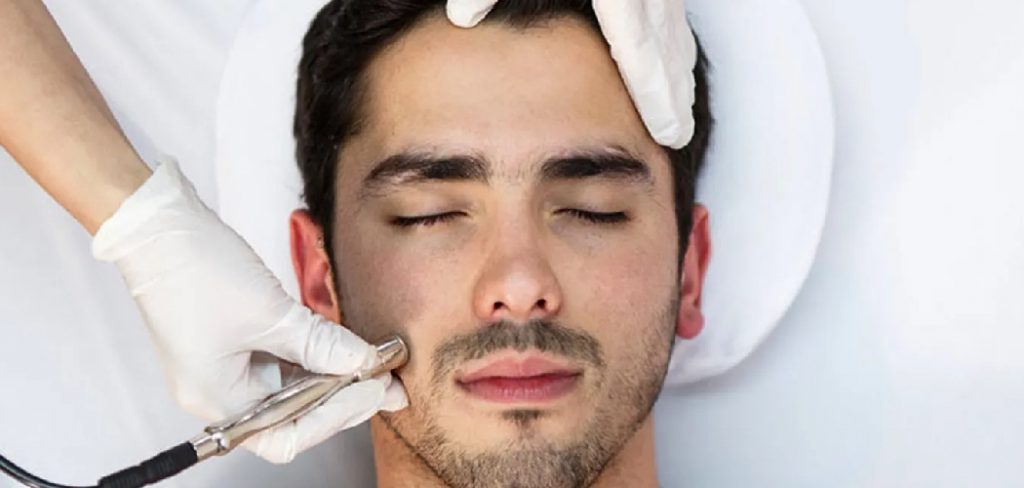
Are you tired of constantly shaving or waxing your hair? Hair removal creams offer an easy and painless way to remove unwanted hair from your body. They are also a more affordable alternative to laser hair removal treatments.
How to make hair removal cream can be a time-consuming and sometimes costly process, but making your hair removal cream at home can be a natural, affordable, and effective alternative. With a few simple ingredients, you can create a gentle solution on the skin free from harsh chemicals often found in store-bought products.
This guide on diy hair removal cream will walk you through the basics of crafting your own DIY hair removal cream, helping you achieve smooth and hair-free skin from the comfort of your home.
What Are the Benefits of Homemade Hair Removal Cream?
There are many benefits to making your hair removal cream at home:
- Natural Ingredients: By using natural ingredients, you can avoid harsh chemicals that can irritate the skin.
- Cost-effective: Making your hair removal cream is much cheaper than buying it from a store.
- Customizable: You can tailor the ingredients to suit your skin type and needs.
- Easy to Make: With just a few simple steps, you can create your hair removal cream without specialized equipment or skills.
Now that you know why making your hair removal cream is beneficial, let’s start on how to make one.
What Will You Need?
Here are the ingredients and materials you will need to make your hair removal cream:
- 1 Cup of Sugar: This acts as a natural exfoliant, helping to remove dead skin cells.
- 2 Tablespoons of Lemon Juice: Lemon juice has natural bleaching properties and helps to lighten hair.
- 2 Tablespoons of Honey: Honey is known for its moisturizing and antibacterial properties, making it ideal for sensitive skin.
- A Small Pot or Saucepan: You will use this to heat and mix the ingredients.
- Spatula or Spoon: To stir the mixture while heating.
- Glass Jar with Lid: Once cooled, store the hair removal cream in this jar.
Once you have gathered all the necessary ingredients and materials, it’s time to start making your hair removal cream.

8 Easy Steps on How to Make Hair Removal Cream
Step 1. Combine the Ingredients:
Add the cup of sugar, two tablespoons of lemon juice, and two tablespoons of honey into a small pot or saucepan. Ensure the ingredients are measured accurately for the best results. The sugar acts as the main component of the mixture, while the lemon juice and honey provide both consistency and skin-care benefits. Stir the ingredients lightly to distribute them before applying heat evenly evenly evenly.
Step 2. Heat the Mixture:
Place the pot or saucepan on the stove over low to medium heat. Stir the mixture continuously with a spatula or spoon to prevent it from sticking to the bottom or burning. It’s essential to heat the mixture slowly to allow the sugar to dissolve completely and combine smoothly with the honey and lemon juice.
The mixture starts to bubble and take on a thick, syrup-like consistency. This process usually takes about 5–7 minutes. Monitor the heat closely—overheating can cause the sugar to caramelize too much, resulting in a mixture that is too hard for application. Once the mixture reaches a golden-brown color and has a smooth texture, remove it from the heat and allow it to cool slightly before moving to the next step.
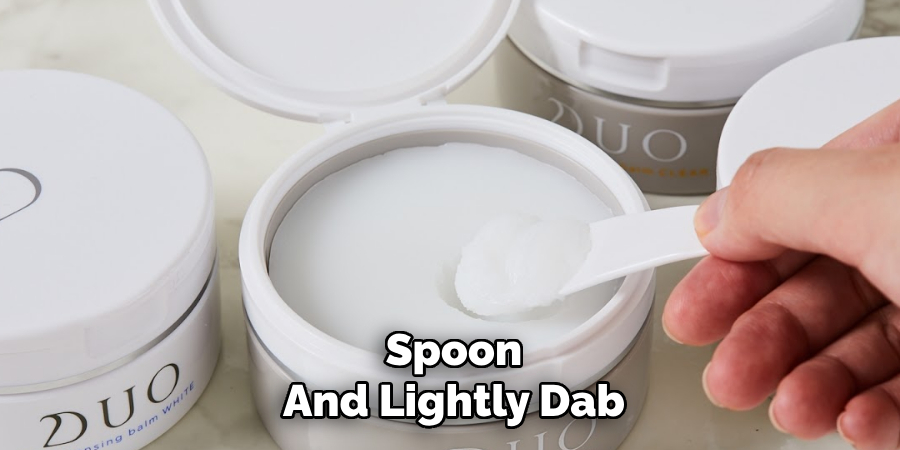
Step 3. Test the Temperature:
Before applying the mixture, it’s crucial to ensure it has cooled to a safe temperature to avoid burns. To test, take a small amount of the mixture on the back of a spoon and lightly dab it onto the inside of your wrist. The mixture should feel warm but not hot. If it’s too hot, allow it to cool for a few more minutes and test again. Once the mixture reaches a comfortable temperature, it’s ready for application.
Step 4. Apply the Mixture:
Using a wooden spatula or a similar applicator, spread a thin layer of the mixture toward hair growth on the area you wish to treat. Ensure the layer is even and not too thick to remove effectively. Next, press a clean cloth or waxing strip firmly over the applied mixture, leaving a slight edge free for gripping. Smooth the strip down firmly toward hair growth to ensure it adheres properly.
Step 5. Remove the Strip:
Hold your skin taut with one hand to minimize discomfort. On the other hand, quickly and firmly pull the strip off in the opposite direction of hair growth. Pulling the strip parallel to your skin rather than upward is vital to reduce pain and achieve better results. Repeat this process on other areas as needed, reapplying the mixture and fresh strips. Discard used strips after each pull.
Step 6. Soothe the Skin:
After completing the hair removal process, it’s crucial to care for your skin to prevent irritation or redness. Begin gently rinsing the treated area with lukewarm water to remove the residual mixture. Pat the skin dry with a soft, clean towel—avoid rubbing to minimize sensitivity.
Apply a soothing product such as aloe vera gel, chamomile lotion, or a fragrance-free moisturizer to calm the skin and reduce inflammation. If you notice redness or mild irritation, consider applying a cold compress to the area for 5-10 minutes to provide relief.
Avoid harsh soaps, exfoliants, or makeup on the treated area for at least 24 hours, as your skin may be more sensitive. Proper aftercare ensures comfort and helps maintain smooth, healthy skin.
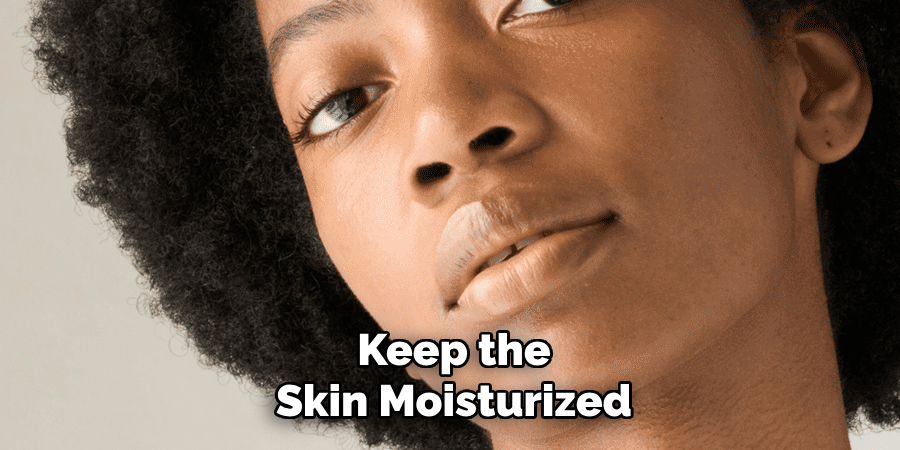
Step 7. Maintain Results:
To prolong the smoothness and keep your skin healthy, it’s essential to maintain a proper care routine post-hair removal. Exfoliate the treated area gently after 2-3 days to prevent ingrown hairs, using a mild scrub or exfoliating glove.
Keep the skin moisturized daily with a hydrating, fragrance-free lotion to retain its softness and elasticity. Additionally, avoid prolonged sun exposure or tanning on the treated area for at least 48 hours to protect the skin from irritation or discoloration.
Regular maintenance and care will help you enjoy longer-lasting results and ensure your skin remains vibrant and radiant.
Step 8. Schedule Your Next Session:
Consistency is key to achieving the best results with hair removal. Plan your next session accordingly, depending on your chosen method and hair growth cycle.
This is usually every 4-6 weeks for waxing or sugaring, while laser hair removal may require sessions spaced several weeks apart. Keeping a regular schedule helps remove the hairs at optimal growth, resulting in smoother, longer-lasting outcomes. Mark your calendar and stay committed to your routine for the best skin care results.
By following these easy steps, you can create and use your homemade hair removal cream safely and effectively.
5 Things You Should Avoid
- Using Harsh Chemicals: Avoid incorporating harsh or untested chemicals into your recipe, as they can cause skin irritation, burns, or allergic reactions. Always prioritize skin-safe ingredients.
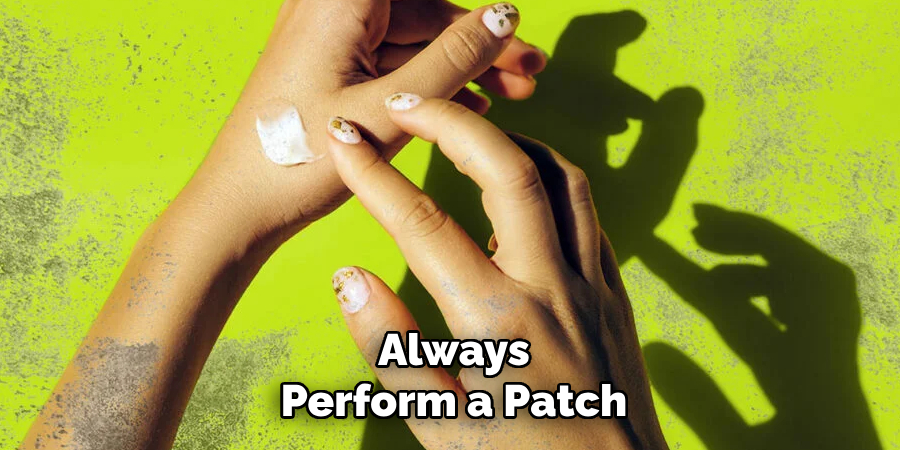
- Skipping a Patch Test: Never skip a patch test before applying the cream to larger areas. Testing ensures the product doesn’t cause adverse reactions to sensitive skin types.
- Ignoring Ingredient Proportions: Using incorrect proportions of ingredients can lead to an ineffective or overly harsh cream. Follow precise measurements to maintain balance and safety.
- Applying to Broken or Irritated Skin: Never apply hair removal cream on cuts, rashes, or sensitive skin areas. Doing so may further aggravate the condition and cause discomfort.
- Neglecting to Research Quality Ingredients: Avoid using low-quality or unverified ingredients. Proper research ensures you’re using the best materials and eliminates unnecessary risks for your skin.
How Can You Add Flavor and Scent to Your Hair Removal Cream?
There are several ways to add flavor and scent to your hair removal cream while still ensuring it is safe and effective for use on your skin. Here are some ideas to consider:
- Natural Essential Oils: Essential oils provide a pleasant scent and have many beneficial properties for the skin. Some popular options for hair removal creams include lavender, tea tree, peppermint, and lemon essential oils.
- Herbs and Spices: Adding dried herbs or spices can give your cream a unique scent and added benefits for the skin. For example, adding a pinch of cinnamon powder can help improve circulation and reduce redness, while rosemary can have anti-inflammatory properties.
- Fruit Extracts: Fruit extracts, such as strawberry or mango, can give your cream a fruity scent while providing nourishment and protection for the skin.
- Floral Waters: Floral waters, also known as hydrosols, are created from the steam distillation of plants and flowers. They provide a subtle scent and can add moisture to the cream.
- Food-Grade Flavorings: If you want a more unique scent for your cream, consider using food-grade flavorings like vanilla or almond extract. Just be sure to use them in small amounts to avoid overpowering the other ingredients.
Remember to do a patch test first and use only high-quality, skin-safe ingredients when incorporating any of these options into your hair removal cream.
Conclusion
How to make hair removal cream at home can be a simple and customizable process that caters to your specific skin needs.
By carefully selecting natural, skin-friendly ingredients and incorporating optional additives for fragrance or additional benefits, you can create a product that is both effective and gentle. Always perform a patch test before using the cream to ensure it is safe for your skin.
You can enjoy smooth, healthy skin without commercial products with the right techniques and attention to detail.
About the Author
Jane Hubbard is a passionate beauty expert with a wealth of experience in makeup, hair, and overall beauty techniques. After years of working as a hairdresser specialist, she followed her entrepreneurial spirit and started her own consultancy business.
Jane has always been driven by her desire to help others feel confident in their own skin, and she does this by sharing her knowledge, experiences, and practical beauty tips. Through her consultancy, she empowers individuals to embrace their unique beauty, offering tailored guidance that boosts both self-esteem and personal style.
Professional Focus
Specializes in makeup, hairstyling, and beauty consulting.
Provides personalized beauty advice, tips, and techniques to help individuals feel confident in their appearance.
Dedicated to staying up-to-date with the latest industry trends and developments.
Passionate about creating a comfortable and empowering experience for every client.
Education History
University of Craft and Design – Bachelor of Fine Arts (BFA) in Woodworking and Furniture Design
Woodworking Apprenticeships – Extensive hands-on training with skilled craftsmen to refine carpentry and furniture making techniques
Online Courses & Masterclasses – Continued education in advanced woodworking techniques, design principles, and specialized tools
Expertise:
Makeup artistry, hairstyling, and beauty consulting.
Personalized beauty techniques to enhance confidence and self-expression.
Educating clients on how to maintain their beauty routines at home.