
Are you looking for an easy way to make sure your makeup stays put all day? Prepping your face before applying cosmetics can help ensure that your look is flawless from the start. From choosing the right products to understanding which steps and techniques are essential, there’s a lot to learn when prepping skin for makeup.
Makeup prep doesn’t have to be complicated or time-consuming. In fact, with just a few key steps and products, you can create the perfect base for your makeup routine in no time. So whether you’re a beginner or an experienced makeup lover, keep reading to learn how to prep face for makeup for flawless application.
We’re here to provide guidance on how you can best prepare your face so that you have nothing but beautiful results with only a few simple steps.
What Will You Need?
To achieve a flawless makeup look, you must have some essential products ready. These include:
- Cleanser
- Toner
- Moisturizer
- Primer
It’s important to choose products that work well with your skin type, as this will ensure that your makeup lasts longer and looks better throughout the day.
10 Easy Steps on How to Prep Face for Makeup
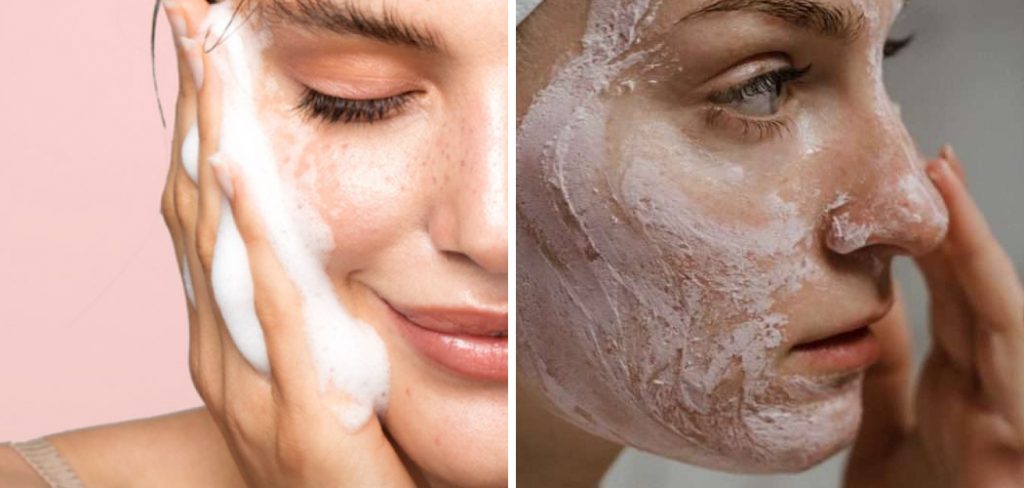
Step 1: Cleansing
The first step in prepping your face is to cleanse your skin. This process removes dirt, dust, and excess oils that accumulate on your face during the day or night. Use a cleanser that suits your skin type and gently massage it onto your face in circular motions. Rinse with lukewarm water and pat your face dry with a clean towel. Remember, a clean face is the ideal canvas for flawless makeup application.
Step 2: Toning
After cleansing, the next vital step is to tone your skin. A toner helps to balance your skin’s pH levels, tighten your pores, and remove any residual dirt or cleanser left behind. Saturate a cotton pad with your chosen toner and sweep it gently across your face, focusing on your T-zone (forehead, nose, and chin). Avoid the eye area as the skin there is more sensitive. Allow the toner to dry naturally on your skin before moving on to the next step. This step prepares your face for the absorption of the moisturizer.

Step 3: Moisturizing
Moisturizing is a critical step in prepping your face for makeup. It hydrates your skin, making it smooth and soft, making the application of makeup more accessible and more even. Depending on your skin type, choose a moisturizer that best suits you. For oily skin, opt for a lightweight, oil-free moisturizer, whereas for dry skin, a more decadent cream is preferable. Apply the moisturizer evenly across your face and neck, paying particular attention to dry areas. Allow it to absorb for a few minutes before moving on to the next step. This step nourishes your skin and ensures that makeup blends seamlessly for a natural-looking finish.
Step 4: Priming
Applying a primer is the final step in prepping your face for makeup. A primer smooths the skin’s surface, minimizes the appearance of pores, and creates an ideal base for your foundation and other makeup. It also helps to keep your makeup in place throughout the day. Choose a primer that works well with your skin type and the makeup products you plan to use. Apply the primer evenly across your face, focusing on areas where your makeup tends to fade first, like the nose and forehead. Allow it to set for a few minutes before proceeding with your makeup application. With this, your face is now well-prepared for a flawless makeup application.
Step 5: Foundation Application
After your face is well-prepared with cleansing, toning, moisturizing, and priming, it’s time to apply your foundation. Choose a foundation that matches your skin tone for a natural look. For best results, use a foundation brush or sponge to apply. Start from the center of your face and blend outwards to ensure a smooth, even application. Pay special attention to blend well around your jawline and hairline to avoid visible lines. Allow the foundation to settle on your skin before moving on to the next step. This step will give your skin a uniform color and provide a perfect base for the rest of your makeup.
Step 6: Concealer Application
The next step in prepping your face for makeup is applying concealer. A concealer helps hide blemishes, redness, dark circles, and uneven skin tone. Choose a concealer with the same shade or one shade lighter than your foundation for the most natural look. Using a concealer brush or your fingertip, gently dab the concealer onto the problem areas, ensuring it does not to rub or blend too harshly. Apply the concealer in a triangle shape under your eye for a brightening effect for under-eye circles. Blend the concealer well into your foundation to avoid any stark color differences.
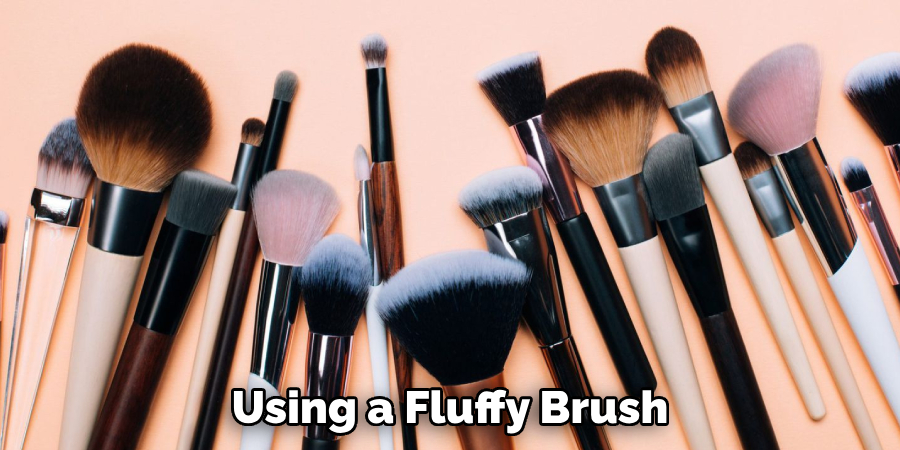
Step 7: Setting Your Makeup
Once you’ve perfected your foundation and concealer, it’s time to set it all in place. Setting powder helps to lock in your makeup, preventing it from creasing or fading throughout the day. Using a fluffy brush, gently dust setting powder all over your face, paying special attention to areas prone to oiliness, such as the T-zone. If you prefer a dewy look over matte, you can skip the areas of your face that you want to keep glowing. Remember, less is more with setting powder and too much can make your makeup look cakey. After applying setting powder, your makeup is now set for the day!
Step 8: Applying Blush and Bronzer
To bring some color and dimension back to your face after foundation and concealer, blush, and bronzer come into play. Start with the bronzer, choosing a shade one or two shades darker than your natural skin tone. Apply it to the areas of your face that the sun would naturally hit, like the tops of your cheeks, forehead, and jawline. This will give your face a warm, sun-kissed look. Follow up with blush, applying it to the apples of your cheeks for a natural, healthy flush. Remember to blend well to avoid any harsh lines or patches. This step will ensure your makeup look has depth and a natural-looking glow.
Step 9: Eye Makeup Application
Eye makeup is essential to enhance your eyes and complement the rest of your makeup look. Start with an eyeshadow primer to create a smooth canvas for your eyeshadow and to improve its longevity. Then, apply your chosen eyeshadow colors. Generally, a lighter shade is used on the lid, a medium shade in the crease, and a darker shade in the outer v for depth and dimension. Next, apply an eyeliner to define your eyes. You can choose between a pencil, liquid, or gel eyeliner, depending on your preference and the look you’re aiming for. Finally, apply mascara to your lashes for added volume and length.
Step 10: Lip Makeup Application
The final touch to your makeup application process is the lip makeup. You are prepping your lips with a lip balm to hydrate and smooth them. If you desire a more defined lip look, outline your lips with a lip liner that matches your lipstick color. Then, apply your chosen lipstick or lip gloss, starting from the center of your lips and blending towards the corners. You can blot your lips with a tissue and reapply the lipstick for a more lasting lip color. This step ties your makeup look together, adding a final pop of color to your face.

By following these steps on how to prep your face for makeup, you’ll create a smooth and flawless canvas for your makeup application.
5 Things You Should Avoid
- Over-exfoliating Your Skin: Over-exfoliating can lead to redness, inflammation, and skin sensitivity. Always be gentle when exfoliating and limit this to once or twice a week, based on your skin type and requirements.
- Skipping Sunscreen: Sunscreen is a must, even on cloudy days. UV rays can penetrate clouds and windows, causing premature aging and increasing the risk of skin cancer. Always apply broad-spectrum sunscreen with at least SPF 30 after your moisturizer.
- Using Dirty Makeup Brushes: Dirty brushes can harbor bacteria that can cause breakouts and skin irritation. It’s essential to keep your makeup brushes clean and sanitized, ideally cleaning them after each use.
- Sleeping with Makeup On: Always remove your makeup before going to bed as leaving it on can clog your pores, leading to breakouts and dull skin.
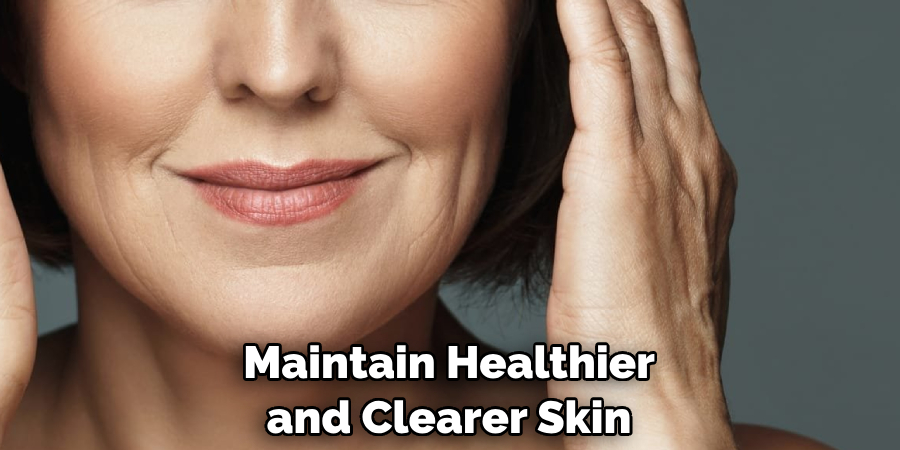
- Ignoring Your Skin Type When Choosing Products: Not all skin products will suit your skin type. Always ensure that you choose products that are formulated for your skin type. This will help maintain healthier and clearer skin.
Remember, prepping your face for makeup is just as important as the makeup application itself. Follow these tips and avoid these common mistakes to achieve a flawless and long-lasting makeup look.
Conclusion
Finally, to master the art of applying makeup flawlessly, it’s important to remember that prepping your face is vital. With the tips highlighted above, you are now equipped with the knowledge to properly prepare your face for makeup. It’s time for you to take action by dedicating a few moments each morning or evening to prepping your skin!
Hopefully, this article has been helpful and informative in teaching you how to prep face for makeup. Remember, caring for your skin is essential for flawless makeup, so make sure to take advantage of the prepping step.
Cleanse, exfoliate, and moisturize regularly, and you’ll notice a marked difference in how your makeup looks and feels during application and all day. So don’t wait any longer – get out there and start showing off your perfect makeup look every day!
About the Author
Jane Hubbard is a passionate beauty expert with a wealth of experience in makeup, hair, and overall beauty techniques. After years of working as a hairdresser specialist, she followed her entrepreneurial spirit and started her own consultancy business.
Jane has always been driven by her desire to help others feel confident in their own skin, and she does this by sharing her knowledge, experiences, and practical beauty tips. Through her consultancy, she empowers individuals to embrace their unique beauty, offering tailored guidance that boosts both self-esteem and personal style.
Professional Focus
Specializes in makeup, hairstyling, and beauty consulting.
Provides personalized beauty advice, tips, and techniques to help individuals feel confident in their appearance.
Dedicated to staying up-to-date with the latest industry trends and developments.
Passionate about creating a comfortable and empowering experience for every client.
Education History
University of Craft and Design – Bachelor of Fine Arts (BFA) in Woodworking and Furniture Design
Woodworking Apprenticeships – Extensive hands-on training with skilled craftsmen to refine carpentry and furniture making techniques
Online Courses & Masterclasses – Continued education in advanced woodworking techniques, design principles, and specialized tools
Expertise:
Makeup artistry, hairstyling, and beauty consulting.
Personalized beauty techniques to enhance confidence and self-expression.
Educating clients on how to maintain their beauty routines at home.