
Are you looking for a fuss-free, natural-looking makeup look? Cushion Foundation might be the answer for you.
Cushion foundation, a staple in the realm of K-beauty, has gained worldwide popularity for its innovative design and flawless finish. Combining the convenience of a compact with the liquid coverage of a foundation, it offers a lightweight formula that promises to deliver a dewy, luminous complexion.
Ideal for on-the-go touch-ups, its sponge applicator allows for a seamless application, ensuring an even and natural look. Whether a makeup novice or a seasoned pro, mastering the cushion foundation can elevate your beauty routine, giving you that sought-after radiant glow.
In this guide, we’ll explore how to use cushion foundation, tips for choosing the correct shade, and additional tricks to enhance your overall makeup experience.
What are the Benefits of Using Cushion Foundation?
Before diving into the application process, let’s understand why cushion foundation has taken the beauty world by storm. Here are some of its benefits:
- Easy to Use: With its compact and sponge applicator, the cushion foundation offers a user-friendly and mess-free makeup experience.
- Natural Finish: The lightweight formula seamlessly blends with the skin, giving a natural, radiant look perfect for everyday wear.
- Buildable Coverage: The cushion foundation allows you to control the level of coverage, depending on the number of layers applied, making it suitable for various occasions and preferences.
- Hydrating Properties: Most cushion foundations are infused with hydrating ingredients like hyaluronic acid or glycerin, which moisturize your skin throughout the day.
- Spf Protection: Many cushion foundations come with SPF, providing sun protection and eliminating the need for an additional layer of sunscreen.
Now that we’ve covered the benefits, let’s move on to the steps for using cushion foundations effectively.
What Will You Need?
- A cushion foundation compact of your choice
- A cushion sponge or a beauty blender
- A clean and moisturized face
Once you have these items ready, you’re all set to begin!
10 Easy Steps on How to Use Cushion Foundation
Step 1: Prep Your Skin

Prepping your skin is the foundational step to ensure your cushion foundation applies smoothly and lasts longer. Start by thoroughly cleansing your face to remove any impurities or leftover makeup. After cleansing, apply a lightweight moisturizer to hydrate your skin. Incorporating a hydrating serum before the moisturizer can boost moisture levels for those with dehydrated skin. If your cushion foundation lacks SPF, consider applying a broad-spectrum sunscreen.
Allow a few minutes for the products to absorb into your skin, creating a perfect canvas for your makeup application. This step not only improves the application of the cushion foundation but also protects and nourishes your skin, enhancing the overall health and appearance of your complexion.
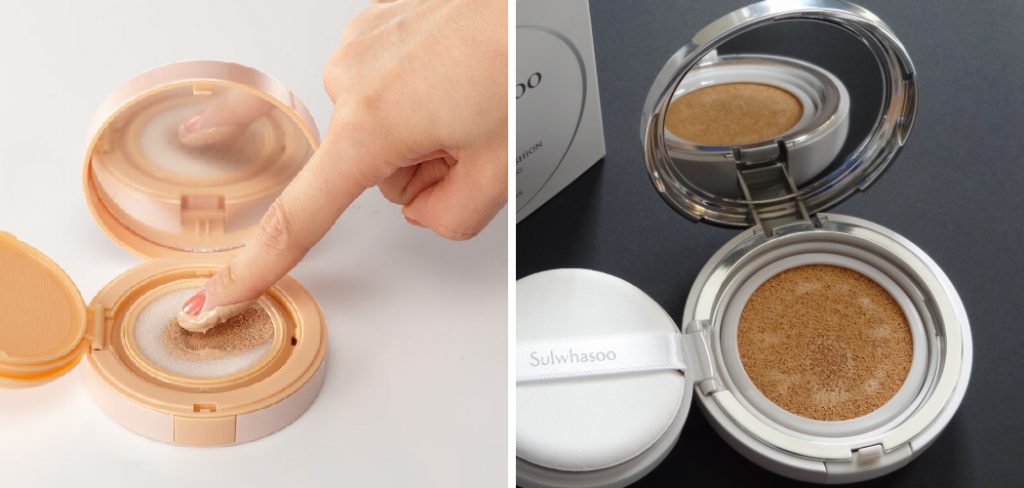
Step 2: Press into the Cushion
Press the provided sponge applicator or your beauty blender into the cushion to pick up the foundation. Remember, a little goes a long way with cushion foundations. Avoid pressing too hard, as this can cause an excess of product to be absorbed by the sponge, leading to wastage and a heavier, less natural finish. Aim for a light dab to obtain a small amount of foundation – it’s always easier to build up coverage with additional layers than to remove excess product.
Step 3: Apply to the Face
Begin by lightly tapping the sponge applicator or beauty blender onto your skin, starting from the center of your face and working outwards. Focus on areas that require more coverage, such as under the eyes, around the nose, and any blemishes or redness.
The key to a flawless finish is gently patting instead of dragging the sponge across your skin. This technique ensures even coverage and allows you to build intensity where needed without disturbing the layer beneath. Continue to layer the foundation until you achieve your desired level of coverage, ensuring to blends well at the edges of your face, jawline, and neck for a seamless look.
Step 4: Set with Powder (Optional)
If you have oily skin or prefer a matte finish, setting your cushion foundation with a light dusting of setting powder can help control shine and extend the wear of your makeup. Using a fluffy brush, gently apply the powder on areas prone to oiliness, such as the T-zone – forehead, nose, and chin.
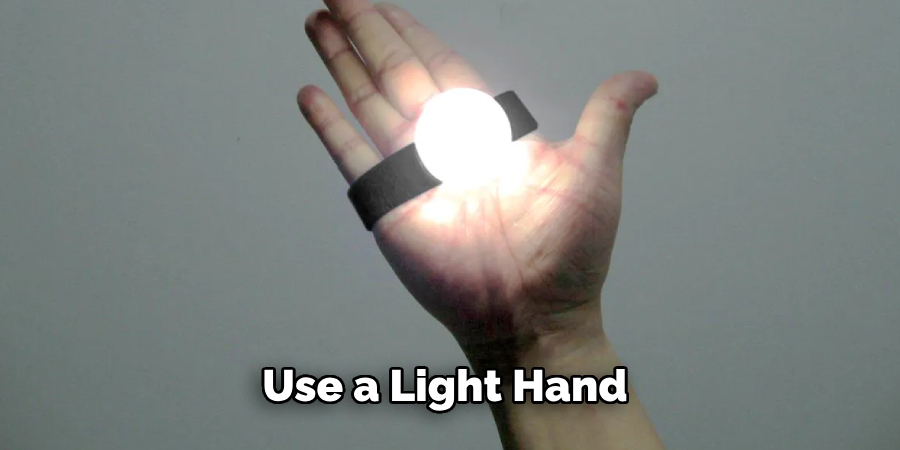
Use a light hand to maintain the foundation’s natural, dewy finish. Setting powder can also be applied under the eyes to prevent the foundation from creasing throughout the day. This step is optional and can be adjusted based on your skin type and preferred finish.
Step 5: Add Warmth with Bronzer or Blush
Incorporate a bronzer or blush into your routine to add dimension and a healthy flush of color to your face. For a sun-kissed look, lightly apply bronzer to the areas where the sun naturally hits your face, such as your forehead, cheeks, and the bridge of your nose.
Alternatively, apply blush to the apples of your cheeks for a more youthful appearance, blending upwards towards your temples. This step enhances the natural glow achieved with your cushion foundation, creating a more vibrant and radiant complexion. Choose a color that complements your skin tone for the most natural effect.
Step 6: Highlight for a Radiant Glow
Adding a highlighter is the next step to elevate your makeup look to a new level of luminosity. Choose a highlighter that matches your skin tone—pearl shades work well for fair skin, while gold tones are beautiful on darker complexions.
Apply the highlighter to the high points of your face where the light naturally reflects, such as the cheekbones, brow bones, down the bridge of the nose, and on the cupid’s bow above your lip. Use a fan brush or your fingertips for application, blending gently to achieve a subtle, radiant glow. This highlighting step not only accentuates your features but also complements the dewy finish of the cushion foundation, resulting in a beautifully radiant and healthy-looking complexion.
Step 7: Define Your Eyes
Enhancing your eyes can dramatically impact your overall look. Start by applying a neutral eyeshadow as a base on your eyelids, providing a smooth canvas for further eye makeup. Use a slightly darker shade in the crease for added depth and dimension if desired.
Follow with eyeliner on the upper lash line to define the eyes, opting for a delicate, subtle line for a natural look or a thicker, more dramatic line for evening wear. Finish with a coat or two of mascara to lengthen and volumize your lashes, ensuring you wiggle the brush from the base to the tips for full coverage and to avoid clumps. This step defines your eyes and complements the flawless base created with your cushion foundation.
Step 8: Perfect Your Brows
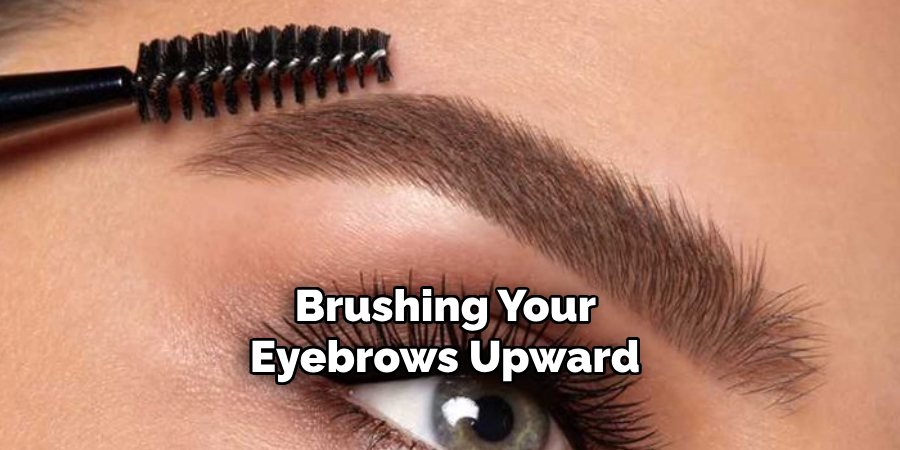
Well-defined eyebrows frame the face and enhance your overall makeup look. Begin by brushing your eyebrows upward with a spoolie brush to see their natural shape and where you may need to fill in. Using a brow pencil or powder that closely matches your brow color, lightly fill in any sparse areas with short, hair-like strokes. Aim for a natural look by not over-drawing or heavily filling in your brows.
Once you’ve filled in your brows, use a clear brow gel to set them in place. This will keep your eyebrows looking neat and polished throughout the day, complementing the polished appearance created with your cushion foundation and eye makeup.
Step 9: Complete Your Look with Lip Color
Finalize your makeup routine by adding color to your lips. Choose a lipstick, gloss, or tint that complements your overall look and skin tone. For a natural daytime appearance, opt for nude shades or a light pink. Consider bold colors like reds or deep plums for a more dramatic or evening look. Begin by outlining your lips with a lip liner that matches your chosen lip color, as this will help define their shape and prevent the color from bleeding.
Then, fill in your lips with your lipstick or gloss, using a brush for precision if necessary. You can blot your lips with a tissue and apply a second layer for a long-lasting finish. This step pulls the entire makeup look together and allows your personality to shine through your choice of lip color.
Step 10: Set Your Makeup
To ensure your makeup remains flawless and intact throughout the day, the final step is to set your makeup. Use a setting spray designed for your skin type—hydrating, mattifying, or suited for sensitive skin—to lock in your makeup. Hold the bottle several inches away from your face and mist lightly, allowing the spray to cover your face evenly.
This helps keep your makeup in place and adds a refreshing feel to your skin. A light mist can be applied as needed for an extra touch of radiance or to revive your makeup throughout the day. This final gesture seals your makeup, ensuring it stays fresh from morning till night, embodying a perfect finish to your beauty routine.
By following these 10 simple steps, cushion foundation can help you achieve a flawless and radiant complexion.
5 Additional Tips and Tricks
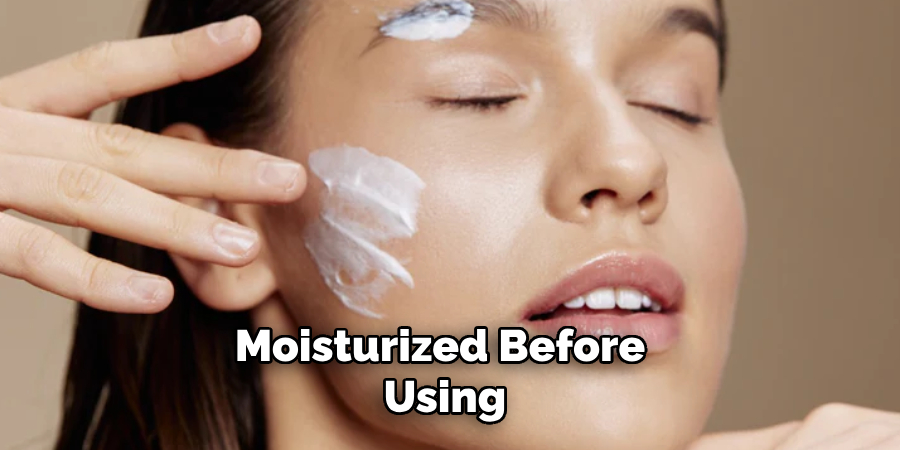
- Start with a Clean Slate: Ensure your face is clean and moisturized before using your cushion foundation. A smooth, hydrated base helps the foundation glide on more evenly and last longer.
- Use the Right Tool: For a more natural, skin-like finish, use the applicator pad with the cushion foundation. It’s designed to pick up and deposit the perfect amount of product. For more coverage, consider using a beauty blender or makeup sponge.
- Press, Don’t Swipe: Press the applicator into the cushion and onto your skin using a light patting motion. This technique helps achieve more even coverage and prevents the foundation from looking streaky or cakey.
- Build Coverage Gradually: If you want more coverage, build it up slowly with light layers. Cushion foundations are buildable without becoming heavy, allowing you to achieve your desired level of coverage without the masking effect.
- Remember to Set: Although cushion foundations often have a luminous finish, setting at least your T-zone with a light dusting of powder can help extend the wear of your foundation, especially if you have oily or combination skin.
With these additional tips and tricks, you can make the most out of your cushion foundation and achieve a flawless, natural-looking complexion.
5 Things You Should Avoid
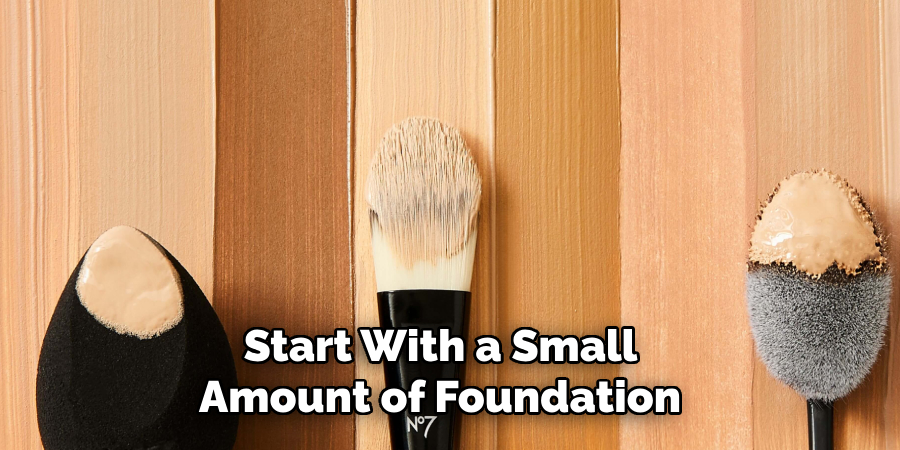
- Avoid Overloading the Applicator: Dipping the applicator too aggressively or repeatedly into the cushion can pick up too much product, leading to a heavy or uneven application. Always start with a small amount of foundation and add more as needed.
- Don’t Skip Hygiene: Avoid sharing your cushion foundation and applicator with others to prevent the spread of bacteria. Also, regularly clean your applicator to maintain hygiene and ensure smooth application.
- Refrain from Storing in Hot Places: High temperatures can compromise the integrity of the product. Store your cushion foundation in a cool, dry place to preserve its quality and longevity.
- Avoid Using a Dry Applicator: It won’t pick up the product effectively if it becomes too dry. Ensure your applicator pad is slightly moist (not wet) for the best results. You can lightly spritz it with a facial mist if necessary.
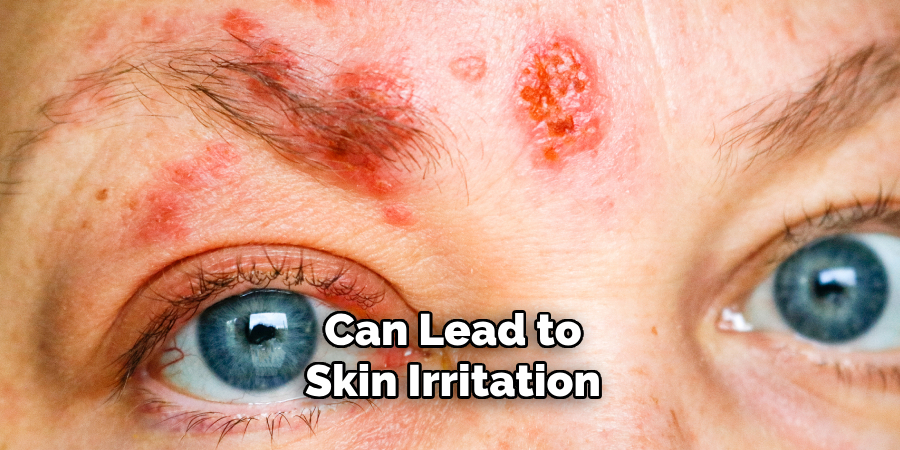
- Don’t Ignore Expiry Dates: Like all cosmetic products, cushion foundations have a shelf life. Using a product beyond its expiry date can lead to skin irritation or infections. Make sure to replace your cushion foundation regularly, usually every 6 to 12 months after opening.
By avoiding these common mistakes, you can get the most out of your cushion foundation and achieve a flawless, long-lasting base. Remember always to follow the instructions on the product packaging and have fun experimenting with different techniques to find what works best for you!
Do You Need Primer Before Cushion Foundation?
There is no hard and fast rule regarding the use of a primer before applying cushion foundation. Some people find that using a primer helps their foundation last longer, while others prefer the simplicity of using the cushion foundation on its own.
If you have oily or combination skin, using a mattifying or oil-controlling primer before your cushion foundation may help control shine and keep your makeup in place throughout the day. If you have dry skin, a hydrating primer can provide extra moisture and create a smooth canvas for your foundation.
Ultimately, it comes down to personal preference and what works best for your skin type. You can always try using a primer one day and going without the next to see which method gives you the desired results.
Which is Better, Cushion or BB Cream?
As with most makeup products, the answer to this question depends on personal preference and individual needs. Here are some factors to consider when choosing between a cushion foundation and a BB cream:
- Coverage: Cushion foundations typically provide more coverage than BB creams, which tend to have a sheer to medium coverage. A BB cream may be the better option if you’re looking for a natural, skin-like finish with minimal coverage. A cushion foundation may be a better choice if you want more coverage to even out your skin tone or cover imperfections.
- Formula: Cushion foundations and BB creams have different consistencies and finishes. Cushion foundations are often lighter and offer a dewy, glowy finish, while BB creams can have a thicker, creamier texture and a more natural, matte finish. Consider your skin type and preferred finish when deciding between the two.
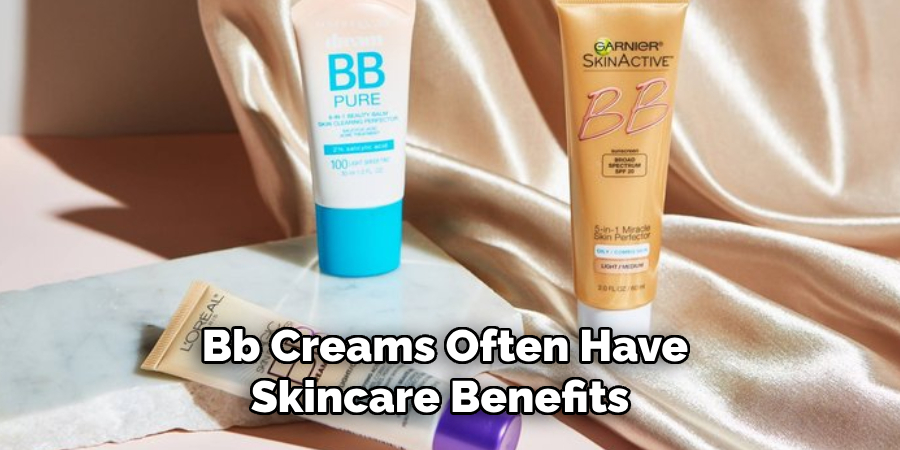
- Ingredients: BB creams often have skincare benefits such as SPF and antioxidants, while cushion foundations may focus more on coverage and hydration. Look at the ingredients list to see which product offers the benefits you’re looking for.
In conclusion, there is no clear winner between cushion foundations and BB creams. It’s important to assess your needs and preferences to determine which product works best for you. Some people even choose to use both: a BB cream for lighter days and a cushion foundation for more coverage on special occasions. It ultimately comes down to personal choice and experimentation to find what works best.
Conclusion
In navigating the world of cushion foundations, remembering a few key takeaways can ensure you maximize the benefits of this innovative makeup product. Start with a clean and moisturized face, and select the right tool for application—whether that’s the provided applicator, a beauty blender, or a makeup brush, depending on the coverage you desire.
Pressing the product into your skin, rather than swiping, can help achieve a flawless, streak-free finish. Building coverage gradually allows for a more natural look, while setting your T-zone with powder can extend the wear time of your foundation.
Equally important is maintaining hygiene with your cushion foundation to prevent bacterial buildup and skin irritation. This includes regular cleaning of your applicator and adherence to the product’s expiry date.
Ultimately, cushion foundation is a versatile and convenient option for achieving a luminous, even complexion. With the above guidelines on how to use cushion foundation, you’ll be well-equipped to utilize this product to its fullest potential, enhancing your beauty routine with ease and effectiveness.
About the Author
Jane Hubbard is a passionate beauty expert with a wealth of experience in makeup, hair, and overall beauty techniques. After years of working as a hairdresser specialist, she followed her entrepreneurial spirit and started her own consultancy business.
Jane has always been driven by her desire to help others feel confident in their own skin, and she does this by sharing her knowledge, experiences, and practical beauty tips. Through her consultancy, she empowers individuals to embrace their unique beauty, offering tailored guidance that boosts both self-esteem and personal style.
Professional Focus
Specializes in makeup, hairstyling, and beauty consulting.
Provides personalized beauty advice, tips, and techniques to help individuals feel confident in their appearance.
Dedicated to staying up-to-date with the latest industry trends and developments.
Passionate about creating a comfortable and empowering experience for every client.
Education History
University of Craft and Design – Bachelor of Fine Arts (BFA) in Woodworking and Furniture Design
Woodworking Apprenticeships – Extensive hands-on training with skilled craftsmen to refine carpentry and furniture making techniques
Online Courses & Masterclasses – Continued education in advanced woodworking techniques, design principles, and specialized tools
Expertise:
Makeup artistry, hairstyling, and beauty consulting.
Personalized beauty techniques to enhance confidence and self-expression.
Educating clients on how to maintain their beauty routines at home.