
Are you tired of using eyelash curlers that don’t work on your short lashes? Look no further, as we have compiled the ultimate guide on using an eyelash curler specifically for short lashes.
Achieving beautifully curled lashes can sometimes feel challenging, especially if you have short lashes. However, with the right technique and tools, you can effortlessly enhance your lashes, adding definition and opening up your eyes for a more striking look. Using an eyelash curler correctly is key to achieving this result without damaging your lashes.
This guide on how to use eyelash curler for short lashes will walk you through the steps needed to properly use an eyelash curler for short lashes, ensuring a safe and effective approach to elevate your makeup routine.
What are the Benefits of Using an Eyelash Curler?
Before diving into the steps on diy eyelash curler, it’s important to understand the benefits of using one. Here are some reasons why incorporating an eyelash curler into your makeup routine can make a difference:
- Lifts and Opens Up Your Eyes: An eyelash curler helps lift your lashes, giving the appearance of wider and more awake eyes.
- Creates a Natural-looking Curve: Unlike mascara alone, an eyelash curler can create a natural-looking curve throughout the day.
- Enhances Mascara Application: Curling your lashes before applying mascara can achieve a more defined and voluminous look.
- Adds Definition to Your Eyes: Curled lashes can help define your eyes and make them stand out, especially when paired with eyeliner and/or eyeshadow.
- Suitable for All Lash Types: Whether you have short or long lashes, an eyelash curler can work for everyone. Just be sure to choose one that fits the shape of your eye and lash line.
- Quick and Easy: Using an eyelash curler takes a few seconds and can make a big difference in your overall makeup look.
What Will You Need?
- An eyelash curler
- Mascara (optional)
- Eyeliner (optional)
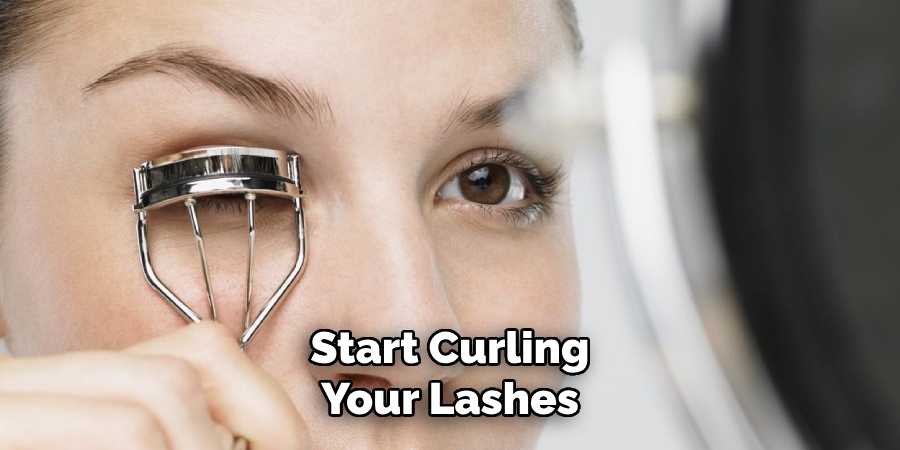
Once you have these items, you can start curling your lashes!
10 Easy Steps on How to Use Eyelash Curler for Short Lashes
Step 1. Clean Your Eyelash Curler
Keeping your eyelash curler clean is essential for both hygiene and effective results. Before each use, ensure the curler is free from any old mascara, dirt, or oils that may have accumulated. Use a cotton pad or tissue dipped in a small amount of rubbing alcohol or a makeup remover to clean the metal or silicone pads gently. This step helps prevent bacterial build-up and ensures a smooth curling process. Allow the curler to air dry for a few seconds before using it. A clean curler protects your lashes from potential damage and ensures you achieve the best possible curl.
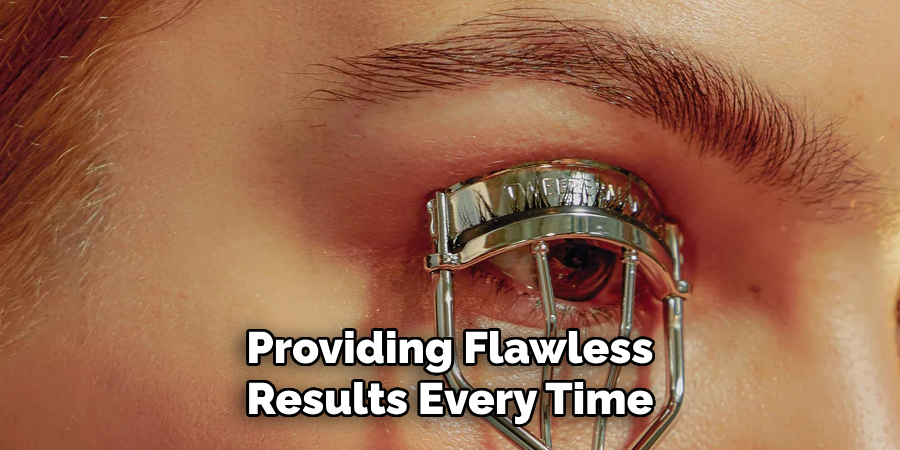
Step 2. Ensure Your Lashes Are Dry and Clean
Before curling your lashes, ensuring they are immaculate and dry is crucial. Residual makeup, such as mascara, can make your lashes sticky and prone to breakage during curling. Use a gentle eye makeup remover to thoroughly clean your lashes, ensuring no makeup or oils remain on the surface. Additionally, pat them dry with a clean tissue or towel, as moisture can prevent the curler from gripping your lashes properly. Dry, clean lashes help you achieve a more defined and lasting curl and reduce the risk of clumping or uneven shaping. Taking the time to prepare your lashes ensures a smoother and safer curling process, providing flawless results every time.
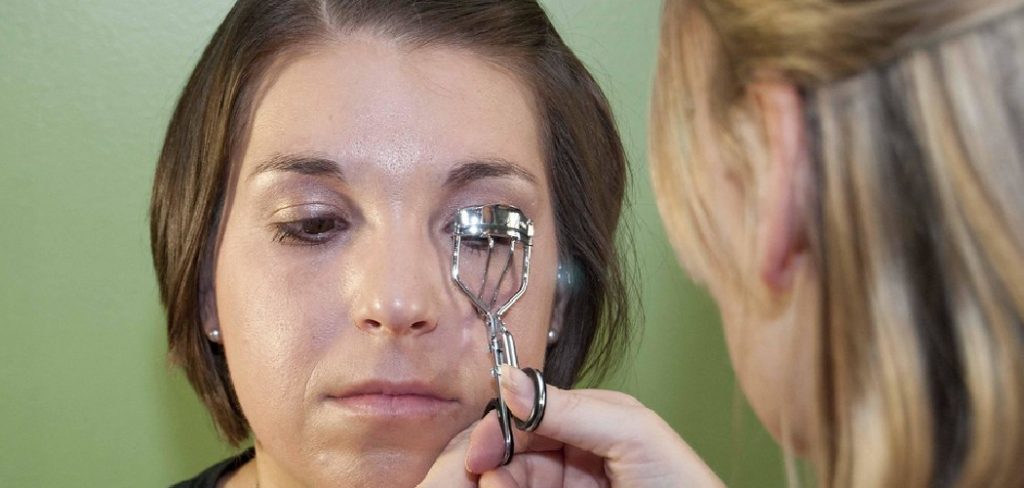
Step 3. Position the Curler Properly
Start by holding the eyelash curler at the base of your upper lashes, as close to the lash line as possible without pinching the skin. Carefully open the curler and place your lashes between the padded clamp. Once positioned, gently close the curler to secure the lashes in place, ensuring all lashes are evenly aligned. During this step, avoid pulling or tugging on the lashes to prevent breakage or damage. Positioning the curler properly is crucial for achieving a natural and even curl, setting the stage for stunning, lifted lashes.
Step 4. Curl Your Lashes in Sections
To achieve a natural and long-lasting curl, working in sections across your lashes is essential. Begin by positioning the curler as close to your lash line as possible without pinching your skin. Gently squeeze the curler and hold it in place for about 5-10 seconds. Avoid applying excessive pressure, as this can cause discomfort or damage to your lashes.
Next, release the curler slightly and move it up to the middle of your lashes, repeating the same gentle squeeze-hold motion. Finally, repeat this process near the tips of your lashes. This step-by-step curling technique helps to create a soft, graduated curve instead of a harsh, unnatural bend. Remember to take your time and ensure each section is evenly curled, as this will enhance the overall appearance of your lashes and draw more attention to your eyes.
Step 5. Move to the Middle of Your Lashes
After you’ve curled the base of your lashes, it’s time to move the curler upward to the middle section. Position the eyelash curler carefully to grip your lashes midway between the base and the tips. Make sure to center the curler properly to avoid pinching the skin or missing sections of your lashes. Once positioned, use the same gentle squeeze-and-hold technique for about 3-5 seconds. This step is crucial as it builds upon the initial curl at the base and creates a seamless, natural-looking curve that blends effortlessly with your lash line. Take care to apply even pressure across all lashes to maintain consistency. You can adjust and repeat the process slightly to ensure all lashes are included.
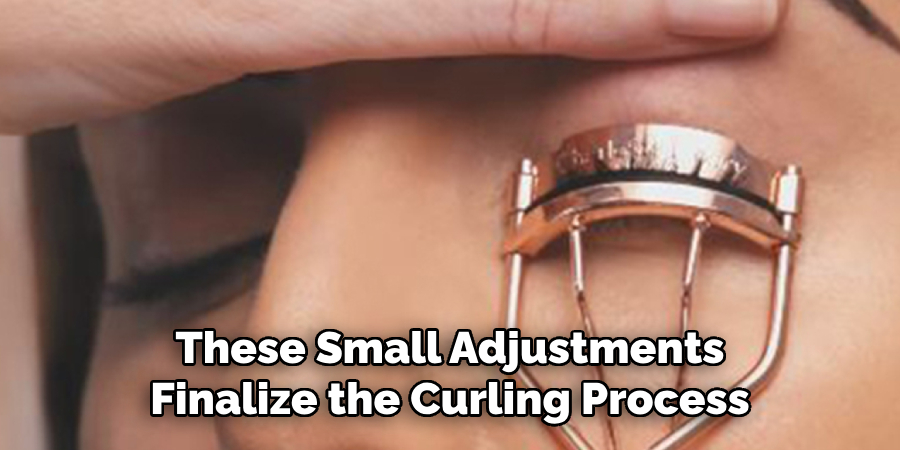
Step 6. Finish at the Tips of Your Lashes
After curling the middle section of your lashes, the final focus should be the tips to ensure the most natural and complete curl. Position the curler near the ends of your lashes, being careful not to clamp down too close to the previous section. Applying pressure for another 3-5 seconds using the same gentle squeeze-and-hold method. This step helps to create a consistent curve from the base to the tips, preventing an awkwardly sharp or uneven curl. Paying attention to the tips adds length and lift to your lashes, enhancing their overall appearance and ensuring they frame your eyes beautifully. These small adjustments finalize the curling process and contribute to a flawless, polished look.
Step 7. Apply a Coat of Mascara
Once your lashes are curled to perfection, the next step is to amplify the effect with mascara. Start by choosing a product that suits your desired look—volumizing for thickness, lengthening for added drama, or waterproof for long-lasting wear. Hold the mascara wand vertically and begin at the base of your lashes, gently wiggling the brush as you move toward the tips. This ensures an even application and helps separate the lashes, preventing clumping.
Allow the first coat to dry slightly before applying a second layer for a more dramatic effect. Be mindful not to overload the brush; excess product can weigh down your lashes and undo the curl. By taking your time and applying mascara with precision, you can further define your eyes and complete your look with a professional touch.
Step 8. Check for Evenness
After completing your makeup application, take a moment to check for overall evenness carefully. Use a handheld mirror and inspect your face under good lighting to ensure that foundation, blush, and eyeshadow are well-blended, with no harsh lines or uneven patches. Look closely at both eyes to confirm that your eyeliner and mascara are symmetrical, and adjust if necessary. If you notice any areas that need touching up, use a clean brush or sponge to make corrections. Paying attention to these finishing details will result in a polished and flawless look.
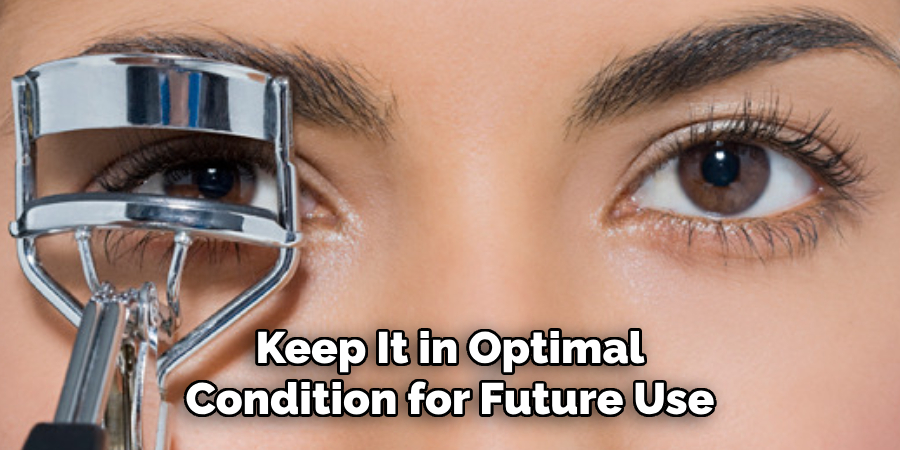
Step 10. Clean Your Curler Again
After using your eyelash curler, cleaning it thoroughly to maintain hygiene and ensure it works effectively is important. Use a cotton pad or soft cloth dampened with rubbing alcohol to wipe down the entire curler, focusing on the rubber pad and metal clamps where residue tends to build up. This helps to remove makeup, oils, and bacteria, preventing potential eye irritation or infections. Allow the curler to air-dry completely before storing it. Regular cleaning will prolong the life of your curler and keep it in optimal condition for future use.
By following these steps, you can achieve perfectly curled and defined lashes without any damage or discomfort.
Conclusion
How to use eyelash curler for short lashes requires a gentle and precise approach to achieve the best results.
Always start with a clean curler to avoid tugging or damage. Position the curler as close to the lash line without pinching the skin, and apply light pressure in short pulses. Focusing on the roots and slightly angling the curler for shorter lashes can help create a more lifted and natural look.
With consistent technique and care, even short lashes can appear beautifully curled and enhanced.
About the Author
Jane Hubbard is a passionate beauty expert with a wealth of experience in makeup, hair, and overall beauty techniques. After years of working as a hairdresser specialist, she followed her entrepreneurial spirit and started her own consultancy business.
Jane has always been driven by her desire to help others feel confident in their own skin, and she does this by sharing her knowledge, experiences, and practical beauty tips. Through her consultancy, she empowers individuals to embrace their unique beauty, offering tailored guidance that boosts both self-esteem and personal style.
Professional Focus
Specializes in makeup, hairstyling, and beauty consulting.
Provides personalized beauty advice, tips, and techniques to help individuals feel confident in their appearance.
Dedicated to staying up-to-date with the latest industry trends and developments.
Passionate about creating a comfortable and empowering experience for every client.
Education History
University of Craft and Design – Bachelor of Fine Arts (BFA) in Woodworking and Furniture Design
Woodworking Apprenticeships – Extensive hands-on training with skilled craftsmen to refine carpentry and furniture making techniques
Online Courses & Masterclasses – Continued education in advanced woodworking techniques, design principles, and specialized tools
Expertise:
Makeup artistry, hairstyling, and beauty consulting.
Personalized beauty techniques to enhance confidence and self-expression.
Educating clients on how to maintain their beauty routines at home.