
Are you tired of looking at yourself in the mirror and wishing you had more defined cheekbones? Do you envy those high cheekbones that make everyone look chiseled and attractive? Well, you’re not alone.

Many individuals seek defined cheekbones to enhance their facial structure and appearance. While genetics plays an important role in the natural shape and prominence of cheekbones, several methods can be used to accentuate them. From facial exercises and makeup techniques to maintaining a healthy lifestyle and considering cosmetic options, various approaches can be taken to achieve a more sculpted and striking look.
This guide on how to get cheekbones will explore practical steps and tips for highlighting your cheekbones and enhancing your overall facial aesthetics. Let’s dive in!
What Are the Benefits of Defined Cheekbones?
Having well-defined cheekbones can bring a range of benefits in terms of appearance and overall health. Some potential advantages include:
- More Defined Facial Features: Accentuating your cheekbones can help to define your other facial features, such as your jawline and chin, giving you a more sculpted look.
- Youthful Appearance: As we age, our skin tends to lose elasticity and firmness. Highlighting your cheekbones can add volume and lift to the face, creating a more youthful appearance.
- Boosted Confidence: Feeling good about how you look can positively impact self-esteem and confidence levels. Having defined cheekbones can give you a sense of empowerment and boost your confidence.
- Makeup Enhancement: Accentuating your cheekbones can also enhance the overall effect of your makeup look. It can add dimension and depth to the face, making your features more prominent.
- Versatility: The great thing about highlighting cheekbones is that it works for all face shapes and sizes. Whether you have a round or angular face, defined cheekbones can help balance your facial proportions.
What Will You Need?
To highlight your cheekbones, you will need:
- A highlighting product of your choice (powder, liquid or cream)
- A brush or sponge for application
- Optional: a contouring product to further define and sculpt the cheekbones
Once you have these items, you can start highlighting your cheekbones!
9 Easy Steps on How to Get Cheekbones
Step 1. Start with a Clean Base
Make sure your face is freshly cleansed and moisturized before applying any makeup. Having a clean and hydrated base ensures that the products blend seamlessly and look natural on your skin. If you use a primer, this is also an excellent time to apply it. A primer helps create a smoother surface for your makeup and ensures that it lasts longer.

Choose a primer suited to your skin type—whether mattifying for oily skin, hydrating for dry skin, or a pore-filling primer for a smoother texture. Prepping your skin properly sets the foundation for achieving the perfect highlight and defined cheekbones.
Step 2. Locate Your Cheekbones
To locate your cheekbones, start by feeling your face with your fingers. Gently press along the sides of your face just below the outer corners of your eyes—where your cheekbones are naturally positioned. You can also make a slight “fish face” by sucking in your cheeks, as this will highlight the natural hollows of your cheeks and make it easier to find the area to enhance.
Remember that cheekbones vary in prominence, so understanding your unique facial structure is key. Once you’ve identified the general area, visualize a line running from the top of your ear toward the corner of your mouth—this is typically the path you’ll follow when applying contour and highlight products.
Step 3. Apply Contour Below the Cheekbone
Using a contour product that complements your skin tone, lightly apply it below the cheekbone along the line you visualized earlier. Use a small, angled brush for precision or a makeup sponge for a softer look.
Blend the product using upward strokes to create a natural shadow, ensuring no harsh lines. Gradually build up the intensity if needed, but remember that less is often more when contouring. Proper blending is essential for achieving a seamless finish that enhances your bone structure instead of overpowering it.
Step 4. Highlight the High Points
To enhance your skin’s natural glow, apply a highlighter to the high points of your face where light naturally hits. These areas typically include the tops of your cheekbones, the bridge of your nose, the center of your forehead, your brow bones, and your cupid’s bow.
Use a fan brush or your fingertips to gently apply the highlighter, blending it in with soft, circular motions for a radiant yet subtle finish. Choose a highlighter that complements your skin tone for the most flattering effect—champagne hues work well for lighter skin, while gold or bronze tones are ideal for deeper complexions.
Step 5. Blend, Blend, Blend
Blending is the key to achieving a seamless and natural-looking makeup finish, and it’s a step that should never be overlooked. Use a clean makeup sponge, brush, or even fingertips to soften harsh lines and ensure a smooth transition between products.

This is especially important when working with products like foundation, contour, blush, and eyeshadow, where uneven application can create a patchy or unpolished look. Pay extra attention to areas like the jawline and hairline to avoid stark contrasts between your makeup and your natural skin. Remember, blending doesn’t just apply to color—it also helps to evenly distribute texture evenly, ensuring your makeup appears skin-like and cohesive.
Step 6. Set with Powder
Setting your makeup with powder is crucial to ensure longevity and a shine-free finish. Begin by choosing a translucent setting powder or a powder that matches your skin tone. Using a fluffy brush or a powder puff, gently press the powder onto areas that tend to get oily, such as the T-zone—your forehead, nose, and chin.
Avoid using too much powder to prevent a cakey appearance. For a smoother finish, lightly dust the rest of your face to lock in your makeup. Setting with powder helps to control oil and blurs any imperfections, giving your skin a soft, matte look that lasts throughout the day.
Step 7. Add a Blush
Adding blush brings a natural, healthy flush to your face and enhances your overall complexion. Choose a blush shade that complements your skin tone; soft pinks, peaches, or deeper rosy tones often work well. Using a fluffy blush brush, gently swirl it into the product and remove any excess.
Smile to locate the apples of your cheeks, then apply the blush in light, sweeping motions, blending upward toward your temples for a lifted effect. Build up the color gradually to avoid over-application. A well-blended blush adds warmth and vitality to your look, making your skin appear fresh and radiant.

Step 8. Check in Natural Light
After completing your makeup, take a moment to step into natural light to evaluate the overall effect. Natural light provides the most accurate reflection of your makeup’s appearance throughout the day. Look closely to ensure everything is well-blended, without harsh lines or uneven patches. Pay special attention to your foundation, blush, and eyeshadow to confirm they complement your natural features seamlessly. If needed, make minor adjustments to perfect your look.
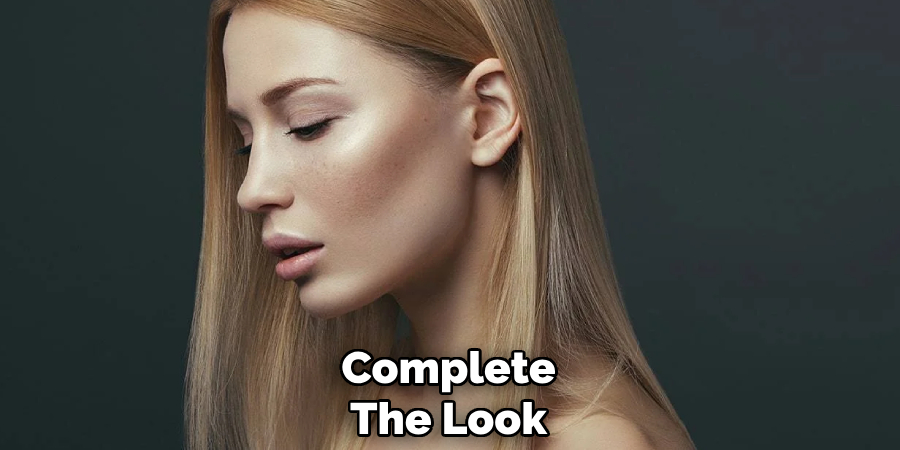
Step 9. Complete the Look
Add the final touches that elevate your makeup to perfection to complete your look. Apply a setting spray or setting powder to ensure your makeup stays in place throughout the day or evening.
Consider adding a pop of highlighter to the high points of your face, such as the cheekbones, bridge of your nose, and cupid’s bow, for a radiant finish. Check your lip color and touch up if necessary, ensuring clean edges and even application. Finally, accessorize with confidence—your look is done, and you’re ready to shine!
By following these tips and incorporating your style, you can create a flawless makeup look that enhances your natural features and boosts your confidence.
5 Things You Should Avoid
- Using the Wrong Shade of Contour Product
Using a contour shade that is too dark or too light for your skin tone can create an unnatural look. Always choose a shade one to two tones darker than your natural skin color for a subtle, natural effect.
- Over-Blending or Under-Blending
Blending is key when contouring your cheekbones, but over-blending can erase the definition, while under-blending can leave harsh, unflattering lines. Take your time to achieve a seamless finish.
- Applying Too Much Product
Overloading your brush with contour or highlight can make your makeup appear heavy and exaggerated. Build the product gradually to control the intensity and create a natural result.
- Neglecting Your Face Shape
Ignoring the natural structure of your face when contouring can lead to an unbalanced look. Tailor your technique to your specific face shape to enhance your unique features effectively.
- Skipping Highlighter or Overdoing It
Highlighting is essential to complement your contour, but using too much can produce an overly shiny or greasy appearance. Apply a small amount to the high points of your cheekbones for a subtle glow.
Conclusion
How to get cheekbones is all about understanding the balance between structure and subtlety.
By mastering the techniques of contouring and highlighting, tailored to your unique face shape, you can sculpt and enhance your natural features effectively. Use quality products, blend thoroughly, and always opt for a naturally radiant finish.
With patience and practice, you’ll find the ideal approach that works for you, giving you confidence in your look every day.
About the Author
Jane Hubbard is a passionate beauty expert with a wealth of experience in makeup, hair, and overall beauty techniques. After years of working as a hairdresser specialist, she followed her entrepreneurial spirit and started her own consultancy business.
Jane has always been driven by her desire to help others feel confident in their own skin, and she does this by sharing her knowledge, experiences, and practical beauty tips. Through her consultancy, she empowers individuals to embrace their unique beauty, offering tailored guidance that boosts both self-esteem and personal style.
Professional Focus
Specializes in makeup, hairstyling, and beauty consulting.
Provides personalized beauty advice, tips, and techniques to help individuals feel confident in their appearance.
Dedicated to staying up-to-date with the latest industry trends and developments.
Passionate about creating a comfortable and empowering experience for every client.
Education History
University of Craft and Design – Bachelor of Fine Arts (BFA) in Woodworking and Furniture Design
Woodworking Apprenticeships – Extensive hands-on training with skilled craftsmen to refine carpentry and furniture making techniques
Online Courses & Masterclasses – Continued education in advanced woodworking techniques, design principles, and specialized tools
Expertise:
Makeup artistry, hairstyling, and beauty consulting.
Personalized beauty techniques to enhance confidence and self-expression.
Educating clients on how to maintain their beauty routines at home.