
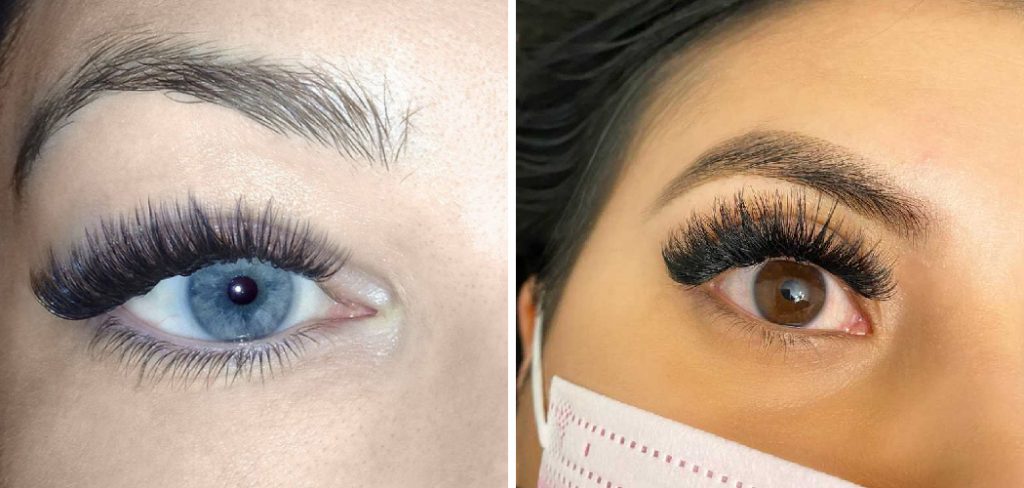
Are you looking for a simple way to make your lash extensions look thicker and fuller? If so, then you’ve come to the right place! Over the years, lash extensions have become increasingly popular as a convenient solution for creating long, luscious lashes.
But if placed incorrectly or neglected, they can easily lose their fluffiness and become too thin. To prevent this from happening, we will provide some tips on how to make your lash extensions look fluffy – without breaking the bank! Keep reading for insight into what materials you’ll need, plus our top tips on applying them.
Making your lash extensions look fluffy is easier than you may think. With the right tools and techniques, you can achieve a perfect fluffy look that will pop your eyes. Keep reading to learn how to make lash extensions look fluffy!
What Will You Need?
Before we get into how to make lash extensions look fluffy, let’s first look at the tools you’ll need. The most crucial tool you will need is given below:
- Fluffy Mascara Brush
A mascara brush is the most important tool you will need to achieve a fluffy look. This type of brush has long, thick bristles that are perfect for getting into the lashes and separating them without clumping.
- Oil-Free Makeup Remover
This is an essential product that you’ll need to help remove any excess oil or makeup from your lashes before applying lash extensions.
- Lash Extension Adhesive
Make sure to use a high-quality lash extension adhesive designed for this purpose. This will ensure the extensions stay in place and do not fall out easily.
- Lash Extensions
Choose the type of lash extensions you prefer, individual or strip lashes.
10 Easy Steps on How to Make Lash Extensions Look Fluffy
Now that you have all the necessary tools let’s get into the tips and techniques to make your lash extensions look fluffy.
Step 1. Clean Your Lashes Thoroughly
Before applying any lash extensions, ensure your lashes are clean and free of makeup or oil. Use an oil-free makeup remover to cleanse your lashes thoroughly. Be careful not to rub too hard, which can damage your natural lashes.

Step 2. Choose the Right Adhesive
As mentioned earlier, choosing a high-quality lash extension adhesive specifically designed for this purpose is essential. Make sure to read reviews and choose one that has a strong hold but is also gentle on your lashes. If you need help deciding which one to choose, ask your lash technician for recommendations.
Step 3. Prep Your Lashes
Before applying the lash extensions, it’s crucial to ensure your lashes are combed through evenly and are free of mascara clumps or any other residue. Using your fluffy mascara brush, gently comb your natural lashes to remove any tangles or clumps. This will help the adhesive stick better to your lashes and make the extensions look more natural and fluffy. Remember, preparation is key to achieving that desired fluffy look.
Step 4. Apply the Extensions
Start by taking an individual lash extension or a section of the strip lash and applying a small amount of adhesive. Wait a few seconds for the adhesive to get tacky before applying the lash extension to your natural lashes. It’s best to start at the outer corner of your eye and work inward. This technique gives a more natural, fluffy look. Be careful not to apply too many lash extensions as it can weigh down your natural lashes and prevent them from looking fluffy.
Step 5. Adjust the Lash Extensions
Once the lash extension is attached to your natural lashes, take a moment to adjust its position if necessary. You can use your fluffy mascara brush or a lash comb to gently fluff up the extensions and position them so that they blend naturally with your real lashes, thus enhancing the fluffy look. Remember to do this while the adhesive is still wet, as it gets challenging to adjust once it has dried completely.
Step 6. Dry the Lash Extensions
After applying and adjusting the lash extensions, allowing them to dry thoroughly is essential to ensure a strong bond between the extensions and your natural lashes. You can use a lash fan or simply wait for a few minutes. Avoid blinking too much or touching your lashes during this time to prevent movement or shifting of the lash extensions.
Step 7. Fluff up the Extensions
Once your lash extensions are completely dry, it’s time to fluff them up! Using your fluffy mascara brush, gently comb through the lash extensions upwardly. This will help to separate the lashes and give them that fluffy appearance. Remember to be gentle and avoid pulling or tugging on the extensions.

Step 8. Maintain Your Lash Extensions
Maintenance is crucial for keeping your lash extensions looking fluffy and beautiful. Avoid using oil-based products on your lashes, as they can break down the adhesive and cause the extensions to fall out. Instead, use an oil-free makeup remover to clean your lashes and a lash sealant to protect them. Regularly brushing your lashes with a fluffy mascara brush can also help to maintain their fluffiness.
Step 9. Regular Touch-Ups
Regular touch-ups are necessary to keep your lash extensions looking fluffy and fresh. Depending on your adhesive’s quality and personal lash growth cycle, you may need a touch-up every 2-3 weeks. During these appointments, your lash technician will replace any extensions that have fallen out and add new ones to maintain your desired volume and fluffiness.
Step 10. Proper Sleep Habits
Finally, how you sleep can impact the longevity and fluffiness of your lash extensions. Avoid sleeping on your face, as the pressure can distort the shape of your extensions. Using a silk pillowcase can also help reduce friction and maintain the fluffiness of your lash extensions. With proper care and maintenance, your fluffy lash extensions can look amazing for weeks!
By following these ten easy steps, you can achieve a natural, fluffy look that will have everyone wondering if those are your real lashes. Remember to choose high-quality products and be gentle with your lash extensions to maintain their fluffiness and keep them looking beautiful for longer.
5 Additional Tips and Tricks
- Use a Spoolie Brush: Keep those lash extensions looking fluffy by brushing them daily with a clean spoolie brush. This helps in maintaining their shape and prevents any crisscrossing.
- Opt for Volume Lashes: If you want a fluffy look, consider choosing volume lashes. These are lighter and finer, allowing more lashes to be added per natural lash, resulting in a fuller, fluffier look.
- Proper Cleansing is Crucial: Maintain the fluffiness of your lash extensions by cleaning them with a lash-friendly cleanser. This helps prevent the buildup of makeup and oils, weighing down the lashes and making them look less fluffy.
- Invest in a Good Lash Serum: Using a lash growth serum can help your natural lashes become healthier and stronger, providing a better base for the extensions and, thus, helping them look fluffier.
- Regular Refills: Regular refill appointments (every 2-3 weeks) are key to maintaining a fluffy look. As natural lashes shed, the extensions attached also fall out, resulting in a less fluffy appearance. Regular refills ensure that your lash line remains full and fluffy.
With these tips and tricks, you can ensure that your lash extensions will always look fluffy and voluminous, giving you the perfect fluttery gaze.
5 Things You Should Avoid
- Avoid Rubbing Your Eyes: Rubbing can disturb the placement of your lash extensions, causing them to lose their fluffy appearance. If your eyes are itchy, try patting them gently instead.
- Stay Away from Oil-Based Products: Oil-based makeup and skincare products can break down the adhesive of your lash extensions, making them fall out sooner and look less fluffy. Opt for oil-free products instead.
- Avoid Direct Heat: Exposing your lash extensions to direct heat (like from a hairdryer or oven) can cause them to singe or change shape. Always keep a safe distance from sources of direct heat.
- Don’t Neglect Your Natural Lashes: It’s important not to neglect the health of your natural lashes. Heavy lashes or improper application can damage them, affecting the fluffiness of your extensions.
- Avoid Sleeping on Your Face: This can cause your lash extensions to crimp, twist, or fall out, thereby losing their fluffy look. Consider a silk pillowcase or a sleep mask designed to protect lashes.
By removing these pitfalls, you can help ensure that your lash extensions stay fluffy and fabulous for longer.
Conclusion
In conclusion, how to make lash extensions look fluffy is a precise process and takes time. From finding the right length and diameter of lashes to apply, how to determine what volume to use for your look, and even proper application tips, we have covered all the essentials for getting the perfect fluffy look. All that’s left is applying these techniques.
Don’t be discouraged if you don’t get it right on your first try; practice makes perfect! Take the time to develop your skills and give it another shot until you find that look you’re after.
So, go ahead– break out those tweezers, dabble in some adhesive magic, and soon enough, you can transform your looks with beautiful fluttery lash extensions!
About the Author
Jane Hubbard is a passionate beauty expert with a wealth of experience in makeup, hair, and overall beauty techniques. After years of working as a hairdresser specialist, she followed her entrepreneurial spirit and started her own consultancy business.
Jane has always been driven by her desire to help others feel confident in their own skin, and she does this by sharing her knowledge, experiences, and practical beauty tips. Through her consultancy, she empowers individuals to embrace their unique beauty, offering tailored guidance that boosts both self-esteem and personal style.
Professional Focus
Specializes in makeup, hairstyling, and beauty consulting.
Provides personalized beauty advice, tips, and techniques to help individuals feel confident in their appearance.
Dedicated to staying up-to-date with the latest industry trends and developments.
Passionate about creating a comfortable and empowering experience for every client.
Education History
University of Craft and Design – Bachelor of Fine Arts (BFA) in Woodworking and Furniture Design
Woodworking Apprenticeships – Extensive hands-on training with skilled craftsmen to refine carpentry and furniture making techniques
Online Courses & Masterclasses – Continued education in advanced woodworking techniques, design principles, and specialized tools
Expertise:
Makeup artistry, hairstyling, and beauty consulting.
Personalized beauty techniques to enhance confidence and self-expression.
Educating clients on how to maintain their beauty routines at home.