
Have you ever wanted to make your daily skincare treatment that brightens and evens skin tone? Hydroquinone powder, an effective starting point for many over-the-counter topical skin treatments, can help you craft a powerful regimen tailored to your needs.
Hydroquinone powder is a skin-lightening agent that inhibits melanin production, the pigment responsible for dark spots and hyperpigmentation. When properly mixed, it can significantly improve the appearance of age spots, acne scars, and other discolorations on your skin. If you’re ready to take control of your skincare routine, you are in the right place.

In this blog post, we’ll consider the benefits of using hydroquinone powder while providing detailed instructions on how to mix hydroquinone powder. Read on and learn how easy it is to make a trusted, customized miracle in a jar!
What Will You Need?
Before we delve into the mixing process, let’s ensure you have all the necessary ingredients and tools. Here’s what you’ll need:
- Hydroquinone powder (can be purchased online or from a compounding pharmacy)
- Distilled water
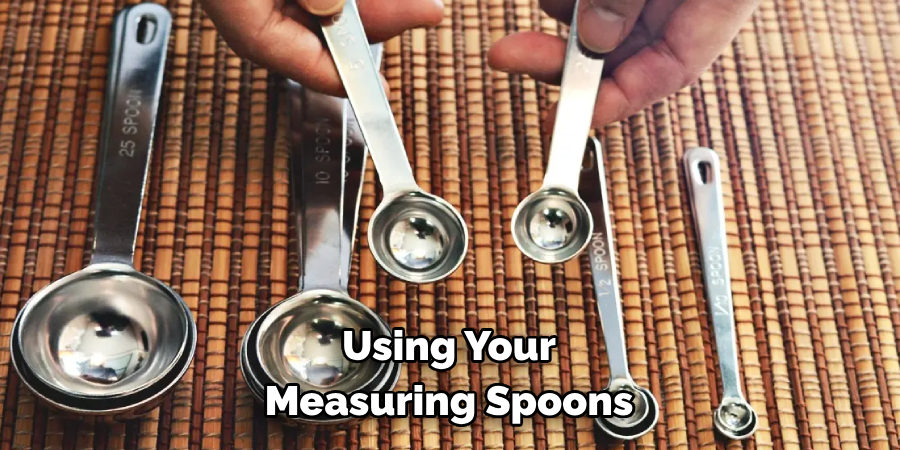
- Measuring spoons
- A small mixing bowl or jar
- A mini whisk or spatula
Once you have these items ready, it’s time to start mixing!
10 Easy Steps on How to Mix Hydroquinone Powder
Step 1. Measure the Hydroquinone Powder:
Using your measuring spoons, measure out the appropriate dosage of hydroquinone powder. Depending on the recommended strength, this will typically range from 2% to 4% of your total mixture. For example, for a 2% solution in a 100ml mixture, you would need 2g of hydroquinone powder. Always follow your healthcare provider’s or pharmacist’s guidance regarding the correct dosage.
Step 2. Prepare the Distilled Water:
Next, measure out the remaining volume of your mixture in distilled water. In our example for a 2% solution, you would need 98ml of distilled water. Warm the distilled water slightly, as this will aid in the dissolution of the hydroquinone powder. Ensure the water is not too hot as this could degrade the hydroquinone.
Step 3. Mix with the Distilled Water:
Add the measured hydroquinone powder to the warmed distilled water in your mixing bowl or jar. Stir the mixture thoroughly using your mini whisk or spatula until the powder has fully dissolved. This process may take a few minutes, so be patient and ensure the mixture becomes a clear, homogeneous liquid. It’s crucial at this stage to make sure there are no lumps or undissolved particles in your solution. This step is the heart of how to mix hydroquinone powder, ensuring a smooth, even mixture.
Step 4. Let the Mixture Cool:
After the hydroquinone powder fully dissolves, allow the mixture to cool off to room temperature. This is an essential step as it prevents any potential skin irritation caused by applying a warm solution to your skin. Place the mixture in a cool, dry place away from direct sunlight while it cools down. Patience is key here; ensure the mixture is completely cool before progressing to the next step.
Step 5. Transfer the Solution to a Storage Container:
Once the mixture has completely cooled, it’s time to transfer it to a suitable storage container. This could be a small, clean jar or a bottle with a dropper for easy application. Carefully pour the solution into the storage container using a funnel, ensuring none is wasted. Remember to secure the lid tightly to avoid any spills and maintain the hydroquinone’s potency. Store the container in a cool, dry place out of direct sunlight. Your hydroquinone solution is now ready for use!
Step 6. Apply the Solution to Your Skin:
Before applying, make sure your skin is clean and dry. Use a cotton pad or your fingertips to apply your homemade hydroquinone solution to the areas of skin you wish to treat. Apply a thin layer and gently massage it into the skin, avoiding the eyes and mouth. Always follow the advice of a healthcare provider regarding the frequency and duration of use. After applying, allow the solution to fully absorb into the skin before applying other skincare products.
Step 7. Follow up with Sunscreen:
Hydroquinone can make your skin more sensitive to the sun, so applying a sunscreen of at least SPF 30 is critical after the solution has fully absorbed. This will protect your skin from harmful UV rays and prevent further damage. Whether it’s sunny or cloudy, indoors or outdoors, apply sunscreen daily while using the hydroquinone solution.
Step 8. Monitor Your Skin’s Response:
Keep a close eye on your skin’s reaction to the hydroquinone treatment. A little tingling or mild redness can be normal initially, but if you experience severe burning, stinging, itching, or redness, stop using the solution immediately and consult your healthcare provider. Your skin’s health and comfort should always be your first priority. Remember to watch for any positive skin tone and texture changes. Patience is key with hydroquinone treatment; results may take several weeks to appear.
Step 9. Regular Maintenance:
Remember to shake the bottle gently before each use to ensure the hydroquinone solution is well mixed. Over time, the solution may separate slightly, but this is normal and does not affect the product’s potency. If the solution changes color, develops a strong odor, or causes increased skin irritation, it may have degraded and should not be used. Make fresh batches of the solution every few weeks to ensure it’s always at its most effective.
Step 10. Discontinue Use After the Desired Results:
Once you’ve achieved your desired results, it’s important to discontinue using the hydroquinone solution. Continued use may lead to unwanted skin lightening beyond your natural skin tone or the development of ochronosis, a bluish-black skin discoloration. Always consult your healthcare provider for guidance on when to stop using the product. Hydroquinone is a powerful agent, and its usage should be monitored appropriately. Finally, maintain a consistent skincare routine post-hydroquinone to ensure your skin remains healthy and vibrant.
By following these steps and using your homemade hydroquinone solution safely and responsibly, you’ll be well on your way to achieving a more even skin tone. Remember always to prioritize the health of your skin and consult with a healthcare provider if you have any concerns.
5 Additional Tips and Tricks
- Ensure Appropriate Concentration: When mixing hydroquinone powder, getting the right concentration is essential. A concentration of 2% is usually safe for skin care purposes but consult with a dermatologist or pharmacist to be sure.
- Proper Storage: Hydroquinone is photosensitive, meaning it breaks down in the presence of light. Store mixed hydroquinone solution in a dark, cool place to maintain effectiveness.
- Use With Caution: Hydroquinone is a potent substance. Always perform a patch test before applying it to larger areas of skin to avoid adverse reactions.
- Avoid Sun Exposure: Hydroquinone can make your skin more sensitive to the sun. You should always use a sunscreen with high SPF when using hydroquinone treatments.
- Adhere to Instructions: Always follow the specific mixing instructions provided with the hydroquinone powder. The effectiveness of the treatment depends on the correct preparation.
With these additional tips, you can confidently mix hydroquinone powder and use it to achieve brighter and more even skin.
6 Things You Should Avoid
- Ignoring Skin Reactions: If your skin reacts negatively to the hydroquinone solution, stop using it immediately and consult a dermatologist. Do not ignore any itching, redness, or inflammation.
- Using Without Professional Advice: Only use hydroquinone when consulting a health professional. Its use should be under the supervision of a dermatologist or pharmacist.
- Overuse: It’s crucial to follow the prescribed dosage. Overuse can lead to skin discoloration and other undesirable effects.
- Mixing with Incompatible Ingredients: Hydroquinone should not be used with peroxides or resorcinol. These substances can cause temporary staining of the skin.
- Use During Pregnancy or Breastfeeding: Hydroquinone is not recommended during pregnancy or breastfeeding as it can have adverse effects. Always consult your healthcare provider before use.
- Going Beyond Recommended Treatment Duration: Prolonged use of hydroquinone can lead to adverse effects on the skin. Always follow your healthcare provider’s recommended treatment duration and discontinue use once you’ve achieved the desired results.
By avoiding these things, you can effectively and safely mix hydroquinone powder and use it to improve your skin’s appearance.

Conclusion
To sum up, mixing hydroquinone powder is a simple but essential task for successful skin care. With the right instructions, focus, and attention, you can get your hydroquinone mix into an ideal consistency and concentration. So now that you know what to do, why not give it a shot? Don’t forget to take all the safety precautions outlined in this article when mixing the powder. Your skin will thank you for taking the time to learn to mix hydroquinone powder properly!
Hopefully, the article on how to mix hydroquinone powder has given you enough information to use this ingredient in your skincare routine confidently. Remember, always consult a professional if you have any concerns or experience adverse reactions.
With proper knowledge and care, hydroquinone can be an effective solution for achieving brighter and more even skin. After all, healthy and radiant skin is worth the effort! Keep glowing!
About the Author
Jane Hubbard is a passionate beauty expert with a wealth of experience in makeup, hair, and overall beauty techniques. After years of working as a hairdresser specialist, she followed her entrepreneurial spirit and started her own consultancy business.
Jane has always been driven by her desire to help others feel confident in their own skin, and she does this by sharing her knowledge, experiences, and practical beauty tips. Through her consultancy, she empowers individuals to embrace their unique beauty, offering tailored guidance that boosts both self-esteem and personal style.
Professional Focus
Specializes in makeup, hairstyling, and beauty consulting.
Provides personalized beauty advice, tips, and techniques to help individuals feel confident in their appearance.
Dedicated to staying up-to-date with the latest industry trends and developments.
Passionate about creating a comfortable and empowering experience for every client.
Education History
University of Craft and Design – Bachelor of Fine Arts (BFA) in Woodworking and Furniture Design
Woodworking Apprenticeships – Extensive hands-on training with skilled craftsmen to refine carpentry and furniture making techniques
Online Courses & Masterclasses – Continued education in advanced woodworking techniques, design principles, and specialized tools
Expertise:
Makeup artistry, hairstyling, and beauty consulting.
Personalized beauty techniques to enhance confidence and self-expression.
Educating clients on how to maintain their beauty routines at home.