
Proper cuticle care is an essential step in maintaining healthy, attractive nails. Cuticle remover is a helpful tool designed to soften and loosen excess or overgrown cuticles, making it easier to push them back or remove them safely. By incorporating a cuticle remover into your nail care routine, you can achieve salon-quality results at home while promoting overall nail health. In this blog post, we’ll walk you through the steps on how to use cuticle remover so that you can get back to using it in no time! So grab your tools, and let’s get started!
What Is a Cuticle Remover?
A cuticle remover is a specialized product designed to simplify the process of maintaining your cuticles. It typically comes in the form of a gel, liquid, or cream and contains ingredients that help break down and soften excess or dead skin around the base of your nails. This makes it much easier to gently push back or remove overgrown cuticles without causing damage to the nail bed. Cuticle removers are often enriched with moisturizing agents to keep the surrounding skin hydrated and healthy. Incorporating this product into your nail care routine can help create a clean, polished look while promoting overall nail health.
Benefits of Using Cuticle Remover
Using a cuticle remover as part of your nail care routine offers several key benefits. First, it helps achieve a neat and professional-looking manicure by softening and removing excess cuticle buildup, giving your nails a clean, well-groomed appearance. Additionally, it can prevent potential nail issues such as hangnails or infections that arise from overgrown or damaged cuticles. Many cuticle removers also contain nourishing ingredients, which help keep the nail area hydrated and healthy, reducing the risk of brittle nails or dry, cracked skin. By maintaining your cuticles properly, you promote stronger and healthier nail growth while enhancing the overall aesthetics of your nails.
Tools You’ll Need
To properly care for your cuticles, having the right tools is essential. Below is a list of tools you may find helpful for maintaining healthy and well-groomed cuticles:
- Cuticle Remover: A gentle solution to soften cuticles for easy removal.
- Cuticle Pusher: Used to gently push back softened cuticles for a neat appearance.
- Cuticle Trimmer: Designed to carefully trim away any excess or overgrown cuticle skin.
- Nail File: Helps shape your nails and smooth out rough edges after trimming.
- Moisturizing Lotion or Cuticle Oil: Keeps the cuticle area hydrated, preventing dryness and brittleness.
- Cotton Pads or Swabs: Useful for applying products and cleaning up during the process.
Having these tools on hand ensures an effective and safe cuticle care routine, helping you achieve beautiful and healthy nails.
10 Methods How to Use Cuticle Remover
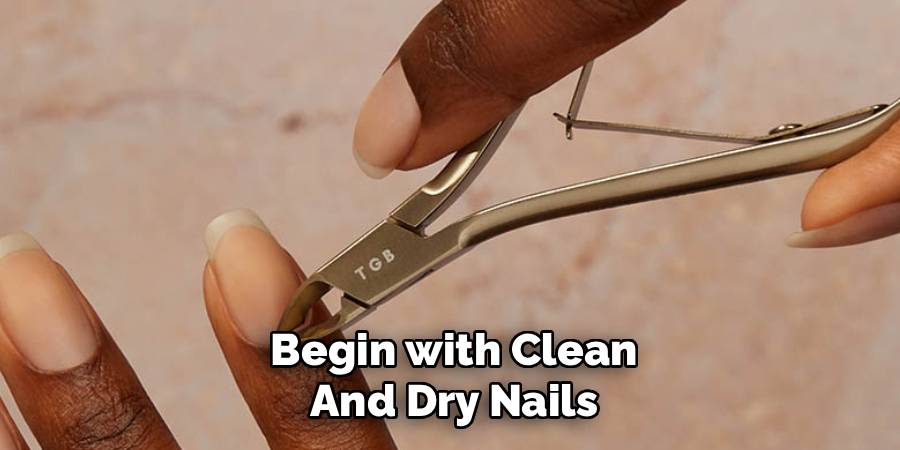
1. Begin with Clean and Dry Nails
The first step in using cuticle remover effectively is to ensure that your nails are completely clean and dry. Wash your hands with soap and warm water to remove dirt, natural oils, or residue that may interfere with the effectiveness of the product. Dry them thoroughly with a clean towel since any remaining moisture may dilute the remover and weaken its performance. A clean surface allows the remover to penetrate and soften the cuticle properly, ensuring better results. Starting with clean nails also reduces the risk of bacteria spreading during the cuticle treatment process.
2. Apply the Cuticle Remover Precisely
When using cuticle remover, precision is crucial. Apply a thin layer of the product directly to the cuticle area, concentrating only on the base of the nail where the cuticle meets the nail plate. Many products come with built-in applicators, droppers, or brushes to help distribute the formula evenly. Avoid applying the remover onto the surrounding skin since this could lead to irritation, especially with stronger formulas. Using just the right amount ensures that the remover softens the cuticles without unnecessary waste or damage.
3. Allow the Product to Sit for the Recommended Time
Every cuticle remover is formulated differently, and the waiting time can vary between one to five minutes depending on the brand. Read the label carefully and follow the instructions provided. Allowing the product to sit for the recommended duration ensures that it penetrates and breaks down the cuticle tissue effectively. Leaving it on too long, however, can lead to overexposure, resulting in dryness or irritation of the skin. Patience during this stage is important since it prepares the cuticle for safe removal without the need for excessive force.
4. Massage the Product into the Cuticles
A useful method to improve absorption is to gently massage the cuticle remover into the nail bed and cuticle area using a fingertip, cotton swab, or a soft brush. This action helps distribute the product evenly while stimulating circulation in the nail bed, which promotes healthier nail growth. The massage should be gentle to avoid damaging the delicate skin surrounding the nails. Doing this step improves efficiency, allowing the remover to soften tough cuticles more thoroughly and making the pushing or trimming process easier.
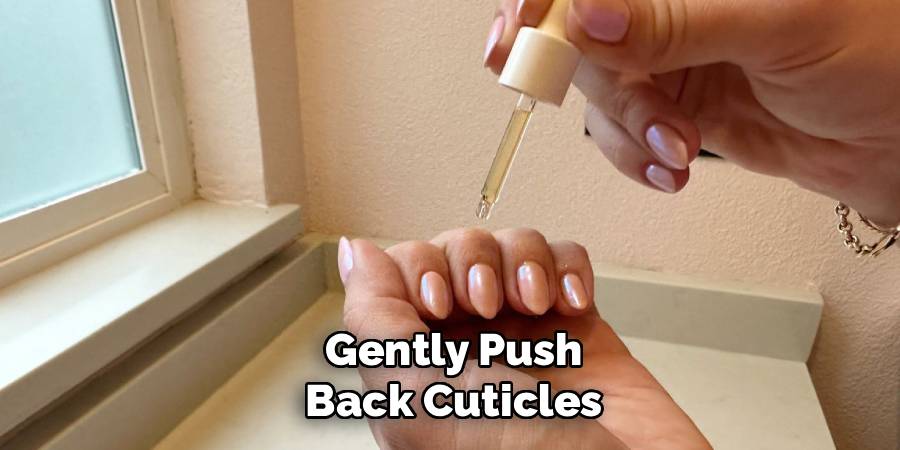
5. Use a Cuticle Pusher to Gently Push Back Cuticles
After the remover has softened the cuticles, take a cuticle pusher—either a wooden orange stick or a stainless steel tool—and gently push the cuticle back along the nail plate. Begin at the sides of the nail and work your way toward the center using small, gentle motions. This helps expose more of the nail surface, creating a clean base for polish application. Applying light pressure is essential since pushing too hard can damage the nail plate or cause painful injury to the nail bed.
6. Remove Excess Cuticle with Care
If there is visible dead cuticle tissue remaining after pushing, you can carefully trim it using sanitized cuticle nippers. This step should be done cautiously, only removing the excess skin that is softened and visibly detached. Avoid cutting into live tissue, as this can result in pain, bleeding, and even infection. Using the cuticle remover beforehand makes trimming more precise and reduces the need for force. This method leaves the nails looking clean and professional while maintaining the protective barrier of the cuticles.
7. Rinse Thoroughly to Remove Residue
Once the cuticle pushing and trimming are complete, rinse your hands thoroughly with warm water to wash away all traces of the remover. Residual product left on the skin or nails may cause irritation or dryness, especially if it contains strong chemicals. Proper rinsing also ensures that your nails are ready for further treatments such as moisturizing, nail strengthening, or polish application. This step is simple but essential for keeping the skin and nails healthy after using cuticle remover.
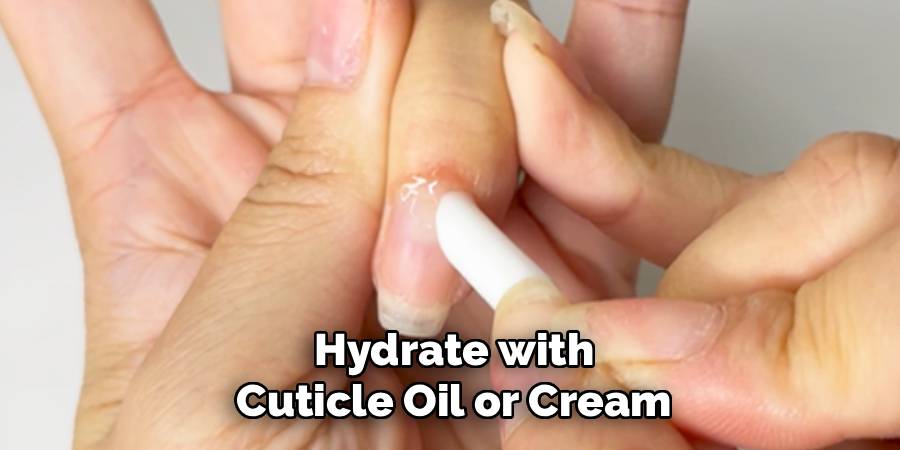
8. Hydrate with Cuticle Oil or Cream
Cuticle remover, while effective, can leave the skin feeling slightly dry. To restore moisture and protect the nails, apply a nourishing cuticle oil or cream immediately after rinsing. Oils such as jojoba, vitamin E, or almond oil penetrate the cuticle area, keeping it soft, supple, and hydrated. Massage the oil into the cuticles and nail bed for a few minutes to encourage absorption. This not only improves the appearance of your nails but also strengthens them and prevents cracking or splitting over time.
9. Use the Product Regularly but in Moderation
Cuticle remover should be used as part of a regular nail care routine, ideally once a week or as needed depending on cuticle growth. Overusing the product can thin the cuticle area and compromise its protective function, leaving nails more vulnerable to bacteria. Moderation ensures that your cuticles remain neat without being over-processed. A consistent but balanced routine prevents build-up, promotes healthy nail growth, and keeps your hands looking well-groomed without unnecessary damage.
10. Combine with Good Nail Care Practices
For the best long-term results, cuticle remover should be used alongside other healthy nail care practices. This includes keeping nails trimmed and filed, avoiding biting or picking at cuticles, and wearing gloves when handling harsh chemicals. Regular moisturizing of both the hands and nails will further support the benefits of using cuticle remover. By combining cuticle removal with comprehensive nail care, you not only achieve a polished appearance but also maintain the overall health and strength of your nails.
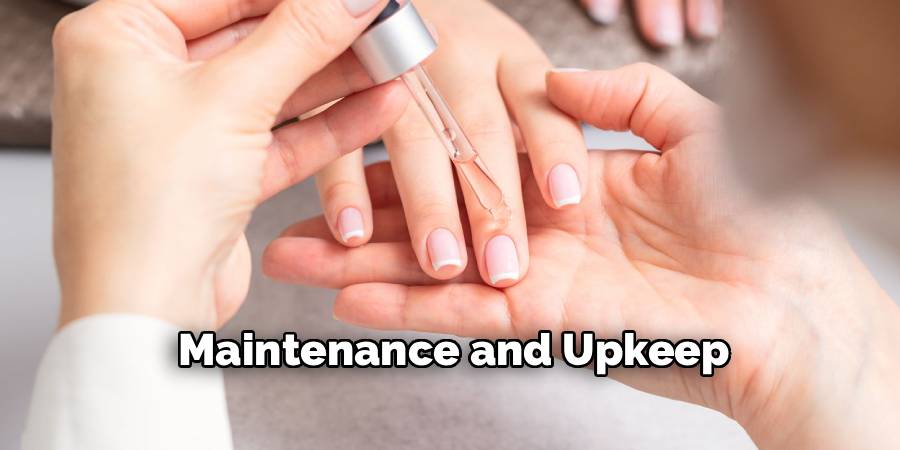
Maintenance and Upkeep
To ensure your nails remain healthy and well-maintained, establish a consistent nail care routine. Start by scheduling regular nail grooming sessions to trim, shape, and clean your nails. Use a gentle nail file to smooth any rough edges and prevent splitting. Hydration is key, so apply a nourishing hand and nail cream daily to keep both your skin and nails moisturized.
Additionally, protect your nails from damage by avoiding prolonged exposure to water, harsh detergents, and chemicals; wearing gloves during household chores can help significantly. Finally, avoid using your nails as tools to open or scratch surfaces, as this can weaken and damage them over time. With consistent maintenance and proper care, your nails can stay strong, healthy, and beautifully polished.
Conclusion
Cuticle remover is a highly effective tool for maintaining clean and healthy nails when used correctly. The process begins with clean, dry nails, followed by precise application, waiting for the correct duration, and gently massaging the product for improved absorption. Thanks for reading our blog post on how to use cuticle remover! We hope you found it helpful and informative.
About the Author
Jane Hubbard is a passionate beauty expert with a wealth of experience in makeup, hair, and overall beauty techniques. After years of working as a hairdresser specialist, she followed her entrepreneurial spirit and started her own consultancy business.
Jane has always been driven by her desire to help others feel confident in their own skin, and she does this by sharing her knowledge, experiences, and practical beauty tips. Through her consultancy, she empowers individuals to embrace their unique beauty, offering tailored guidance that boosts both self-esteem and personal style.
Professional Focus
Specializes in makeup, hairstyling, and beauty consulting.
Provides personalized beauty advice, tips, and techniques to help individuals feel confident in their appearance.
Dedicated to staying up-to-date with the latest industry trends and developments.
Passionate about creating a comfortable and empowering experience for every client.
Education History
University of Craft and Design – Bachelor of Fine Arts (BFA) in Woodworking and Furniture Design
Woodworking Apprenticeships – Extensive hands-on training with skilled craftsmen to refine carpentry and furniture making techniques
Online Courses & Masterclasses – Continued education in advanced woodworking techniques, design principles, and specialized tools
Expertise:
Makeup artistry, hairstyling, and beauty consulting.
Personalized beauty techniques to enhance confidence and self-expression.
Educating clients on how to maintain their beauty routines at home.