
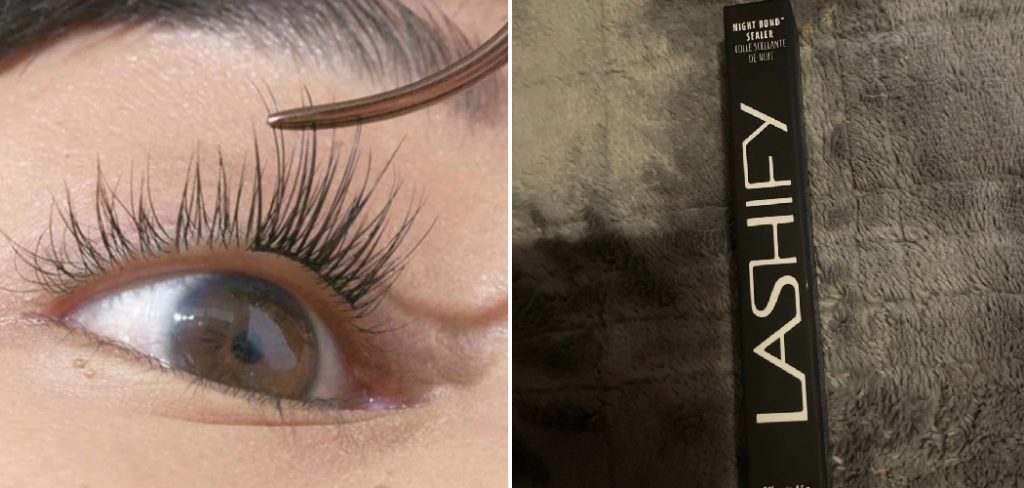
Are you tired of waking up to messy, clumpy eyelash extensions? Are you tired of constantly getting fills and spending money on upkeep? Look no further; Lashify Night Bond is here to save the day! This tutorial will discuss what Lashify Night Bond is and how to use it for flawless lash extensions.
Lashify Night Bond is an essential product designed to enhance the longevity and durability of your lash extensions. Whether you are new to the world of lash extensions or a seasoned user, mastering the application of Night Bond can help you achieve a secure and long-lasting hold. This guide will walk you through the steps on how to use Lashify Night Bond, ensuring your lashes look flawless and stay in place throughout the day and night.
With the right techniques and a little practice, you’ll be able to maintain beautiful, full lashes with ease.
What Will You Need?
Before we dive into the application process, having all the necessary tools and products on hand is essential. Here’s what you’ll need:
- Lashify Night Bond
- Tweezers
- Lash extension tray (optional)
- Lash extensions
- Lash applicator tool or lash wand (optional)
Once you have all your supplies ready, it’s time to get started!
10 Easy Steps on How to Use Lashify Night Bond
Step 1: Prepare Your Work Area
Creating an optimal work area is crucial for a seamless lash extension application. First, make sure your space is well-lit so you can see each lash clearly. Natural daylight is ideal, but a bright, adjustable lamp works well. Ensure that your work surface is clean and free from dust or debris that could contaminate your lash extensions.
Lay out all your tools and products within easy reach, organizing them neatly so you can quickly grab what you need without interrupting the flow of your application process. If you have a mirror or magnifying mirror, place it at an angle allowing a clear view of your lash line. Comfort is also key, so ensure you have a comfortable chair and that you are seated at the right height relative to your work surface. Taking the time to properly prepare your work area will set you up for a smooth and successful lash application experience. Once your space is ready, you’re set to move on to the next step.

Step 2: Cleanse Your Natural Lashes
Before applying Lashify Night Bond and your lash extensions, it is essential to ensure that your natural lashes are clean and free of oils, makeup, or other residues. Begin by thoroughly cleaning your lashes with an oil-free makeup remover or a gentle lash cleanser. Gently pat them dry with a soft, lint-free cloth or tissue. Properly cleansing your natural lashes is crucial as it helps the Lashify Night Bond adhere better, resulting in a stronger and longer-lasting bond.
Step 3: Choose Your Lash Extensions
Now it’s time to select the lash extensions that best suit your desired look. Lash extensions come in various lengths, curls, and thicknesses, so take a moment to consider the effect you want to achieve. For a natural look, opt for extensions that are similar in length and curl to your natural lashes. If you prefer a more dramatic flair, go for longer, thicker, or more curled extensions. Arrange the chosen lash extensions on your lash extension tray or on a clean, sanitary surface within easy reach. Organizing your lashes beforehand will help streamline the application process and ensure you can apply them quickly and efficiently.
Step 4: Apply Lashify Night Bond to Your Natural Lashes
Now that your work area is prepared, your natural lashes are cleansed, and your lash extensions are chosen, it’s time to apply the Lashify Night Bond. Begin by holding the Lashify Night Bond applicator wand and gently brushing a thin layer of the bonding agent onto your natural lashes. Focus on the base of your lashes, as this is where the lash extensions will adhere. Be sure to coat each lash evenly, avoiding clumping the product to ensure a smooth and secure bond. Allow the Lashify Night Bond to dry slightly until it becomes tacky, typically taking a few seconds. This tackiness will help the lash extensions adhere more effectively and stay in place longer.

Step 5: Apply the Lash Extensions
With the Lashify Night Bond now tacky, you can begin applying your lash extensions. Use tweezers to pick up one lash extension at a time from your lash extension tray. Hold the extension by the base and carefully place it along the base of your natural lash where you applied the Night Bond. Press gently to ensure it adheres securely.
For best results, start applying from the outer corner of your eye and work your way inward, arranging the extensions closely without overlapping. Continue this process until you have covered the desired area with lash extensions. If using different lengths for a more natural or customized look, alternate as needed while maintaining symmetry. Take your time to ensure that each lash extension is properly aligned and securely attached.
Step 6: Secure the Lash Extensions
After applying all your lash extensions, it’s important to ensure that they are properly secured. Use the lash applicator tool or your tweezers to gently press along the base of the extensions where they meet your natural lashes. This step helps reinforce the bond created by the Lashify Night Bond, making sure each extension is firmly attached. Starting from the outer corner, carefully press and hold for a few seconds before moving inward. If any extensions seem loose or misaligned, adjust them as needed before the bond fully sets. Taking the time to press and secure your extensions will enhance their longevity and keep them looking flawless throughout the day and night.
Step 7: Check for Symmetry
Once you’ve secured all the lash extensions, it’s crucial to check for symmetry to ensure a balanced and natural look. Stand back and use your mirror to inspect both eyes, comparing the lash extensions on each side. Look for any gaps, uneven lengths, or misalignments that might need adjusting if you notice any discrepancies, gently reposition or add additional lash extensions as needed to create an even and cohesive appearance. Ensuring symmetry enhances the overall aesthetic and makes your lash extensions look professionally done. This extra step will leave you with beautifully balanced lashes that perfectly complement your eyes.

Step 8: Finish with a Sealer
To maximize the longevity of your newly applied lash extensions, finish the process by applying a lash sealer. A lash sealer is designed to protect and fortify the bond, making the extensions last longer and keeping them in place despite daily wear and tear. Using the sealer applicator, gently brush a thin layer along the base of the lash extensions where they meet your natural lashes. Be careful not to use too much product, as a little goes a long way. Let the sealer dry completely, which may take a few minutes. This final step will enhance the durability of your lash extensions and add a polished finish to your look, ensuring your lashes remain flawless and fabulous for days.
Step 9: Clean Up and Maintain Your Lashes
Now that your lash extensions are perfectly applied and sealed, cleaning up your work area and establishing a maintenance routine is important. Carefully dispose of any used applicators, tissues, and other disposable items. Clean your tweezers and any other tools you use with a suitable disinfectant to keep them sanitary for future applications.
Avoid using oil-based makeup removers or products to maintain your lash extensions, as they can weaken the bond. Gently brush your lashes daily with a clean spoolie brush to keep them looking neat and avoid tangling. Additionally, avoid rubbing your eyes excessively or sleeping on your face, as these habits can dislodge the extensions.
Step 10: Touch-Up as Needed
As time passes, you may notice that some of your lash extensions have naturally fallen out or lost their original alignment. To keep your lashes looking fresh and flawless, it’s essential to perform periodic touch-ups. Inspect your lashes under good lighting to identify gaps or misaligned extensions.
Gently remove any loose extensions using your tweezers, taking care not to pull on your natural lashes. Prepare a small amount of Lashify Night Bond and apply it carefully to the areas where you need to reapply or replace extensions. Follow the same application process as before, applying new extensions to maintain the fullness and symmetry of your initial look. Regular touch-ups will help extend the life of your lash extensions and ensure they continue to enhance your eyes beautifully.
By following the steps outlined in this guide, you can easily achieve salon-worthy lash extensions at home.
Conclusion
In conclusion, how to use lashify night bondat home can be a seamless experience when following the proper steps.
Preparation is key, so ensure your natural lashes and application tools are clean and ready. Carefully apply the Night Bond, making it tacky for optimal adhesion. Proceed with meticulously applying the lash extensions, starting from the outer corner and moving inward, ensuring each extension is secure and well-aligned for a natural appearance. Emphasize securing and checking for symmetry to perfect your look before finishing with a sealer to prolong the life of your lash extensions. Regular maintenance and touch-ups will help maintain their beauty and longevity.
By adhering to these detailed steps, you can enjoy stunning, long-lasting lash extensions that enhance your eyes effortlessly.
About the Author
Jane Hubbard is a passionate beauty expert with a wealth of experience in makeup, hair, and overall beauty techniques. After years of working as a hairdresser specialist, she followed her entrepreneurial spirit and started her own consultancy business.
Jane has always been driven by her desire to help others feel confident in their own skin, and she does this by sharing her knowledge, experiences, and practical beauty tips. Through her consultancy, she empowers individuals to embrace their unique beauty, offering tailored guidance that boosts both self-esteem and personal style.
Professional Focus
Specializes in makeup, hairstyling, and beauty consulting.
Provides personalized beauty advice, tips, and techniques to help individuals feel confident in their appearance.
Dedicated to staying up-to-date with the latest industry trends and developments.
Passionate about creating a comfortable and empowering experience for every client.
Education History
University of Craft and Design – Bachelor of Fine Arts (BFA) in Woodworking and Furniture Design
Woodworking Apprenticeships – Extensive hands-on training with skilled craftsmen to refine carpentry and furniture making techniques
Online Courses & Masterclasses – Continued education in advanced woodworking techniques, design principles, and specialized tools
Expertise:
Makeup artistry, hairstyling, and beauty consulting.
Personalized beauty techniques to enhance confidence and self-expression.
Educating clients on how to maintain their beauty routines at home.